September 21, 2023 | by siunam | Tags: OSCP, Certicicate
I Earned OSCP on My Second Attempt!
Table of Contents
After my first attempt back on August 28, 2022, I wrote a blog post about my utter failure in that attempt. This time, however, I finally earned the OSCP certificate with 80/100 points!

In this blog post, I'll talk about my process for earning OSCP. Without further ado, let's buckle up our seatbelts and dive in!
Before The Exam
After 9 months of my first attempt, I started to focus on studying for the second attempt, which was already decided right after my first attempt.
During that period of time, I redeemed HackTheBox's £30.00 gift card from HKCERT CTF 2022 writeup prize (writeup winners list) and purchased the VIP for 3 months (kudos to Mystiz from Black Bauhinia :D).
On August 7, 2023, I purchased my second attempt exam and scheduled it for August 24, 2023, at 8:00 a.m. In the meantime, I also played a lot of HackTheBox boxes and VulnHub machines.
My Study Material
During those months, I pwned and wrote some of TjNull's HackTheBox VM list's boxes writeup. I also watched almost all of IppSec's HackTheBox Active Directory box walkthroughs. In my humble opinion, I think HackTheBox boxes are actually better than PWK-2022 labs XD. Ultimately, I felt confident in passing the second attempt because of HackTheBox boxes.
Besides HackTheBox, I also played some OSCP-focused VulnHub machines after August 16, this is purely because my HackTheBox VIP was expired. VulnHub machines, however, I found that it's less helpful to me than HackTheBox; maybe the contents are outdated? Luckily, the methodologies and enumerations still apply.
During The Exam
24 August 2023, my second attempt exam day. I woke up at 5:30 a.m and finished my breakfast at around 6:30 a.m. I then decided to play a random OSCP-focused VulnHub machine to get warmed up.
I also fired up my browser and listened to music from recent YouTube playlists that I found by kneon
Fun fact: Music helps me stay focused and relax :D
Proctoring Software
At around 7:34 a.m, I showed up early in the proctoring software before the exam started. Fortunately, I completed the verification process at exactly 7:59 a.m. Pewh, I'm almost late for the exam.
At 8:00 a.m, the VPN connectivity pack and the exam control panel were sent to my email. Then, I connected to the exam VPN on my Kali VM. Now, I can visit the exam control panel. After reading a little bit, there're 6 IP addresses, which are the Active Directory set (2 clients and 1 Domain Controller) and 3 independent machines.
Independent Machines
Since I'm familiar with the flow of independent machines, I quickly hopped over to the first independent machine. Well… After 1 hour of enumeration, I found nothing to gain initial foothold. Am I going to screw up again?… Crap…
Nevertheless, at 9:06 a.m, I switched to the second independent machine. As usual, I enumerated the machine with Rustscan, poking around with the open ports. But… Again, I was unable to find things that gain initial foothold. My heart started beating as I was afraid of failing the exam again. To calm myself, I took a 5-minute break.
After the break, at 9:50 a.m, I hopped over to the last independent machine. This time, however, I was able to spot the vulnerability and exploit the application to gain initial foothold! Next, I enumerated the system and successfully escalated my privilege to root! That was easy! In total, this machine took me 2 hours and 1 minute.
Active Directory Set
After rooting that independent machine, I started to poke at the Active Directory set at 12:01 p.m. However, I wasn't able to gain inital foothold. I also felt hungry, so I went for lunch and came back at 1:13 p.m.
In the initial foothold, I encountered something stupid during the enumeration process. At the beginning of the Rustscan result, the scanned machine has 14 open ports. However, in my second Rustscan result, it shows that the machine has 15 open ports! Oh crap! I wasted so much time because of the missing port… Anyway, once I found that open port, I quickly identified the vulnerability and gained initial foothold at 1:23 p.m.
Then, based on my knowledge from HackTheBox AD boxes and IppSec walkthroughs, I was able to escalate my privilege to SYSTEM on the first client machine and move laterally to the second client machine. After that, I was also able to move laterally into the Domain Controller and become Domain Admin! Nice, the AD set has been fully compromised at 4:04 p.m. At this point, my point was 60/100.
In total, this AD set full chain compromise took me 4 hours and 3 minutes.
Back to Unfinished Independent Machines
After compromising the whole AD chain, I then went back to the second independent machine. Although I found something new, I still wasn't able to gain initial foothold… At the same time, I felt hungry again, so I decided to go for dinner and came back at 5:27 p.m.
After dinner, I found something new in the first independent machine and I was able to escape the rabbit hole and gained initial foothold at 8:35 p.m! At this point, I knew that I had already passed the exam with 70/100 points!! What a huge, huge relief! After taking a short break, I was finally escalated my privilege to root at 10:59 p.m!
Now, it's around 11:00 p.m, again, I tried to gain initial foothold on the second independent machine, but no luck; maybe I fell into the rabbit hole way too long. But hey, at least I tried :D
Ending The Exam
After double-checking all my screenshots and notes, I decided to end the exam at around 11:30 p.m.
Note: I actually accidentally deleted some screenshots and notes during the checking process. Luckily, I had backed up those notes via
zipwhen I rooted the first independent machine.
Ultimately, I was able to:
- Fully compromised the AD set and gained 40 points
- Rooted 2 independent machines and gained 40 points ($10 + 10 + 10 + 10$)
and scored 80/100.
After The Exam
The next day, I woke at around 9:30 a.m and started to finish up my professional penetration report. To generate a PDF report, I used the "Offensive Security Exam Report Template in Markdown" GitHub repository by noraj.
The report writing process was very straightforward to me, as I used to write writeups for different CTFs and wargames like TryHackMe and HackTheBox.
During writing the report, I actually found that I missed 1 screenshot. Luckily, it wasn't that important, like missing a screenshot of proof.txt.
Finally, I completed and submitted my 72 pages of report at 8:21 p.m.
Note: The upload process could take more than 10 minutes.
After 24 hours of my report submission, I received this email from OffSec:
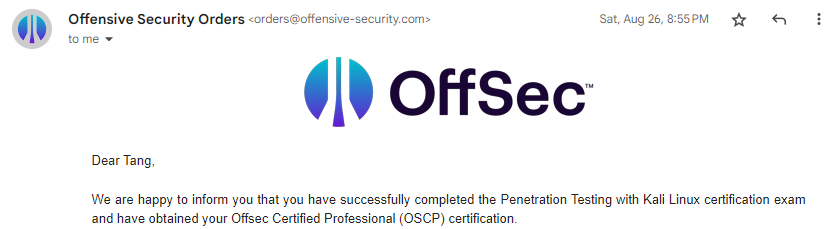
Nice! I've officially passed the OSCP exam on my second attempt!!
Takeaways
After earning the certificate, I can share some tips and tricks for people who want to earn the OSCP certificate.
Independent Machines
Enumerate, enumerate, and enumerate. It's extremely important in both initial foothold and privilege escalation.
- Port scanning: Scan the machine a few times to see any missing ports
- Avoid rabbit holes: Don't stay at 1 thing for too long; it's ok to move on to other stuff
Active Directory Set
Same as independent machines, but a few things more for AD. The following tips and tricks were gained from HackTheBox AD boxes and IppSec's videos:
- Enumerate domain username / naming scheme:
RPC
Mainly using rpcclient to enumerate the AD environment.
Try null authentication (guest login):
rpcclient -U '' <RHOSTS>
If null authentication is successful, you can enumerate the AD environment.
Get domain username:
enumdomusers
Then copy the output into a file and extract the domain username:
cat tmp | awk -F\[ '{print $2}' | awk -f \] '{print $1}' > domain_users.txt
Read domain users' description (sometimes it may contain cleartext passwords):
querydispinfo
Query a specific domain user:
queryuser <RID>
Enumerate printer:
enumprinters
LDAP
Mainly using ldapsearch to make LDAP queries to enumerate the AD environment. You can also use ldapdomaindump to automate it if you have a null session or a valid domain user's credentials.
Get the actual domain in LDAP format:
ldapsearch -x -h <RHOSTS> -s base namingcontexts
Dump everything about the domain:
ldapsearch -x -h <RHOSTS> -s sub -b 'DC=foo,DC=tld'
Web application
Check the web application and look for users, including files (i.e., PDF) metadata.
- Validate domain users:
Mainly using kerbrute.
/opt/kerbrute_linux_amd64 userenum -d domain.local <domain_username_wordlist>
Note: For kerbrute, try to use an invalid domain username to check for false positives.
You can also use CrackMapExec (cme) to validate domain users:
cme smb <RHOSTS> -u '<domain_username>' -p '<password>'
cme winrm <RHOSTS> -u '<domain_username>' -p '<password>'
- Enumerate SMB:
Mainly using cme and smbclient to enumerate SMB shares.
Null authentication:
cme smb <RHOSTS> --shares
cme smb <RHOSTS> -u '' -p '' --shares
cme smb <RHOSTS> -u '' --shares

smbclient -L //<RHOSTS>/
If you have a valid domain user's credentials:
cme smb <RHOSTS> -u  '<domain_username>' -p '<domain_user_password>' --shares

smbclient -U '' -L //<RHOSTS>/
- Password spraying / brute forcing
Before performing password spraying or brute force, it's important to retrieve the domain's password policy:
cme smb -i <RHOSTS> -u '' -p '' --pass-pol
If there's no account lockout, you can start to perform password spraying or brute force. To do so, you can use kerbrute or CrackMapExec.
Kerbrute password spraying:
/opt/kerbrute_linux_amd64 passwordspray --dc <RHOSTS> -d domain.local <domain_username_wordlist> <password>
Other Tips
- Show up at least 30 minutes earlier in the proctoring software to prevent being late to start the exam
- If you've been stuck at a machine for 1 - 2 hours, it's time to move on to another machine
- Remember to take some breaks if necessary
- Sleep well
- Backup all your notes and screenshots. Just in case you somehow lost them
What's Next?
After earning the OSCP certificate, I'll continue to pursue different certificates because I know this is just the beginning of the end.
Since my ultimate goal in cybersecurity is to become a red team operator and my AD penetration testing skill isn't strong enough, I'll maybe try CRTP (Certified Red Team Professional) from Altered Security.
It's worth noting that I'm not pursuing the certificate itself, but the knowledge of the course and its journey.
Thank you for reading. I hope you guys enjoyed this blog post!